Blog

  • 3 Ways to copy/transfer music from iPhone/iPad to Computer or Mac |Transfer music iPhone to Computer

    3 Ways to copy/transfer music from iPhone/iPad to Computer or Mac |Transfer music iPhone to Computer

    Many a time we need to copy data/music stored in our iPad/iPhone to PC , but due to the limited functionality of iTunes its not possible to do that. But in some scenarios it becomes very necessary to have a backup of our favourite songs/music on our Computer , or may be some important data & documents. So, here are the 3 Methods/Ways to Copy or Transfer data/music/songs from iPhone/iPod to Computer/Mac (Transfer Music from iPhone to PC/Computer) . I have personally tested these methods on Windows 7/8.1 but they’ll work on Mac too!

    Way # 1 – Using iTools for Windows / Mac OS

    Pre-requisites –

    Now, to export / copy or to transfer songs from your iPhone to Computer follow these steps – 

    • First of all connect your iPhone / iPad device to your system , If iTunes automatically opens up & start syncing close it.
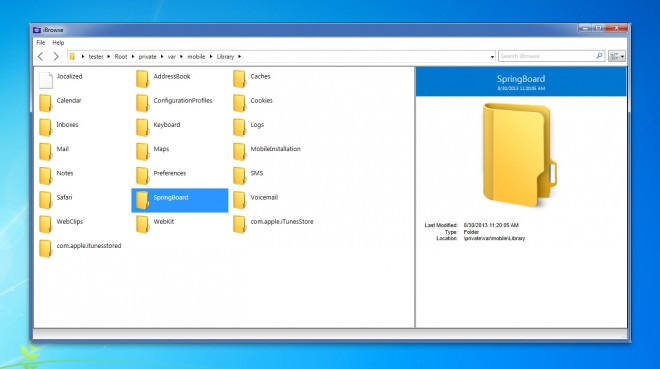
    • Now, Open iTools app, you will see your iOS device in the window, there in click on the “Music” icon / media tab under the device menu as shown below –
      iTools Music icon shown only after device recongnized by iTools


    • Here you will see all the music tracks present inside your device here Please Checkmark the songs you want to copy, Now near the menu bar there’s an option labelled “Export as shown below –
    • Click on the “Export” button , It will ask you for path where you want to copy the selected tracks, select the folder and click on “OK”.
    • That’s it you’ve successfully copied music from your iPhone to your Macbook or Computer-laptop.


    Way # 2 – ShareIt App by Lenovo

    Transfer Music from iPhone to PC – ShareIt App
    • Download and install this – ShareIt app for iPhone/iPad by lenovo on your iPhone/iPad (iOS device) ShareIt app now doesn’t support music transfer but however you can transfer other data!.
    • Now, download and install this ShareIt app for PC on your Windows 7/8/8.1/10.
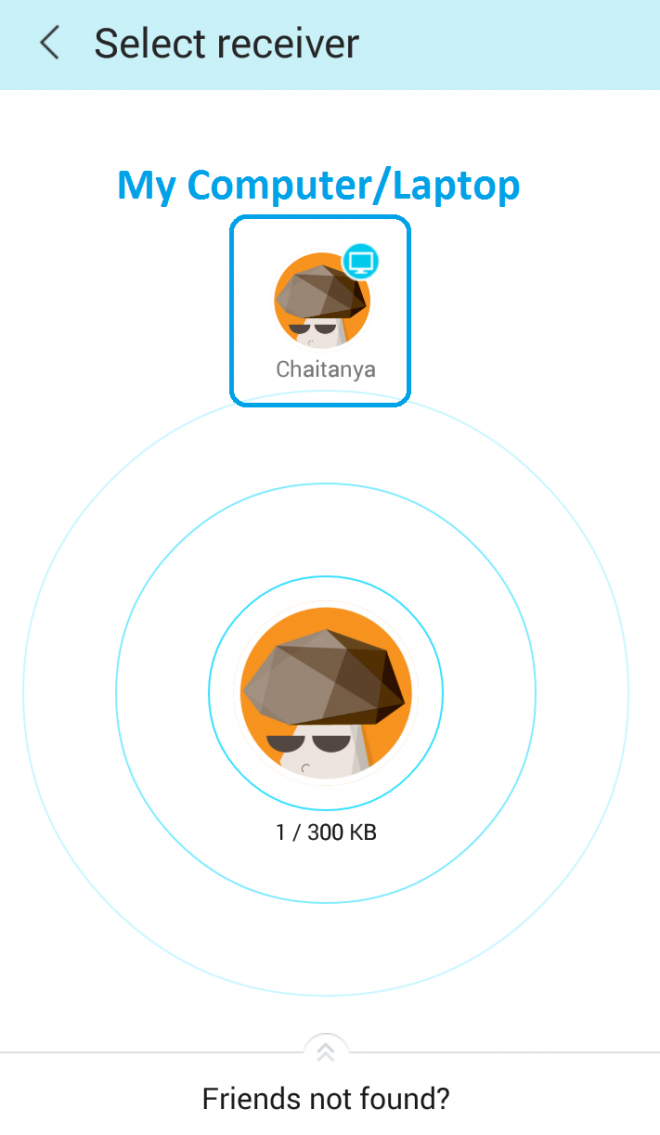
    • Now, open the ShareIt app on your device, tap on “Send”. Now, select the files/music/songs/documents you want to transfer/copy and click on ‘Next‘.
    • After finishing the previous step, Open the ShareIt app on PC – Now, Click on “Receive” option.
    • Shift again to your device (iPad/iPhone)- It will ask Now you’ll see your PC/Laptop’s WiFi id in the radio network range in the app – “Click on the circle/network id” to start the transfer!.
    • That’s it! you have successfully transferred your data/music from your iPad to computer.


    Way # 3 – Using DropBox

    • This is the most simple method , but the only constraint is that it requires an Internet Data connection unlike the previous two methods .
    • You can download the DropBox app from the iTunes store, Install, Sign-In and upload all your data/music to be transferred to your dropbox account.
    • later, you can Open Dropbox on your Computer and download the uploaded data.
    • However, i will recommend this method only in some unique cases where the first two fail, which is very rare.


  • 5 Free iOS – iPad & iPhone File Explorers for Mac/PC (Windows 7/8.1/10) | iPhone to Mac/PC file transfer

    5 Free iOS – iPad & iPhone File Explorers for Mac/PC (Windows 7/8.1/10) | iPhone to Mac/PC file transfer

    Transferring files from an iOS device iPod, iPhone or iPad to PC is a really cumbersome task as iTunes provides support only for PC to iDevice (iPhone/iPad) and not vice versa. Many times we need to copy the files/data from our iPhone/iPad to PC/Mac and it becomes a difficult task as all iTunes allows us to do is sync/create a backup and its very difficult to explore that backup too. Plus due to lack of native file managers for iPhone & iPad – We bring you 5 Free iOS (iPad/iPhone) iPod File explorers for Mac OS/Windows which will allow to do such Device – iPad/iPhone to PC file transfers! that too without Jailbreaking (No Jailbreak) your device,thus not compromising on your device’s warranty. These apps can also be used as default iOS file manager app for iPhone & iPad too –

    Software # 1 – iBrowse 

    iBrowse in action on Windows 7

    iBrowse was the first software I tried and it worked with a bang even on iOS 8. I was able to browse all iPhone files and folders on my iPhone and explore even the app data files present on my iPhone like whatsapp images,media etc . To export any file (iPhone/iPad to PC file transfer) all you have to do is –

    • Navigate to the folder/desired file you want to export . ( believe me this is the most daunting task! ).
    • Now select it by left-clicking on mouse , now right-click on the selected file .
    • Select the “export” option , select the destination folder where you want to save the file in the popped-up explorer window.
    • Hit on “OK” and that’s it! your file will be exported to PC!
    • Thus, you have successfully completed your iPhone to PC file transfer!

    Requirements –

    Software # 2 – iFunBox

    iFunBox on Windows 7

    iFunBox is yet another smart File Manager cum App Manager for your iOS device. iFunBox may be defined as an alternative to iBrowse but it has additional features such as App Management –

    • You can uninstall/remove apps present on your iPhone/iPod/iPad.
    • You can even install apps from .ipa files to your device from your PC. (The installation is safe as the apps are installed in a safe “sandbox”).
    • Also you can batch install apps and manage your device apps and games with ease.

    Requiements –

    iFunBox is very easy to use with dual function panes, hence its easy to use it!


    Software # 3 – iMobie – PhoneBrowse


    Phonebrowse for MAC


    iMobie’s Phone Browse is yet another 100% Free File Explorer and App Manager app for iOS devices .

    It provides a free iOS file manager app which allows you to manage files on your device. You can transfer files from PC to iPhone and also vice versa.

    It also even allows advanced customisation of your iPod/iPhone/iPad – You can change your apps’ icons , text , sounds etc.

    Click here to download PhoneBrowse for PC.

    Click here to download PhoneBrowse for MAC

    Click here for complete tutorial-guide on using PhoneBrowse.

    Requirements –

    • .Net framework 4.0 or higher installed.
    • iTunes 9 or later.
    • Windows 7 & later..

    Software # 4 – iTools

    iTools File explorer

    iTools is yet another awesome software for iOS users, infact it can be said as the best alternative to iTunes. iTools not only just allows you to Browse and copy files of your Apple device, but it also even allows to backup ipa applications as well as install them directly. It also features an inbuilt iPhone ringtone maker as well. To browse files on your iOS device Simply connect your device to Computer , Open iTools and click on the “FileSystem” option as shown in the figure.

    Click here to download iTools for Windows 7/8/8.1/10
    Click here to download iTools for Mac OS.

    Software # 5 – iMazing

    iMazing

     iMazing as the name suggests is an amazing piece of Software , actually it would have been on the first position if this list was prepared based upon functionality, but the list is based upon the free features hence this position.

    • iMazing allows you to browse and view the contents of your phone in a really easy manner. As shown in the iMazing image you can transfer data from iPhone/iPod/iPad to PC by a simple click – “Copy to PC” option presented after right-clicking on the file.
    • iMazing also offers the ability to copy data from the apps’ documents folder the folder where apps store their data on the device.
    • You can also backup your documents,contacts and messages using iMazing.

    Click here to download iMazing for PC- Windows.

    Click here to download iMazing for MAC.

    If you encounter any problems while using any of these softwares or if you know any of such good software feel free to comment 🙂

  • Adsense Ads now Visible on Opera Mini – It now displays Adsense Ads too

    Adsense Ads now Visible on Opera Mini – It now displays Adsense Ads too

    Opera Mini is one of the most widely used Mobile browser in the world! Infact one of the top mobile browser present;y . Opera mini had only one drawback – It didn’t use to display or it couldn’t display Adsense Ads/ Ad Units. this was resulting in loss of revenue/ or inability of websites/bloggers as the Ads themselves weren’t displayed on The Mobile/Opera Mini traffic. But, there’s a reason to rejoice – Adsense Ads are now displayed on Opera Mini. i.e Opera Mini now displays Adsense Ads too –

    It brings a lot of many benefits to us bloggers –

    • Higher and increased revenue for Mobile/Tech browser through their blogs/sites. You can check the below screenshot of my site as 16% of my total traffic was from Opera Mini –
    • Opera Mini consists of 16% of total traffic
    • Though, Opera Mini now supports AdSense, I still don’t have much Idea about UC Browser and Adsense Ads Display.
    • You can also  check the below ScreenShot of my Website to check the AdSense units displayed and working in action –
    • AdSense in action with Link unitstoo

    The Above blue highlighted box shows AdSense for Content Ads , while the bottom blue highlighted box shows the AdSense link units as shown in the image alongside.


    Thus, its a good news for we bloggers and site owners as it will enable us to more revenue from our sites 🙂 . Do, comment your views and opinions about this latest update of Adsense + Opera Mini Side.

  • FreeB App- Get instant free Recharge,Coupons & exciting deals! and exclusive offers.

    FreeB App- Get instant free Recharge,Coupons & exciting deals! and exclusive offers.

    We have yet another new Entry jumping into the Free Recharge giving apps arena, – FreeB App! . FreeB comes from a well-known developer  – Spice digital (The same developer had developed the Spice Safar app which was providing instant free Rs.10 Recharge) . FreeB not only provides Free recharge on downloading apps, but it also has coupons which can be used to apply to various online sites/services to get discounts on Food , Online purchases etc . It also has options to pay for Free Datacard recharge, Free Landline/Mobile Postpaid bill payment . Let’s have a look onto the features of FreeB App in detail –

    Features of FreeB App

    some of free coupons provided by FreeB
    • FreeB provides free Money in wallet for downloading apps, completing offers .
    • It also provides exclusive deals and discount coupons for Free! , I myself ordered a Monginis 15% off coupon for free and it worked.
    • FreeB also provides Rupees for friend referral –
    • Infact, FreeB gives Rs.30 per referred friend, which is right up there amongst the best in the free recharge apps arena. 
    • Note – If you download through TechApple! you get extra Rs.5 in your wallet as welcome Bonus!
    • The rupees earned by FreeB can be used to get free Mobile recharge as well as FreeB supports Free DTH Recharge too!
    • The recharge request is processed instantly by FreeB! all the recharge are done within seconds the recharge request is received.
    • Click here to download FreeB App from Play store.


    Personal take on FreeB – Though, its a new app but the developer is quite trusted and old, the payouts for installing apps are comparatively lesser as compared to other apps . A really good app if your earnings are from referrals!.
    It has the best Payout options amongst all the apps i have ever tried – It provides

    • Free Mobile & DTH Recharge .
    • Free DataCard Recharge.
    • Free Postpaid Landline bill payments.
    • Free Postpaid Mobile bill payments.
    • Overall, this app has a huge scope and will surely improve –
  • Use Google Chrome browser as MP3/Audio/Video Player on Android/PC !

    Use Google Chrome browser as MP3/Audio/Video Player on Android/PC !

    Recently, i flashed my phone and I was left with literally no external apps , also I didn’t had the apk packages with me and I had to urgently play some MP3 Songs present on my SD Card. I was looking for options, and then i remembered this article which i used to use Google Chrome/Mozilla Firefox as a File explorer cum Media player on PC using “file:///” protocol . So I decided to try my hand with this trick on Android too and it worked! I was able to use Google Chrome as a File explorer + MP3 Player + Video player too! on my Android! . Also this trick works on PC too! so i’ll be mentioning the steps for PC too!

    Google chrome’d File Browser view

    Method to use Google Chrome as MP3/Audio/Video Player on Android

    • First of all Open your Google Chrome browser , you can also use Mozilla Firefox on Android . I tried it and it worked on Firefox too, but other 3rd party browsers like UC browser, Opera Mini and Dolphin browser weren’t able to support our method .
    • Now in the address bar , Type and navigate these locations one – by – one ( Note – I am saying to try all URLs because the File system structure vary from device-to-device depending upon the Android version) .file:///sdcard/
      file://sdcard0/
      file://sdcard1/
      file://storage/

      file://storage/sdcard0/

    • You’ll find that the Browser is able to open / show files on atleast one of these five address locations.
    • Now, click on the folder name to enter it , and browse to the media file you want to open.
    • After reaching the file , Simply Click on it – If its a MP3/Video File it will be played , or if its an image/html file it will be displayed right in your browser!
    • Magical! isn’t it (Check the alongside image for reference) .
    • Note – You can also use this trick to use Google Chrome browser as PDF viewer as Android lacks in-built PDF viewer (Thus, saving your memory required to install PDF viewer on your phone)

    Method for PC Users to use Google Chrome/ Firefox Browser as MP3 / Audio Player on PC (Windows / MAC / Linux )

    • The method is actually the same except you have to enter the URLs like this –

    file://c:/                             (To Access/Open C Drive in windows)

    file://root/                         (For Linux Users)

    file://home/  

    file://Desktop/

    • Now, again one of them will show your folder contents depending upon your OS , Click on the foldername to open the folder and on the media file to play/open it in your Browser 🙂 . It’ll work without any hiccups (You can also use it to view PDF files ).

    The trick is quite simple but I hope, you guys will like it and use it to flaunt your geekiness 🙂 , Signing off with yet another Screenshot of my device using Firefox as the File explorer. If you face any problems or have any doubts/queries feel free to comment 🙂


  • Task Bucks App! – New Free Recharging app with a twist!

    Hello friends, the Free Recharge providing apps market seems to be getting hotter and hotter every day with new apps coming everyday! . One of such new apps to enter this arena is Task Bucks app. Task Bucks app provides free Recharge for downloading apps, completing registration offers, filling surveys too

    Features of Task bucks app

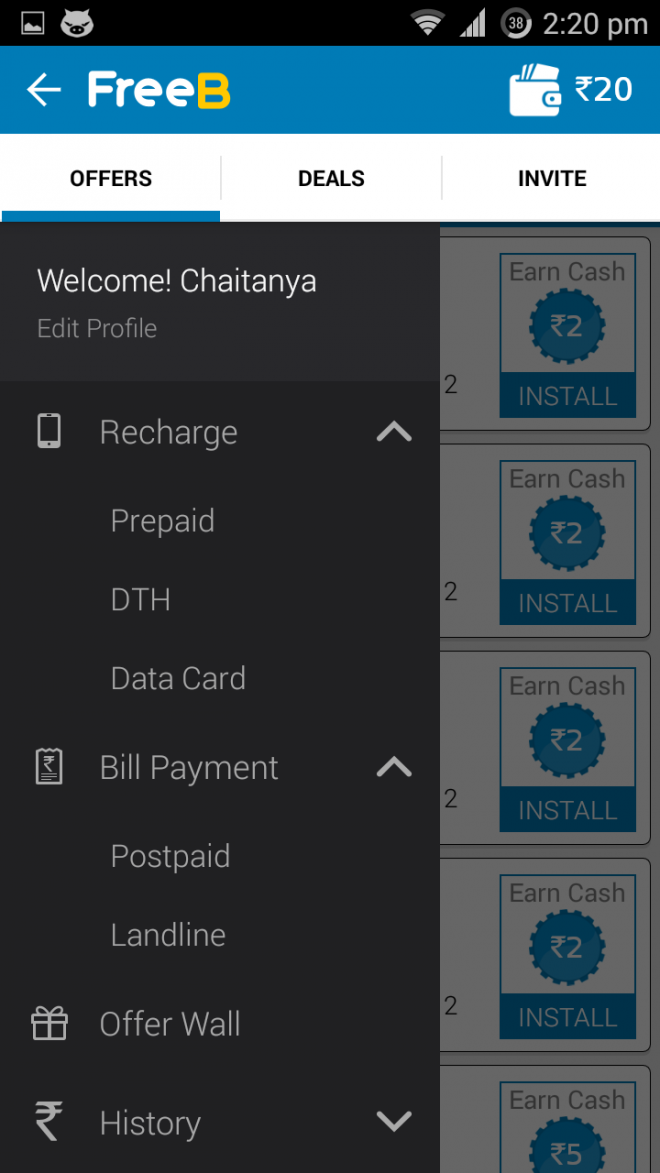
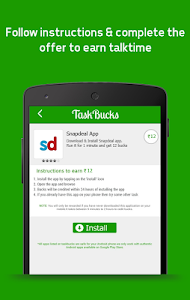
    • Task bucks is the new free recharging app and it provides bucks for –
      1. Downloading Apps
      2. Completing Offers.
      3. Filling Surveys.
    • The earned bucks can then be redeemed to get your Free Recharge.
    • Minimum Rs.10 are required in your account to request the Recharge.
    • The recharges made by the app are instant, and besides all this
    • Task bucks also provides you Rs.5 per friend referred!, also daily 100 New users are given Free Rs.100 Recharge.
    • You can refer many firends to get unlimited Recharge through it,

    Click here to download Task Bucks.

    Personal take – Personally, i liked the user-interface of the app, as its very smooth. Also the size of Task bucksapp is very small (1.4 mb) which is very less as compared to other recharging apps. Task bucks may take some time to credit bucks for offers completed,  but overall It will soon enter our exclusive list of 10 Best free Recharge Apps. It would have been actually there in the list had it provided Rs.5 per referred friend.


  • Perform OTP verification on apps which get stuck waiting for verification code/sms [Earn talktime/Magic Recharge]

    Perform OTP verification on apps which get stuck waiting for verification code/sms [Earn talktime/Magic Recharge]

    As, we all know some Android apps require mobile number verification, and they do it by automation i.e by checking the messages directly themselves instead of asking the user to enter the verification code to us. This creates problems on some handsets as the apps simply get stuck on “verifying/waiting for OTP verifcation/password” . Recently, I myself faced such problem with Earn talktime app and Task bucks app stuck on my Xiaomi Redmi 1S. So, i started looking for solutions as i really needed to install the app and couldn’t purchase a new phone for only that thing. here’s what you can do to Perform OTP verification/validation of apps, which get stuck on waiting for verification code/sms.

    Method 1 – Disable all 3rd-party apps which use messaging.

    • Uninstall any third-party apps which use messaging or which can access your messages – Chat-app on Samsung / Hangouts app by Google. (Check the alongside image on how to disable hang-out to use messaging)
    • These read the messages before our desired app can read them, hence the desired app which we are trying to install, cannot read those sms as they are being processed by app / thus causing starvation and inability to verify though the sms is received on our phone.
    • Same is the case with black-list/message filtering apps, these also check the sender/message before our desired app to be installed, which again causes starvation to the app which is waiting for OTP verifation.
    • Some, 3rd-Party launchers/widgets also interfere with the stock messaging features, hence it is recommended to disable them before we request OTP.

    Method 2 – Changing the ROM (Method i followed for my Xiaomi Redmi 1s)

    • Though, this requires a little-bit more technical expertise and efforts , but it’s totally worth it!.
    • While, in my case i had the launcher (MIUI) built right into my ROM, hence i had no option but to change the ROM itself.
    • So, after changing my ROM to Cyanogen Mod 11, I installed earn talktime,magic recharge and both of them got verified in an instant!
    • While, changing your ROM , make sure that the custom ROM which you’re going to select for flashing is closest to Stock Android ROM (Cyanogen Mod)  in my case.

    I bet, you won’t face any problem if you follow these steps – The method 1 worked for my friend with a Samsung Android, while the second one worked for me.

  • 3 Ways to add/install desktop gadgets for Windows 8/8.1/10 | Gadgets in Windows 8/8.1/10

    3 Ways to add/install desktop gadgets for Windows 8/8.1/10 | Gadgets in Windows 8/8.1/10

    Windows 7 was very cool, and one of the many things of Windows 7 which i liked were – Desktop Gadgets!. They were cool in every way, they showed CPU/Ram Status, News feed, Weather etc and lots of important stuff right on desktop!. So, i tried to add Gadgets in my Windows 8 installation and found these 3 best softwares to install desktop gadgets for windows 8/8.1 or to add gadgets in windows 8/8.1. Though, I have tested them in Windows 10 Technical preview , i hope they’ll work in the final release as well.

    Way # 1 – Desktop Sidebar/Gadgets installer by Gadgetsrevised.com

    Gadgets on Windows 8/8.1 using Desktop Gadgets Installer

    This is perhaps the most simple yet safest way to add Gadgets to your Windows 8/8.1 installation . All the Gadgets, sourcefiles are from Microsoft hence assured of being virus-free.

    Steps to add Gadgets in Windows 8/8.1/10 through Desktop Sidebar installer

    • Download and Install the Desktop Gadgets installer by clicking here. (Just 5 MB in Size)
    • Once, you are done with the installation, go to Control Panel.
    • In control panel, Search for “Gadgets” .
    • As shown in the alongside image, Some results for Gadgets will appear – Here select the “All Gadgets” option. (Highlighted in the Black rectangle in the alongside image).
    • In the dialog-box opened, you’ll be shown various Gadgets, Now simply double-click on the Gadget you’ll like to add and voila! it will be added to your desktop!.(Highlighted in the Green Rectangle in the alongside image).
    • This is the most-easiest way to install/add Gadgets on your desktop.


    Way # 2 – 8GadgetPack

    Gadgets on Windows 8 using 8GadgetPack

    8GadgetPack is yet another freeware which allows easy addition of Gadgets in Windows 8/8.1/10 . besides this you can even install 3rd party Gadgets ( .gadget files) with this software likewise in Windows 7!.

    Method to use 8GadgetPack

    • Download and Install 8GadgetPack from here.
    • Once you’re done with installing, launch the “8GadgetPack” from the Start menu, if not executed/run after the installation.
    • Now, Click on the Gadgets you want to be shown, they’ll appear in the Sidebar!
    • You can even disable the Sidebar fence by right-clicking in the blank area of the Sidebar and select “close sidebar” option, the Sidebar will be closed but the Gadgets will still be intact!.

    Way # 3 – Rainmeter

    Rainmeter provides endless Widgets and Gadgets customisability!. There are no limits for the functionality of Rainmeter and customizability provided by it – hence, I have covered them all in this separate – Rainmeter Tutorial – Windows 7/8/8.1/10 .

    Providing just a sleek-peek at what Rainmeter can do –

    Rainmeter!

    I hope, you too will be able to add your favorite gadgets in windows, If you face any problem feel free to comment 🙂

  • 5 Best Free Apps/Websites to create UML Diagrams Online! – HTML/Web based UML Diagram creation tools

    5 Best Free Apps/Websites to create UML Diagrams Online! – HTML/Web based UML Diagram creation tools

    UML (Uniform Modelling Language) Diagrams are a vital component of Software Engineering/Documentation. I recently came to knew about this thing,as the documentation/UML diagrams presented by me were rejected by the university as they had been hand-made through Paint/MS-Word. After searching around for much time – I came across these online UML diagram tools and created diagrams using them and my diagrams were finally approved!. So, lets check out these Free yet awesome things – 5 Best Websites/Apps to create uml diagrams online.

    App / Website #1 – Cacoo

    Cacoo User Interface

    Cacoo Diagram creator is the website/tool which i liked the most for creating UML diagrams online. Caccoo not only suports

    • UML diagrams, but it also supports
    • Network diagrams,
    • mind maps, site maps and
    • flowcharts too.
    • All UML diagram consituents such as Use Case diagrams, Sequence diagrams, Class diagrams, Activity diagrams, Package diagrams etc are supported by cacoo.
    • You can Export your created diagrams in multiple formats! . (Check this image for export formats supported by cacoo)

    Cacoo’s free account itself got my complete project documentation work done, and cacoo supports educational purposes too! –

    Cacoo provides free Premium account features to Students and tutors/teachers! – > Click here to apply for Cacoo premium – Academic purposes only!

    Cacoo also boasts of an inbuilt store which contains pre-designed templates, icon sets which you can use in your diagrams –

    • Click here to access Cacoo Template Store. (You can use pre-designed templates to make your diagram/map creation even more easier! )
    • Click here to visit Cacoo Store.

    Click here to visit Cacoo UML Diagram creator.


    App/Website #2 – GenMyModel

    GenMyModel

    GenMyModel is yet another free and awesome tool to create flowcharts, UML diagrams online . You can directly skip the sign-up process and login with your G+ account.

    GenMyModel provides inbuilt project management even for Free Users, and it supports major UML modelling features such as

    • Class diagrams.
    • Activity diagrams.
    • Use case diagrams.
    • Object diagrams.
    • Sequence diagrams.

    Its user-interface too is very easy to use and efficient –

    GenMyModel Interface

    Click here to visit GenMyModel.com

    App/Website #3 – Draw.io

    Draw.io – Software Design Templates

    Draw.io is the tool which is perhaps quite-easy to use among all the tools/websites in this article. The only thing is that draw.io takes a time to get a little used-to.

    • There is no explicit “UML diagrams” category in draw.io .
    • UML diagram templates are present in the “Software design” templates in draw.io .
    • You can directly click on the template and start modifying itQ Thus, saving the time required t create UML diagrams
    • This tool was the most-widely used tool in my class, to create UML diagrams.

    Click here to visit Draw.io


    App/Website #4 – Grapholite.com

    Grapholite.com Interface – Most easy of them all!

    Of all the tools mentioned in this article only Grapholite loaded a proper WebApp in the browser, hence its capable of running in Offline mode too!

    But as Grapholite loads a proper Web App it takes the most time for loading amongst all the apps mentioned, thus requires a lot of patience.

    But on the features side-

    • Grapholite supports all UML diagram types – Activity, Class, Use-Case, Collaboration etc.
    • All the default notation/icons featured in UML 2.0, are present in Grapholite!.
    • The only downside is that for saving the diagram you require a Grapholite account and registering for an account too is FREE!. 

    Click here to visit Grapholite.com’s Online designer. (We gave the direct link for online designer as they provide PC software apps too!)

    App/Website #5 – Lucidchart.com

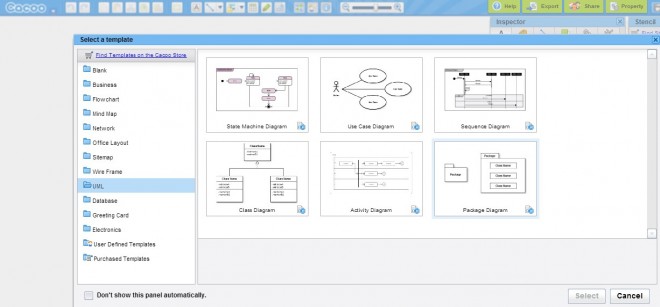
    LucidChart is a wodely-known online diagrams creation site, but only a few know that it can be used to create UML diagrams too!

    • Lucid Chart again provides all the UML diagram features.
    • It has the most largest library of symbols/icons amongst all the tools!
    • And it loaded very quickly in browser as compared to other UML diagram creation Web Apps.
    • Allows directly saving/printing of UML diagrams through the browser!.

    Click here to draw your UML diagram online using LucidChart.

    After navigating to the above page Click on “Try it Now” option to start creating your diagram!

    Bonus – Creately.com

    Creately.com – explained in brief

    Generally Bonus content arent;t that good! but here the Bonus content is perhaps even better than the original article content. Creately is the tool I loved the most, but its free version only allows 5 Public diagrams , and hence had to write it in bonus.

    Creately is very easy to use, efficient and light-yet beautiful User Interface.

    Creately is the only UML tool who provides revison history of diagrams/projects.

    So, if you require less than 5 diagrams/or if you can create multiple accounts – Creately is surely the way to go ahead!

    Click here to start Creately Diagram creator


    These, were the Best 5 Free Online UML diagram creators – Do comment your favourite one, and if you face any problems while using any of these – We will be happy to help you out 🙂