Category: Windows Tricks and Tutorials

  • 7 Best Free Epub Readers for Windows 10 / 7 /8.1 (2020) | PC & Laptop – Read epub ebooks on Windows Computer

    7 Best Free Epub Readers for Windows 10 / 7 /8.1 (2020) | PC & Laptop – Read epub ebooks on Windows Computer

    Epub (.epub) file format is one of the most widely used file format used to distribute e-books. Also, major e-book reading apps like Amazon Kindle do not natively support the .epub ebook format. So, here are the Top 7 Free Epub Readers for PC – Windows 7/8.1/10 which will open the epub files on your Windows systems. Thus, enhancing your Reading experience!


    Reader # 1 – FbReader

    FbReader for Windows 7,8.1 & 10
    FbReader for Windows 7,8.1 & 10

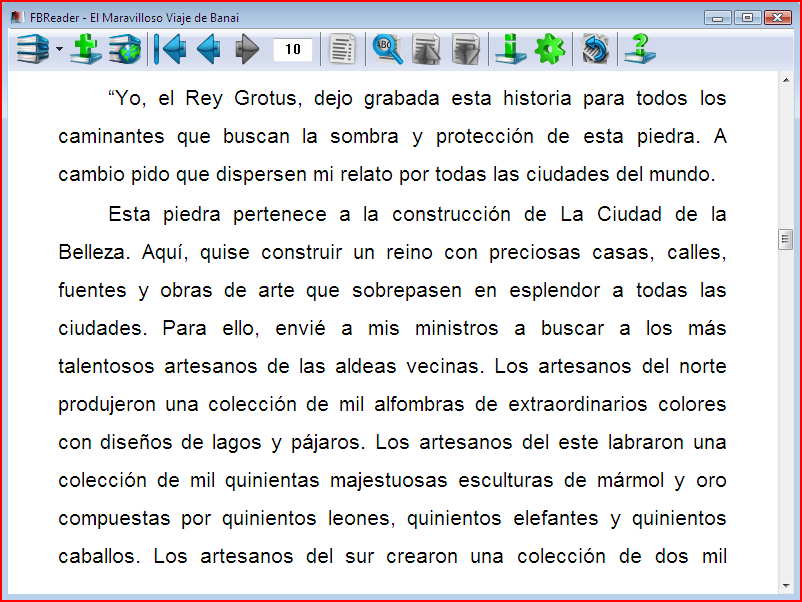
    Not to get confused by its name FbReader is surely one of the best epub readers for Windows out there. FbReader hosts a lot of useful features which will make your epub reading a pleasant experience.

    The most striking feature & which we love the most is perhaps its Distraction free viewer. Reading is a passionate hobby & various distractions caused due to host of different features inside epub readers make it a bit difficult to continue reading and this is where FbReader comes out to be the winner!.

    Also, not to forget FbReader is very small in size a meagre 5Mb which makes it load easily on older systems and lower CPU resource consumption. (To open new epub file in your system on FbReader click on the second-left icon with a book & green plus sign)

    Click here to Download FbReader for Windows 7/8.1 & Windows 10 (32-bit & 64-bit)


    Reader # 2 – Sumatra PDF

    Sumatra PDF can read Epub files as well

    Sumatra PDF as the name suggests is primarily a PDF reader, but it isn’t simply just a PDF reader. It can read a host of other file formats too like epub,cbr,cbz etc. Thus, making it a really must have in Windows 7 especially which comes in without a PDF reader installed.

    Not to forget Sumatra PDF is completely free of cost, and is easier to use as well. Though the background yellow color on the welcome page might not appeal to many, the features provided by it will surely create many fans.

    Sumatra PDF thus is a good alternative to FB reader for reading epub files. Sumatra PDF is just 4.8 mB in size which is another plus point for the software. Also, it is available in Portable app so that you can carry your ebook & reader on any system you go!

    Reader # 3 – Calibre


    Calibre epub reader
    Calibre for Windows 7

    Calibre is a complete ebook management software, and naturally it contains an epub reader too inbuilt which functions very smoothly.

    Calibre lets you not only read ebooks, but even edit their metadata. Besides, it even lets you download drm free ebooks via its inbuilt portal.

    Considering the large number of features it hosts the size of Calibre too is on the larger side, however ebook fanatics who have a large collection of ebooks will love it.

    Click here to Download Calibre for Windows 7,8.1 & Windows 10 32-bit.
    Click here to Download Calibre for Windows 7,8.1 & Windows 10 64-bit.


    Reader # 4 – IceCream Ebook Reader 

    Ice Cream Epub Reader
    IceCream Ebook Reader

    IceCream Ebook reader is yet another efficient epub reader for Windows and can also read other ebook formats such as fb2,mobi formats as well.

    The Downside is that its free version allows only 10 ebooks inside its digital library, and you cannot edit the metadata about them. But if you do not like to keep books after reading which is rare though, IceCream reader is the perfect choice for you. Not to forget, you can remove ebooks from library without physically deleting them from your hard disk.

    Click here to Download IceCream Ebook Reader for Windows 7,8.1 & 10 (32-bit & 64-bit)


    Reader # 5 – Sony Reader for PC 

    Sony Ebook Reader for PC (Windows 7 , 8.1 & 10)
    Sony Ebook Reader for PC

    Sony stands for its quality, and its Sony reader too is a quality one. Though, its not full feature-rich unlike other epub readers in this article . It gets the job done and provides a smooth reading experience.

    Sony Reader is around 45 mB in size and provides Library management, and reading ebooks from its Sony ebook store. However, you can use the “Computer” option to browse & read drm free ebooks present inside your Computer/ laptop.

    Click here to Download Sony Reader for PC – Windows 7 / 8.1 / 10 (32 &  64 bit)


    Reader # 6 Adobe Digital Editions

    Adbobe Digital Editions for Windows
    Adbobe Digital Editions for Windows

    Adobe dominates the PDF reader arena and we expected it to dominate the ebooks & epub one too. But sadly, Adobe Digital Editions failed to impress us.

    Although , the Adobe Digital Editions is just 8 MB in size. It sometimes lagged while opening large epub ebooks. Though, the updates seem to be improving the speed & efficiency, we really expect more from Adobe!

    Click here to Download Adobe Digital Editons for Windows 7, 8.1 & 10.


    Reader # 7 – Epub File Reader

    Epub File reader

    This software has the most clean User-interface we came across all the epub ebook readers we tested and we loved it. Also, the software also gets the job fairly done, except that it may sometimes mis-spell the chapter names. Apart from that the Epub file reader will also require .net framework installed. Though, Windows 8 (8.1) & Windows 10 come with inbuilt .net framework, Windows 7 users will need to download it separately.

    Click here to Download Epub File Reader.

    So these are the Top 7 Best Free epub readers for Windows 7, 10 Computer / laptop we came across . If you know of any other such good app or have trouble using any of these feel free to comment .
  • Top 3 AirPlay Receivers for PC – Windows 7/8.1/10 | Use Windows as Apple TV

    Top 3 AirPlay Receivers for PC – Windows 7/8.1/10 | Use Windows as Apple TV

    AirPlay is the streaming technology used by Apple to stream or mirror iPhone / iPad or Mac OS contents onto an Apple TV. But AirPlay can be used on any system for example Windows 7 , Windows 10 laptop or desktops. We just require an AirPlay receiver on the Windows system to receive and Play the AirPlay Streams from out iOS device . Thus, We bring before you the Top 3 AirPlay Receivers / Players for Windows which will turn your Windows machine into an AirPlay compatible Apple TV.

    Top 3 AirPlay receivers for Computer – Windows 7 , 8.1 and Windows 10 – Use your Computer desktop as an Apple TV

    AirPlay Receiver # 1 – LonelyScreen

    Lonely Screen

    LonelyScreen is our favorite AirPlay receiver. Unlike its competitors –

    • LonelyScreen works with iOS 9.1 , 9.2  & later versions (iPhone 6, iPhone 6S Plus compatible).
    • It works with Mac OS X El Capitan as well.

    Thus, you could easily use LonelyScreen as an Apple TV receiver for your Windows 7 / 8.1 /10

    Click here to Download LonelyScreen AirPlay Receiver for Windows 7 , 8.1 & Windows 10 (32-bit & 64-bit)


    AirPlay Receiver # 2 – 5kPlayer –

    5kPlayer AirPlay compatible

    We really love 5kPlayer as it has multiple functionalities like –

    • It can act as a both as an AirPlay receiver as well as an AirPlay transmitter.
    • Its totally free of cost.

    The only downside as of now of 5kPlayer is that its AirPlay compatible Receiver only upto iOS 8.3 and Mac OS Yosemite , and the mirroring feature doesn’t work on Mac OS X El Capitan, iOS 9 and its later versions. However due to its dual capabilities its our second most favorite tool.

    Click here for tutorial on How to use Windows 7, 10 as an AirPlay receiver using 5kPlayer.

    Click here to Download 5kPlayer for Windows 7/8.1/Windows 10.


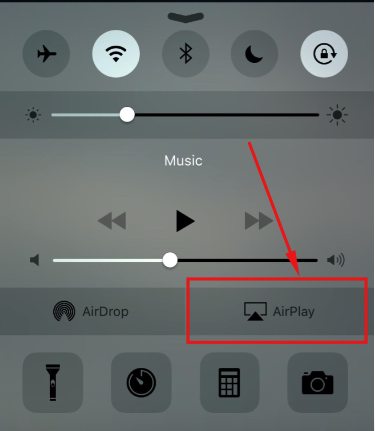
    AirPlay transmission icon on iOS 9.1
    AirPlay transmission icon on iOS 9.1

    Note – Now the procedure to use LonelyScreen or any other AirPlay receiver on Windows is pretty much the same –

    1. Install the AirPlay Receiver software on your Windows operating system.
    2. Launch the AirPlay receiver on your Windows machine (Allow firewall exceptions if prompted)
    3. Get your Transmitter (iOS Device/iPhone/Mac OS(macbook)) connected to the same WiFi network as that of the Windows system. (Both Transmitter and Receiver should be on the same WiFi network).
    4. Now, on the Transmitter (iOS/Mac device) Click on the AirPlay icon and select the “Windows machine” name in the menu to start mirroring your screen directly to your Windows system using AirPlay.
    5. The AirPlay icon is visible inside the control center shown in the image alongside (swiping bottom screen to up) on iPhone / iPad and on Mac OS it appears on the Top Bar.
    6. That’s it your AirPlay receiver (Windows) will now start mirroring your iOS or Mac OS Screen.

    AirPlay Receiver # 3 – Mirroring 360 (7-Day Free Trial)

    Mirroring 360 is an all in one solution from Splashtop which will let your Wundows PC be an AirPlay receiver, it works with Mac OS & Chromebooks too. Thus, using Mirroring 360 you can even use your Chromebook as an AirPlay receiver. Mirroring 360 unlike 5kPlayer supports iOS 9, and El Capitan as well for Mirroring using AirPlay. The only downside of Mirroring 360 is that its a Paid app and hence you will need to pay for it after 7 days to continue using it.

    Click here to Visit the Mirroring 360 Website.

    So, these are the Best 3 AirPlay receivers for Windows systems or Computers which will turn your Windows into an AirPlay display device. If you know of any other such good tool or encounter any issues feel free to comment.


  • 3 Free Apps to turn your Phone into Remote Mouse/Keyboard (Android as well as iOS)

    3 Free Apps to turn your Phone into Remote Mouse/Keyboard (Android as well as iOS)

    Imagine sitting on the cushion of your couch or sofa and controlling your Laptop or Computer via your mobile. And when we say controlling it means full-fledged control including Mouse as well as Keyboard access as well. Sounds great! , Isn’t it ? Yes its possible now due to various WiFi remote apps which are available for Android & iPhone devices. Now there are many such apps and not all of them work flawlessly, here we list down the 3 Best Free Apps which are available for all platforms according to their performance.

    App No . 1 – Remote Mouse –

    Remote Mouse

    Though this app has a very simple name, but it simply cannot be under-estimated. This small & compact app packs a great performance. You can use Remote Mouse app to –

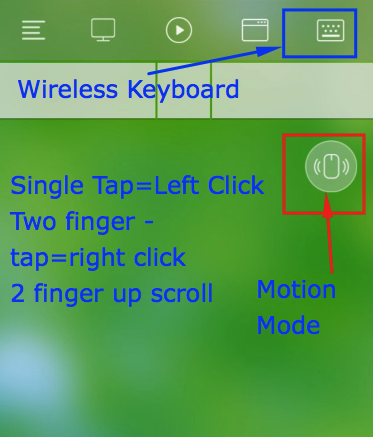
    • Use your Mobile Device as a Wireless Mouse / Trackpad.
    • Use your Mobile Device as a Wireless Keyboard.
    • Use your Mobile Device as a Media Remote,
    • Remote Mouse can even open and close programs for you.
    • In addition, it can even Shut down your machine, and act as a presenter for Powerpoint presentations.

    We have already covered Remote Mouse for Mac previously in this Article. , Also technorange has covered the Windows Version tutorial for setting up Remote Mouse App. It’s perhaps the best free remote control app we found on the market.


    App No .2 – Unified Remote 

    Unified Remote Control

    Unified Remote Control is an awesome alternative to remote mouse app, infact it cannot be considered as alternative as its almost as par as remote mouse. Unified Remote even comes with a Linux version so that you can control your mouse pointer on Linux as well by your Android or iPhone.

    Alongwith, the Mouse capabilities, Unified Remote even packs in a Wireless Keyboard,  App specific keys, media center remote and OS Client specific shortcuts which are not available in even Remote Mouse app.

    The reason why we put Unified Remote on the second position is the problem which is faced in connecting the devices, despite both of them being on the same WiFi Network.

    Click here to Download Unified Remote Client & Server apps. 


    App No .3 – Ultimate Mouse Lite –

    Ultimate Mouse Lite

    Unlike the first two choices there was a stiff competiton for the third spot with the likes of PC Remote Server app, Yooii studios Mouse kit giving a fair challenge. But Ultimate Mouse narrowly marches ahead because of it Bluetooth support, which is absent even in Mobile Remote & Unified Remote apps discussed above.

    Now the Bluetooth functionality is a really useful one, but Ultimate Mouse lite server has some disconnection issues which they need to resolve as soon as possible, as the server crashes the remote service as well. Thus, having t0 restart the server for remote access on mobile.

    Unified Mouse Lite also has a Linux Version which makes it possible to use on Android as well as iPhone touchscreen as a mouse to Linux machines.

    Click here to Visit the Downloads Page of Ultimate Mouse Lite App.

    SO, these are the top 3 Free Remote Control apps which will turn your mobile device into a wireless keyboard or a wireless mouse , so that you can control your Desktop, Mac or Laptop with ease ! without even having to touch it! . You can change music, control powerpoint presentations, play games, the possibilities are endles.. If you know of any other good app, do let us know in your comments 🙂

  • How to Install ADB & Fastboot on Windows by Compact ADB Installer

    How to Install ADB & Fastboot on Windows by Compact ADB Installer

    ADB Android Debug Bridge & FastBoot drivers are required for flashing ROM’s, Changing Recoveries, Installing apps etc. It is very tiresome to install these tools via the default SDK Manager as downloading SDK requires 100 mB of data, while the things we require are of roughly 1mB. So, here’s Compact ADB & Fastboot Android Drivers installer for Windows 7 , 8 , 8.1 & Windows 10 (32 – bit & 64 -bit both supported).

    Some, Salient features of our Compact ADB & Fastboot Installer are –

    Compact ADB Desktop Icon
    • One-click single Installer which installs required ADB & Fastboot drivers in split seconds.
    • No need to manually configure Path, the Installer does it all by itself.
    • The automatic configuration of environment Variables allows you to use ADB & Fastboot commands in any directory.
    • Uses the latest tools from Android SDK which work on all Android versions.
    • The ADB & Fastboot can be used for Adroid Kitkat , Lollipop and Android Marshmallow as well.

    Click here to Download Compact ADB & Fastboot Installer for Windows 7 / 8 .1 /10 (32 & 64 bit)

    Mirror Link  : Click here to Download Compact ADB & Fastboot – Android Drivers installer for Windows 7 / 8 .1 /10 .

    Installation Instructions –

    1. Download Compact ADB & Fastboot Installer from Above links.
    2. Double-click to open the Installer & click on “Next” , and finish.
    3. That’s it! your ADB & Fastboot drivers are successfully installed. no need to configure anything.
    4. Optionally you can also launch the shortcut from your desktop to directly type in adb & fastboot commands.

    Note!! : Please launch the Desktop Shortcut / or Use ADB “only in Run as Administrator” mode for the proper functioning as shown in the image below – 

    ADB = Android Device Bridge is a tool  used to communicate to your Connected Android device. It can be used to completely browse your Android device via USB Connection, Install & uninstall apps. Reboot into Recovery mode etc.

    Fastboot = Fastboot is an alternative recovery protocol which can be used to boot into different recovery modes. CWM & TWRP etc.Besides, these Fastboot is also used for solving Bootloop issues.

    Click here to Download Compact ADB & Fastboot Installer for Windows 7 / 8 .1 /10 (32 & 64 bit)

    Mirror Link  : Click here to Download Compact ADB & Fastboot – Android Drivers installer for Windows 7 / 8 .1 /10 .


  • Top 5 Nes Emulators to Play Nes Games on Windows 10 / 8.1 /7 (PC /Computer/Laptop)

    Top 5 Nes Emulators to Play Nes Games on Windows 10 / 8.1 /7 (PC /Computer/Laptop)

    The Nintendo Entertainment System (NES Console) was perhaps the Best source of Joy & Happiness for a 90’s Kid, it was atleast for me and some of the greatest games such as Super Mario Bro’s , Super Contra , Tanks 1990 and many others were available very easily. These NES Games though lack in Graphics, Gameplay as compared to Today’s games but when it comes to giving a competition to the new Games they give a good punch to them be it in Competity Level, or be it Fun & Adventures. So, In this article we bring you the Top 5 Best Free NES Emulators for Windows 7 & 10, so as you can Play NES Games on your Computer without the need of having a NES Console. And ya , not to forget all NES Games are actually 8-bit ROM’s (or max kB’s)  and these emulators size anywhere between (1 mB- 5 mB) so in a few mB’s you can get 100’s of games where a typical new game would easily cost few GB’s .

    Note : These emulators don’t come in with in-built NES games (ROMs) , so if you need to play any game of your choice , you may need to download ROM for playing on the emulator . NES games roms are freely available on the following  links – RomHustler.Net , FreeRoms.Com and you can search on google too for Nintendo or NES roms.

    Top 5 Free NES Emulators for Windows 10 / 8.1 / 7  to play Nes Games on PC / Computer

    #1 – FCEUX :

    Fceux NES Emulator on Windows
    Fceux NES Emulator on Windows

    FCEUX Nes Emulator comes with a lot of exciting features, makes your gaming Fun! . FCEUX is pre-loaded with features such as hex editor , Debugging mode, Video recording , Full Screen view, Joy Stick support and so on..

    Some Salient Features of FCEUX Emulator are

    • FCEUX  can load files of NES, UNF, NSF, FDS, RAR, ZIP and GZ formats.
    • Support for various Gamepad , And Joystick controllers.
    • Input Configuration is provided to set up controllers.
    • Presets for custom controls are available for your preferences.
    • It can save any game at any point.
    • Recording option is available both audio and video.
    • The Emulator works on any Version of Windows XP and later, we ourselves tested the same on WIndows 8, & Windows 10 64-bit.

    Click here to Download FCEUX NES Emulator for Windows 7/8.1/10


    # 2 – Nestopia :

    Nestopia Emulator for Windows

    Nestopia is one emulator which is handy as well as good. Its very light on resources, has ability to custom resize the game video rendering screen as well as an auto-saver as well so that your game status is automatically saved.

    Below are some Salient features of Nestopia –

    • Cheat code support.
    • Well-organized interface.
    • Wide range of options.
    • Customizable controls.
    • It can connect external devices.
    • Simulateously Four players can play a single game via keyboard.
    • It can save games at any anywhere at point.

    Click here to Download Nestopia NES Emulator for Windows.


    # 3 – VirtuaNES :

    VirtuaNES for Windows

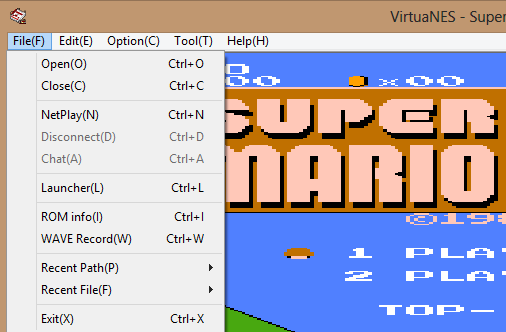
    The active development of VirtuaNES stopped wayback in 2007, but it still doesn’t hamper its compatibility nor it needs active development as it still works flawlessly on Windows 7,8 and even Windows 10 too!. Now coming to the features – VirtuaNES is highly customizable with features such as –

    • External Gamepad & JoyStick Support.
    • Active Cheat Code Support.
    • Support editing memory hex locations so that you can even try out new cheats!.
    • Supports Full-Screen play as well as resized windows adjustment.

    Click here to Download VirtuaNES for Windows 7/8/10 (32 bit & 64 bit)


    # 4 – jNES :

    Jnes is one of the extensively used NES emulator, It is not only  widely used but is also wuite stable. Jnes comes with pack of features, and is probably the only emulator which has an Android App as well, Thus, the large fan following ensures that you get the best features each time-

    • It supports NES or NSF format in order to load the game.
    • jNES allows you to use controllers in order to recreate the gaming experience.
    • jNES NES Emulator allows you to adjust sound by enabling the sound channels that you want to hear.

    Click here to Download jNES Emulator for Windows 7/8.1/10 (32 bit & 64 bit)


    # 5 –  : Nintendulator

    Nintendulator for Windows

    Now the name of this emulator is really brainy as it conveys what it does in some style. Nintendulator is a NES System emulator written entirely in C++ , which makes the emulation as realistic as possible with great speed! . This emulator impressed us on the following features –

    • Inbuilt Game Genie support for auto-play.
    • Inbuilt USB Gamepad support! (Now that’s really cool).
    • Soft-rest & hard-reset as found on the original console.

    Click here to Download Latest Nintendulator for Windows 7 / 8.1 /10

    So, these are best Nes Emulators because we came across after our trials and choose the best among those. Try them , they all are free to use and go into the past to enjoy those moments!

    NOTE : Just in case, If you do not understand any part of the post or tutorial, Do not hesitate to contact us via email or comments.

  • 3 Free Apps to take Animated GIF Screenshots on Windows 7/8.1/10 | Capture Moving Screenshots

    3 Free Apps to take Animated GIF Screenshots on Windows 7/8.1/10 | Capture Moving Screenshots

    GIFs are back again! Their ability of being able to animate like videos & to be less in size like normal static photos always make them useful for conveying information, plus their ability to loop-continuously makes them even more usable for tutorials. Basically, Windows Operating Systems capture screenshots in normal image (jpg/png) format, and there arise questions such as How to Capture Animated GIFs Screenshots on Windows? So, as a answer – Here are 3 Best Free apps which will help you capture Animated GIF Screenshots on Windows 7 / 8.1 & even Windows 10 (32-bit as well as 54-bit support)

    Top  3 Free Apps to Capture Moving GIFs Screenshots on Windows –

    App No.1 – Gyazo

    Gyazo Icon

    Gyazo  tops our list due to multiple features – It not only allows you to create or creates GIFs but it even instantly uploads them to the Gyazo Server, this helps in saving the time required to save the GIF Screenshot and uploading them separately – improving productivity. Besides this, Gyazo has the rare ability to record complete screen into GIF format which is perhaps the missing feature in the other two apps present in this article.

    How to Record Screen in GIF using Gyazo –

    • First of all Download & Install Gyazo from the below Download Link –
      Click here to Download Gyazo for Windows 7 / 8.1  & Windows 10 .
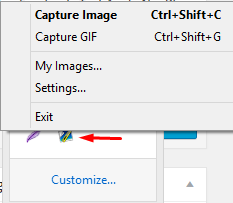
    • Now, Once you have installed Gyazo simply navigate to your Taskbar and look for the Gyazo icon as shown in the alongside image.
    • This shows that Gyazo is running now to capture GIF simply “right click” and select “Capture GIF” option , else you can press the keys “ctrl+shift+g” to capture GIF anytime.
    • Now, once you press the Key combination, it will show you a plus ‘+’ sign, asking you to select the area to capture – Now select the rectangular area whose GIF is to be recorded, by clicking the left mouse button until you draw the rectangle as show below –
      Selecting Rectangle for GIF

      Now, it will start recording the selected area for actions (moving pointers,images etc) as shown below –

      Gyazo Recording

      Once the blue bar is filled, it means that your GIF is ready and it will start uploading your GIF to their server.

    • That’s it! Now once the upload is done (5 seconds)  it will open a URL with your recorded GIF link which is ready to be used anywhere. Congratulations! You have successfully uploaded your Animated GIF Screenshot.


    App No.2 ScreenToGIF

    ScreenToGIF

    ScreenToGIF is a very easy, neat and simple to use utility to capture your Screenshot in GIF format in the most efficient & easy way. It also provides functionality to apply various filters to the GIF like Sepia etc, as well as it even lets you add text to the GIF . Following is the method to record GIF using ScreenToGIF –

    • First of all Download & Install ScreenToGIF from the below link –
      Click here to Download ScreenToGIF for Windows.
    • Now, its a single .exe file, which on execution directly gives you a window with a transparent body as shown below –
      ScreenToGIF Window (Drag to place) and resize using Corners

      Here, drag the window to the location you want to record into GIF using the Title bar, you can also re-size the recording window using the “maximize” button or by extending the window by its edges.

    • Once, you are onto the area you want to record simply hit on the “Record” button as highlighted by blue box in the previous image, the app will now start recording the screen within the app’s frame into GIF. Once you are done with taking the Screencast simply click on the “Stop” button to stop the Recording. It will now show you a preview window as shown below –
      Screen To GIF Editor Window

      You can now Play your GIF Preview, or simply Click on “Done” as highlighted by the blue box to save your GIF! .

    • That’s it, you have successfully captured another Animated GIF Screenshot on your Windows PC ( Computer) or Laptop.


    App No.3 LICEcap

    LICEcap is just 220kB in size, but packs a big punch in it features. The method to use LICEcap is similar to that of Screen To GIF and their UI too are similar. Inorder to capture Moving GIF Screencasts using LICEcap you need to perform the following actions –

    • Download & Install the LICEcap app from the below link –
       Click here to Download LICEcap for Windws 7 / 8.1 /10.
    • After installing, execute LICEcap , now it will show you a window similar to that as we saw in S To GIF as shown below –
      LICEcap app window

      Simply resize the window to the portion of Screen you want to record into the GIF and click on “Record” button.

    • Once you click on “Record”, the buttons will change to “Pause” & “Stop” as shown below . Now click on “Stop” once you’re done with the recording. 
    • Now, in the File-Explorer box, it will ask you to input name for the GIF file, simply type here the name for the GF and click on “Save”.
    • That’s it you have successfully recorded your screen into GIF.

    So, these are the best free apps to Record / Capture  Screen into GIF format on Windows . If you have any queries or suggestions feel free to comment .

  • JoyToKey Tutorial to configure Gamepad on PC Windows 7/8.1/10 [Windows Installed Laptop/Computer]

    JoyToKey Tutorial to configure Gamepad on PC Windows 7/8.1/10 [Windows Installed Laptop/Computer]

    Recently we wrote about configuring gamepad on your pc using an old version of Xpadder, but you may want to use the latest software for controlling your gamepad /joystick on pc , or you may want to tweak some extra settings or have extra configuration options to use your gamepad / joystick on pc for some games. In all above cases, and many more JoyToKey comes to the rescue, JoyToKey is another great tool to configure and use your Xbox 360 , PS2 , PS3 , PS4 and nintendo remote wii controllers on PC . Here’s a brief JoyToKey tutorial which will introduce and help you to configure JoyToKey for using gaming controllers gamepads on your Windows 7/8.1/10 PC/laptop.

    JoyToKey Tutorial for configuring gamepad on PC –

    JoyToKey on Windows tutorial
    • First of all, connect your gamepad/joystick to your PC / Laptop and install the Gamepad drivers.
    • Now, download JoyToKey by clicking here, and extract it to a folder where you want to keep JoyToKey (JoyToKey doesn’t require installation, its extract and run app).
    • After you have extracted JoyToKey, connect your gamepad controller/joystick to computer and now run the JoyToKey.exe executable.
    • You’ll be shown a window as shown in the alongside image, now press any key/push any anaolog on your gamepad. It will be highlighted in yellow as highlighted in the alongside image.

    Mapping Keyboard input / mouse controls using JoyToKey

    • Now, once you’ve seen the highlighted labels, you can start mapping your keyboard inputs /mouse controls to the gamepad buttons and analog , To do this follow the below steps –
    • Simply start double-left clicking by mouse on the Joystick 1 elements – Stick 1 <- , Button 1, Button 2 . or you can even manually select each element and click on “Edit button assignment” .
    • Once you select the button/stick on the gamepad profile , it will ask you for its corresponding keyboard input /mouse control – , Now if you want to assign keyboad input , select the keyboard label on the top and enter the corresponding keyboard stroke to be mapped to the joystick button as shown below –
    • Keyboard mapping in JoyToKey


    • Similary, you can also assign mouse control options, by selecting the sunction category as “Mouse” , and then selecting the mouse pointer / cursor controll by assigning the pointer option values as shown in the below figure – (The cursor movement if pushed to left minus or negative indicates left mouse movement and to right indicates right hand side movement, similarly for top (positive) and bottom (negative) , You can also checkmark the corresponding mouse click options highlighted by green color to simulate mouse clicks on your gamepad).
    • JoyToKey mouse mapping

      Click on “OK” to confirm your keyboard / mouse input mapping to gamepad / joystick.

    • That’s it after mapping all the inputs, you can click on ok to save your gamepad profile, similarly you can configure the second joystick too on JoyToKey, i.e use and coonfigure two gamepads/ joysticks on same computer to simulate keyboard/mouse which wasn’t supported by Xpadder.
    • Voila!  its done, configuring JoyToKey is rather easy and you can now start beating the game boss by playing the game easily by your gamepad!

    Click here to download JoyToKey for Windows 7/8.1/10

  • How to Configure any gamepad by old Xpadder version on Windows 10 / 7 / 8.1

    How to Configure any gamepad by old Xpadder version on Windows 10 / 7 / 8.1

    Some games are very difficult to play on the normal keyboard + mouse combo and we feel that it would have been better if the game supported gamepads, joysticks. Or by someway we could have been able to simulate keyboard key -press or mouse control simply on our gamepads, which would make playing games much easier! especially the online & DOS based games. Yes its possible to do such actions by a small free utility  – Xpadder v 5.3 , Xpadder lets you simulate keyboard key presss, and mouse actions by mapping the keyboard keypress, and mouse actions to Joystick and Gamepad buttons!. Let’s have a brief look into the following tutorial to configure xpadder for Windows 7/8/8.1/10 –

    Tutorial to configure Xpadder on Windows 10 /  7 / 8.1 (32-bit as well as 64-bit)

    Step 1 – Downloading Xpadder

    • Xpadder used to be free until version 5.3, but now if you try to download it from its official site – xpadder.com, it won’t be for free!. In our tutorial we will be using an older version of Xpadder, which is free to use for playing games with weak or no gamepad support.
    • Click here to download Xpadder free for Windows 7/8/8.1/10 .
    • The above package also contains, sample 3 images which are required for configuring joysticks, and an example mapping profile just incase you’re too lazy to map  keys 🙂

    Step 2 – Installing Xpadder

    • Now, simply install the above linked Xpadder, by clicking next .
    • Make sure your gamepad/joystick is connected to your computer before you open Xpadder.

    Newbie alert –

    Loading bundled in configuration of Xpadder

    If you’re new to Xpadder and mapping , or if you were unable to map your controller, you may try opening the bundled-in controller and mapping file which comes with our installer, you can load it by –

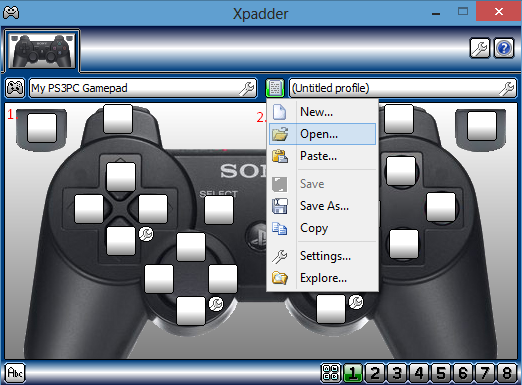
    • First click on the “gamepad” icon labelled “1” in the alongside image of Xpadder window, and select the “Open” option , here in select the folder in which you’ve installed our Xpadder and select the controller file present in it.
    • To load key-mapper again click the second icon labelled “2” as shown in the alongside image and use the “open” option for our pre-defined mapping.
    • Or if you think you’re an Hard-core Gamer, and like challenges, or faced any issues while loading the bundled configuration files , or would like to customise with additional options please proceed to Step 3, for manual configuration!


    Step 3 – Configuring Xpadder

    Xpadder compatibility troublesoot
    • Now, when you first try to run Xpadder on your windows, it will give you an Unsupported Windows Version detected error on Windows 8.1 /10 , and here’s the solution for the problem –
    • Simply, right-mouse click on the Xpadder icon, and select the “properties” option. (Click this to view the screenshot).
    • Now, go to compatibilty tab, as shown in the alongside xpadder compatibilty troubleshoot image, and in the section named “Compatibility mode” , select the version as “Windows 7″ and click on apply, and OK. You can also additionally checkmark the “run program as an administrator” option if you encounter any issues later.
    • That’s it, Xpadder is now ready to function, in your latest version of Windows.

    Step – 4 Xpadder overview and adding Joystick image

    • Below is the screenshot of Xpadder , on running now, click on the settings icon which looks like a wrench , to load the xpadder joystick image file as shown below –
      Xpadder wrench icon (joystick image)

      Now , we need to select the appropriate joystick format *.bmp image file for loading onto Xpadder, we have bundled the ones for PS2, and Xbox 360 in the installer itself, however you can have a google search for *.bmp files of the gamepad controller image you have.

    • Now , clicking, on the wrench would open the image selection window – here we need to specify the image file of controller as shown by the labels 1..2.. & 3.. in the following image –
    • Xpadder – selecting controller image file

      Now, after loading the controller image file, you will be shown the controller image in the Xpadder window.

    • Here , select the option “Sticks”  present in the bottom left corner of xpadder window, and now to configure the analog sticks –  click on the first “Enable” option marked by green color in the below image labelled analog configuration , and push the corresponding analogs(whose name is indicated on the pop-up) to the directions shown in the pop-up “left,up,down,right” , do the same for the other analog too (if present) on the controller.

      analog configuration

    Step 5 – Moving the highlight bubbles

    • After you, push the analog on your gamepad, a transparent bubble shapes would appear on the window, drag and drop them to their corresponding controller locations , as shown in this image. (Click here to view bubble drag image)

    Step 6 – Configuring the D-Pad and other Joystick buttons

    • Once, you are done with the analog sticks, configuration – Navigate to the “DPad” option in Xpadder, and “Enable” it, now again press the corresponding Keys (whose name is indicated on the pop-up) on the connected controller/gamepad.

    Step 7 – Adding the Buttons, and placing them

    • Now , click on the “Buttons” option  in the xpadder, and start pressing the buttons of your gamepad – they’ll start appearing in the gamepad image as you press them, Now place them according to the location of the button which you had pressed on the gamepad.
    • Now, in the below mentioned example (image)  – We pressed the “X” button on our controller and it appeared on the place marked by “1” now, we will move its appeared place shown by the maroon arrow, to its original place on the controller shown by blue arrow.
      We pressed “X” we will move the box “1” to “X” position(blue arrow)

      Now, please repeat these steps for all the buttons present on your gamepad and press “OK”.

    • A completely configured controller would look like this –

      Completely configured gamepad controller

    Step 8 – Mapping the Keyboard keys, and mouse actions to Added Analog and buttons.

    • Whoosh! we are done only with half the part yet, after you click on “OK” , you’ll be redirected to the following screen as shown below , here we need to individually click on these “white buttons” and assign the keyboard/mouse actions to them. –
      We have to assign maps to each of these buttons, simply click on any whitebox to start.


    • Clicking on the white button, would open the part of assigning keys – Check the below image carefully for conventions , alternatively you can click on the “wrench icon besides the white-button to select pre-defined mapping, check the below image for manual mapping –
      Manual mapping for white buttons – joystick actions.. (Click on image to view full-size)

      You can assign the mouse-movements to the 4-white buttons of analog , to simulate the mouse movements :).

    • After assigning some functions to the buttons, it would look somewhat like this –
      A demo assignement mapping


    • Voilla! Now, you can check puching your analog , the mouse pointer would also be moving! the way you are pushing it 🙂 ,

    Step 9 – Running the game!

    • Now, simply run the game without closing Xpadder! and play it using your gamepad like a boss! 🙂

    If you, face any issues or encounter any problems feel free to comment 🙂 ,

    Click here to download Xpadder free for Windows 7/8/8.1/10 32 bit & 64-bit.


  • Top 3 iOS iPhone+iPad Emulators to test iOS on PC/Windows 7/8/8.1/10 Online

    Top 3 iOS iPhone+iPad Emulators to test iOS on PC/Windows 7/8/8.1/10 Online

    Unlike Android, testing Apple iOS apps is a kinda tedious tasks as there are NO emulators available for iOS compared to many  Android emulators available for either Windows / Linux or Mac OS X  . Hence when it comes to testing iOS apps or be it taking a feel of Apple iOS for iPhone or iPad , there are a very few alternatives. But not anymore, we present you Top 3 iOS emulators which you can use not only to take a feel of iOS , but also test your ipa’s – iPhone or iPad apps online. Being cloud based solutions these emulators work on any operating system – Windows 7/8/8.1 , Linux , Mac OS and even Chrome os too!

    No # 1 – App.io

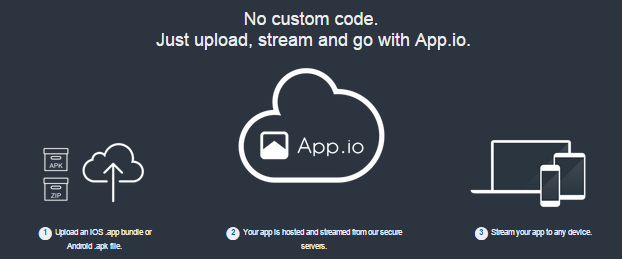
    App.io Process

    The most simplest and easy to use amongst them is App.io (Check the alongside screenshot)). All you need to do is upload your iOS .app bundle on App.io , and then it can be streamed from the App.io cloud to any of your devices be it your PC / Mac / Android Phone / Tablet etc. Thus, App.io is a great way to experience iOS apps on Android phones as the apps are streamed from the cloud, hence no extra configuration hardware is required.

    App.io offers a free 7-day trial which is enough to get a look and feel of Apple iOS, the keyboard, menus etc. Below is a demo screenshot of eBay app for iOS deployed on the app.io cloud, it works flawlessly with all features! you can yourself check it out on App.io’s homepage.

    Click here to visit App.io and view the eBay iOS app demo


    No # 2 – Appetize.io

    Appetize.io provides a complete emulated iOS device

    Appetize.io is another alternative to app.io which provides iOS & android app deployment on the cloud. And in addition to app deployment Appetize also provides a free live iOS demo which can be used by everyone to have a complete peek into iPhone 4/5s/6 as well as Nexus 5. However, you cannot install any app in the demo emulated device. If you want to test a particular iOS app or .ipa you can upload it using the upload option on the Appetize site, and yo! your emulated iOS app link will be emailed to you 🙂

    Click here to use the demo iOS emulator of Appetize.io

    Personal take – I really like the appetizer iPhone 6 demo, though it was sluggish at first but later it gave a complete hand-on on iOS , highly recommended for users who want to have a feel of Apple iOS for iPhone. Appetizer now has a demo device of iPad available too!

    No 3 – Xamarin Testflight

    Xamarin – TestFlight

    We weren’t able to test this solution personally like we were able to as in case of app.io and appetize.io . However, being tied-up with Apple, Xamarin Testflight also gives a platform to deploy your apps and test them.

    Click here for a complete guide about Xamarin Testflight


    So, to be frank there is really no offline software or solution available which can be termed as a complete apple iOS emulator, however we found Appetizer.io to be the closest one can get just to handle and get the feel Apple iOS for iPhone and iPad and run their own apps. App.io also gives a similar solution but has a 7 day free trial and needs to be payed for later..