Category: Mac OS X Zone

  • 3 Best Free Avi Players to Play AVI/MKV Videos on Mac OS X

    3 Best Free Avi Players to Play AVI/MKV Videos on Mac OS X

    Mac OS X’s default media player – Quicktime 10 doesn’t natively support the playback of AVI, MKV & DIVX video files. These formats are widely used to distribute Videos. Also, the previous solution of playing these files in Quicktime 7 using Perian doesn’t work anymore since the new Mac OS X Mavericks update. So, here’s an easy tutorial which will show you How to Play AVI/MKV Files on Mac OS X using the 3 Best Free Avi Players to Play AVI/MKV/DIVX/MOV/WMV files on Mac OS X. These Video players are not only free but contain the codecs inbuilt within them to play these files

    3 Best Free Media Players to Play Avi, Mkv & DivX Videos on Mac OS X –

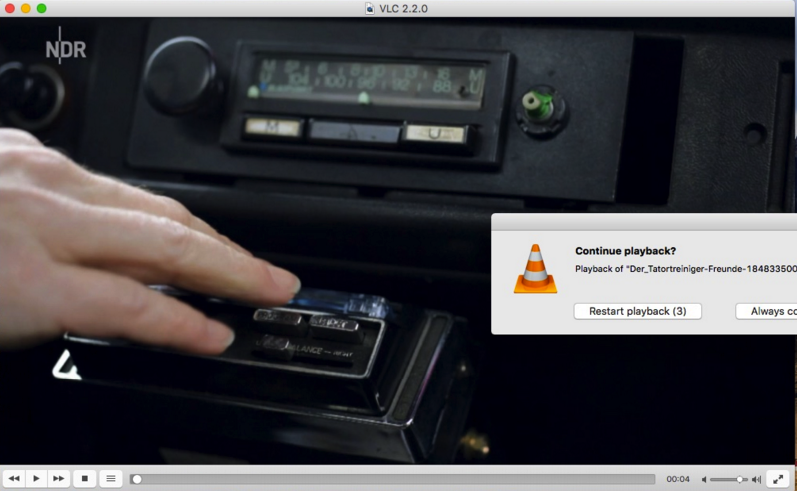
    Player # 1 – VLC Media Player for Mac OS X

    VLC for Mac OS X
    VLC for Mac OS X

    The most popular Media player for Windows – VLC is available for Mac OS X too, and to be frank it really does come in as a saviour!. VLC Media player for Mac OS X comes with a host of features such as –

    • Codecs to Play MKV & AVI & HD Videos.
    • Subtitles .srt files support on Mac OS.
    • Ability to play network streams & rtmp:// protocol.
    • Plays real media .ram and .rm files too.
    • VLC for Mac is Open-source & thus free of cost.

    The method to use VLC to play mkv, avi files on mac is Pretty simple –

    Click here to Download VLC Media Player for Mac OS X.


    Update – ElMedia is another great light-weight media player for Mac OS X which can play all major video file types –
    Click here to Download ElMedia Player .dmg file


    Player # 2 – UMPlayer for Mac OS X

    UMPlayer for Mac OS X Installation
    UMPlayer for Mac OS X Installation

    Another great free alternative to VLC for Mac OS X is UMPlayer. Universal Media Player (UMPlayer) like VLC is an open-source media player which has inbuilt codecs to play .avi, .mkv and can play .webm video on Mac OS.

    UMPlayer too is free of cost and easy to use as well. The Installation procedure slightly differs for installation of UmPlayer –

    • First of all download the UmPlayer for Mac OS X from the link below –
      Click here to Download UmPlayer for Mac OS X.
    • Now, Double-click the downloaded .dmg file & it will open a window with UMPlayer installer icon as shown in the alongside image.
    • Simply double click on the icon, to start the installation process.
    • Now, click on continue to finish the installation.
    • That’s it! Now once UmPlayer is installed, launch the UmPlayer app from Applications folder/ Spotlight and use the “File->Open method as used in VLC to start playing your favorite videos in Mac OS X.
    • Click here to Download UmPlayer for Mac OS X.


    Player # 3 – MPlayer OS X Extended

    Mplayer OS X Extended
    Mplayer OS X Extended

    Now there was a bit of tussle for the third spot between MPlayer OS X, its lookalike – MPlayerX and 5kPlayer. Now, since 5kPlayer provides a lot of features such as AirPlay streaming, and mirroring. And the MPlayerX installer coming with some toolbars we chose Mplayer OS X extended – as although being an older app, it worked smoothly on Mavericks, Yosemite and even El Capitan too.

    The Process of using MPlayer OS X extended to play .mov .wmv files on Mac too is same as that of VLC – Install, File – Open.

    Click here to Download MPlayer OS X .

    Here’s a list of formats supported by MPlayer OS X Entended –

    .wma , .avi , .divx , .ram , .dat , .dv , .vcd , .wmv all popular formats are supported. Do let us know if you face any problems while using any of the above app. Also do let us know of any other such great media player for mac if you know one.

  • How to add Equalizer on Mac OS to iTunes, Spotify for Free!

    How to add Equalizer on Mac OS to iTunes, Spotify for Free!

    All audiophiles and music lovers know about the importance of Equalizer, but sadly the default iTunes Music player on Mac OS X doesn’t come with an equalizer. Neither does the Spotify app for music streaming has an in-built equalizer. So, here’s a free app which will add a great working Equalizer to Mac OS X  (Mavericks,  Yosemite, Mountain Lion & El Capitan as well)

    How to Install Equalizer on Mac OS X –

    • First of all, Download the eqMac app for Mac OS X from the link below (its free of cost unlike Hear app) and can be classified as a Boom app alternative –
      Click here to Download the eqMac Equalizer for Mac app (.dmg) file.
    • After downloading the eqMac install the downloaded .dmg file , by dragging and dropping the app image to Applications folder as shown in the below image. A detailed tutorial to install apps from .dmg file can be found here. (Tip – open the .dmg file by pressing ctrl key + mouse click to install)
      eqMac Free Mac OS Equalizer
      Drag & Drop the icon to install eqMac Mac Equalizer

      Now, after dragging & dropping the eqMac icon the app will be installed.

    • Launch the eqMac app, it will ask you permissions to modify the sound output , permit the app to required audio access.
    • The eqMac app will now be showned up on your TopBar as shown in the below image –
      eqMac Free Equalizer for Mac
      Equalizer on Mac (eqMac)

      Now simply adjust the corresponding toggles to change the Bass , Treble and adjust the equalizer to Bass , Flat , Jazz , Rock or any other type of Songs & Audio.

    • You can directly change the audio output from the topbar which no other equalizer app provides for free!.
    • Also eqMac isn’t a media player and changes the system audio Stream it works with iTunes, Spotify, Google Chrome (Youtube) or any other media app installed on your Macbook. Thus eqMac is a highly recommended app.

    Note – Inorder to disable the app, simply Close the app by clicking on “Quit” in the drop-down menu and your Audio would be back to the normal Mac OS Output.

  • How to AirPlay or Mirror Screen Mac to Mac /Windows 10/7/8.1

    How to AirPlay or Mirror Screen Mac to Mac /Windows 10/7/8.1

    AirPlay allows streaming of your Mac OS device’s screen directly to an Apple TV. But sometimes we may want to mirror our Mac OS Screen to another Mac or a Windows computer or a Laptop. So, here’s a small tutorial on How to AirPlay or Mirror your screen from Mac to Mac or a Windows PC / Laptop.

    Tutorial to Mirror Display from Mac to Mac OS Device –

    Pre-Requisites –

    Tap and Select LonelyScreen

    Method to Start AirPlay or Mirror Mac display to Mac/Windows –

    • First of all on your sender machine, launch the AirPlay receiver app. (In our example we will use LonelyScreen app).
    • Now on your Mac OS topbar, lookout for the AirPlay icon as shown in the alongside image.
    • Now inside the drop-down menu, select “LonelyScreen”.
    • That’s it your Apple Mac’s screen will now be mirrored onto your Windows or another Mac System running Lonely Screen as shown in the image below –
      AirPlay Mac Mirror on Windows
      AirPlay Mac Mirror on Windows


    • Note – We used LonelyScreen as our AirPlay receiver to convert our Windows or Mac OS into Apple TV compatible Receiver, you can even use 5kPlayer or any other AirPlay receiver for the same purpose. –
    • Click here for complete tutorial to Mirror your Mac Screen using 5KPlayer

    Enjoy AirPlay streaming your Presentations, Movies & Music Videos from your Mac!

  • 3 Apps to use AirPlay on Mac & use Mac as Apple TV Display Receiver

    3 Apps to use AirPlay on Mac & use Mac as Apple TV Display Receiver

    Mac OS X has inbuilt AirPlay transmitter/sender hence you can easily stream or Cast your Mac content to an Apple TV. But We might want to use our Mac OS X device as Apple TV in order to display content from iPhone / iPad. In such cases we need to use our Macbook as an AirPlay receiver display. So, here are the 3 Best Apps to turn your Mac into an AirPlay display reception unit –

    3 Apps to use AirPlay on Mac as Receiver Display –

    App # 1 – Lonely Screen 

    Lonely Screen Receiver
    Lonely Screen

    Lonely Screen is one of the most sleek yet efficient AirPlay receiver for Mac OS X. It turns your Mac OS X into an Apple TV Receiver which is AirPlay compatible, so that you can easily stream your Audio, or Mirror your iOS iPhone or iPad screen.

    • Lonely Screen even supports iOS 9.1, 9.2 updates and is Apple TV 2/3/4 compatible AirPlay receiver.
    • You can easily stream using AirPlay and use your Mac as Apple TV.

    The method to stream to LonelyScreen is quite simple –

    • Mirroring AirPlay iOS 9 to Mac
      Mirroring AirPlay iOS 9 to Mac

      Download & Install the LonelyScreen app for Mac from the link below –
      Click here to Download Lonely Screen for Mac OS X 10.7 & later.

    • Launch the LonelyScreen app on Mac. It will now setup its server.
    • Now make sure that your Mac OS X Receiver and iOS device or AirPlay are on the same WiFi.
    • Now on your AirPlay sender tap the AirPlay icon and in the list of available devices select “LonelyScreen” option as shown in the alongside image.
    • That’s it your iOS device will now be mirrored on your Mac device.


    App # 2 – 5kPlayer

    5kPlayer

    5kPlayer is a multi-function media player which can even be used as an AirPlay receiver. Though 5kPlayer has inbuilt media player, its on second position in our list as its AirPlay compatible only upto iOS 8.3 , 8.4 . Hence, 5kPlayer won’t be able to receive AirPlay casts from iOS 9 and later.

    The Method to use 5kPlayer as AirPlay receiver is same as that of Lonely Screen, and it can be downloaded from the link below –
    Click here to Download 5kPlayer for Mac OS X.


    App # 3 – Mirroring 360 (7 Day Free Trial)

    Mirroring 360 comes from Splashtop which is well known for producing quality applications. Mirroring 360 also is a quality product. Unlike 5kPlayer Mirroring 360 is AirPlay compatible with iOS 9 and later, so that you can even use your latest iPhone 6S , iPhone 6 for mirroring. The only downside of Mirroring 360 is that its a Paid app and hence you will need to pay for it after 7 days to continue using it.

    Click here to Visit the Mirroring 360 Website.

    So, these are the 3 Best AirPlay receivers for Mac OS, which will turn your Mac into an Wireless Apple TV. If you know of any other such good app, feel free to comment.

  • How to use Android Mobile & iPhone as Mouse in Mac OS to move the Mouse Pointer over WiFi

    How to use Android Mobile & iPhone as Mouse in Mac OS to move the Mouse Pointer over WiFi

    Your Android mobile or iPhone’s smooth touchscreen panel can be used to control the mouse pointer on Mac OS. Not only the mobile screen can act as a touchpad, but you can even control your Mac OS mouse pointer using your phone’s gyroscope,or motion sensors. Thus, the mouse pointer will move as you tilt your phone! Sounds interesting ? Here’s how you can control your Mac OS Mouse pointer using your Android or iPhone, iPad!

    Pre-Requisites –

    Remote Mouse at topbar

    Method to Use your iPhone or Android Mobile as a Wireless Mouse –

    1. First of all, Install remote mouse on Mac OS & your phone and get them connected on the same WiFi Network.
    2. Now, launch the Remote Mouse App on your Mac OS , from launchpad or spotlight.
    3. Once you have launched the Remote Mouse app on your Mac OS , it will align at the topbar as shown in the alongside image. The image indicates that the Remote mouse server has started.
    4. Now, Open the Remote Mouse app on your Android phone or on iPhone which is connected to same WiFi as that of Mac.
    5. After opening the app on your Mobile device, it will first scan for the available servers to which it could act as a remote as shown below –
      Tap to Connect to Mac OS

      Here in the list of devices in your network tap on the name of the Mac OS device to connect it.

    6. That’s it , It will now automatically get connected. Thus now you can use Your mobile’s touchscreen as a wireless mouse & trackpad. You can even use the Mobile as Wireless Keyboard.
    7. Tap on Mobile screen for left click, two finger tap for right click, You can now use your Mobile as a Wireless Remote for a variety of purposes as listed below .

    Benefits & Applications of Remote Mouse –

    • You can show off your Geeky Side, by controlling the mouse pointer without touching your Laptop!.
    • You can use your Mobile as a wireless Presenter remote to control your Powerpoint presentations via Mobile.
    • Mobile Remote also contains an inbuilt keyboard so that you can even type in on your screen and control it remotely.
    • Last but not the least you can even use your Mobile as a Mobile Remote.
    • All this for free!


  • Transfer Files between Mac OS & Android over WiFi by Share It (Wireless File Sharing)

    Transfer Files between Mac OS & Android over WiFi by Share It (Wireless File Sharing)

    In the last article we showed How to Transfer files from Mac OS & Android MTP via USB , But its not possible to carry our USB cable all the time. So, In such cases we can share files from Android device to Mac OS even wirelessly! over WiFi. Sharing files between Mac OS & Android over WiFi doesn’t require any Internet or cellular data connection and is really fast using the Share It app. In this tutorial we will cover How to Transfer Files from Mac OS to Android or from Android to Mac OS X over WiFi by Share It app .

    Pre – Requisites / Requirements –

    We will divide our tutorial into two parts –

    1. How to Transfer Files & Documents from Mac OS X to Android over WiFi.
    2. How to Transfer Files & Documents from Android to Mac OS X over WiFi.

    Part . 1 – Method to Transfer or Share files from Mac OS X to Android over WiFi by Share It-

    ShareIt on Mac OS X

    Important –  This method Requires both your Mac OS X & Android device to be connected to a common WiFi Network . The Common Network must not be coming from(hotspot) from either of the devices (Mac OS X or The Android Device) which are transferring files. We Recommend connecting both the devices to a 3rd Party WiFi Network e.x a WiFi Router , or a Hotspot created by a non-transfer involved Android Hotspot.

    • Connect both the Sender (Mac OS X device) and Receiver (Android Device) to a common WiFi Network.
    • Now First launch the Share It app on Mac OS X either through Applications folder or via the Launchpad. It will look as shown in the alongside image. (Do make sure you do not close / minimize the app) .
    • During our tests the Scan & Connect option wasn’t visible on Android Phone, hence we did the following steps –
    • Launch Share It app on Receiver Android Phone and now you will see “three vertical lines at the top right hand side , tap on it and select the Option “Connect to PC Option” as shown in the below image –
      Connect to PC Option in Share It App on Android

      Tap on the “Connect to PC Option” , now it will give you a Radar view on your Android Device with your Mac Device name. Now tap on your “Mac Device name” in the radar view on the Share It android app as shown in the image below-

      Tap on the Screen icon on your Android


    • Now, On your Mac OS Share It app  it will ask you for permission to share files , Here tap on “OK” as shown in the below image –
      Tap on OK button on your Mac

      Once you have clicked on OK button, it will now display you a connected screen as shown below –

    • Now Open Finder app and select the files which you want to transfer to your Android device.  Simply Drag & Drop” files on to this ShareIt window! Your files will be successfully copied to your Android device as shown! –
      Drag & Drop Files on Share It window


    • That’s it! Congratulations You have successfully transferred Files from Mac OS X to Android over WiFi.


    Part . 2  – Transferring Files & Music from Android to Mac OS X via WiFi –

    Transferring Files & Music from Android to Mac OS X again could be done via 2 Methods –

    1. Using ShareIt WebShare , ShareIt App required only on Android Sender. (Mac OS X Connected to the Android Sender HotSpot)
    2. Both Devices Required to be Connected to a 3rd Party WiFi (ShareIt App Required on Both Android Sender & Mac Receiver).

    1 . ShareIt Webshare Method to Transfer Files from Android to Mac OS X

    Note – Unlike the above method this method doesn’t require a 3rd party WiFi device , your Android device itself will act like a HotSpot WiFi and we need to connect to that WiFi on your Mac.

    • Now, First open the Share It App on your Android Sender device. Click on the Vertical lines on the top right hand side and select the option “WebShare” .
    • It will now open a viewer tab, here select the files which you want to transfer to Mac and tap on “Send” as show in the image below –
      Tap on Send After tapping Send

      It will now show you the Procedure to be done on Mac OS X device as shown –

      Procedure For Mac OS X


    • Now on your Mac OS X , Connect to the WiFI network mentioned in the Android Share It app screen.
    • After connecting to the mentioned HotSpot, Open any web browser Safari or Google Chrome on your Mac OS Machine.
    • Now, Type in the URL / Link along with Port mentioned in the second step on ShareIt Android app.
    • Here you will see all your content, which was shared via the app – Simply Click on the Download icon beside the app as shown below –
      Check the URL Tap on the Down icon


    • Once you tap it the file will be downloaded or we can say successfully copied from your Android device to your Mac OS Device!!

    Impportant Note – For Transferring Files from Android to Mac OS without Webshare method –

    • Make sure that both Mac OS X & Android Sender device is connected to same 3rd Party WiFi.
    • First Open the Share It app on Android device, and tap on “Send”.
    • Now Open the Share It app on Mac OS X device.
    • Again return to your Android device and Select the Files which you want to Share to Mac OS Device and after you’re done selecting the files tap on “Send”.
    • You will see a radar view on the Android device, Tap on the Mac device name.
    • Return to the Mac OS X Share It App to accept the files!

    Cngratulations! You have now successfully shared files betwen your Mac OS X device and Android phone. If you face any problems or encounter any issues feel free to comment.

  • Transfer files Between Mac OS X & Android in MTP USB Mode

    Transfer files Between Mac OS X & Android in MTP USB Mode

    Mac OS X doesn’t natively support the MTP Connection mode of Android devices. The newer Android phones however use MTP Connections for USB Data transfer. The reason behind the same is MTP Mode allows disk or storage access to memory without the need to close apps, unlike Data Storage mode which requires force closing of apps. So, As Mac OS X doesn’t natively support MTP, here’s a tutorial which will show you How to Transfer files from Mac OS X to Android in USB MTP mode. Our tutorial uses the Official Android File Transfer App for Mac OS X hence it can be used to Transfer files from Android to your Mac OS X device too.

    We will be dividing our tutorial into two Parts –

    1. How to Transfer Files from Mac OS X to Android in USB MTP.
    2. How to Transfer Files from Android to Mac OS X in USB MTP.

    Pre-Requistes / Requirements – 

    • Drag & Drop the Android USB Icon to Applications folder to Install

      As Mac OS X doesn’t natively support MTP , first of all download the Android File Transfer app from the below link –
      Click here to Download Android File Transfer App for Mac OS X.
      The above app itself contains necessary Android MTP Drivers for Mac OS X.

    • Now, to Install the Android File Transfer App , double click on the downloaded .dmg file.
    • A window labelled “Android File Transfer” simply drag and drop the Android Icon on to the Applications folder as shown in the image alongside.
    • That’s it you have successfully Installed the required Android MTP USB Drivers.


    Launch the Android File Transfer App

    Part . 1 – Method to Transfer files from Mac OS X to Android via USB MTP

    • First of all, Download & Install the Android File Transfer App for Mac OS X as mentioned earlier in the article .
      Click here to Download Android File Transfer App for Mac OS X. 
    • Now, connect your Android Phone in MTP Mode to your Mac OS device via USB Cable.
    • Launch the Android File Transfer app from the “Applications” folder or from the “Launchpad” as shown in the alongside image.
    • Once you have connected your Phone via USB & launched the Android FileTransfer app it will show up your Phone contents, thus you can browse your Android Phone contents here as shown below –
      Browse your Phone Contents in Android File Transfer App for Mac

      Android File Transfer app doesn’t have the copy, paste , share or the normal import export options. So, here’s how You Can transfer Files from Mac OS to Android –

    • Launch Finder App , and navigate to the directory location of the file which you want to copy to your Android Device.
    • Now, Simply “Drag & Drop the file “ from Finder window to the Android File Transfer app window (on the folder where you want to copy your file on Android) as shown in the image below –
    • Transfer File from Mac OS to Android File Transfer (Android Phone)

      Thus, in the above screenshot our File will be copied from Mac Documents folder to Pokkt Video folder on Android.


    Part . 2 – Method to Copy / Share Files from Android to Mac via USB 

    • The Basic Method of connecting your Android Phone to Mac via Android File Transfer remains the same.
    • In order to Copy files/documents from Android to Mac all you need to do is –
    • Launch the Finder app.
    • Navigate to the directory in Finder where you want to copy / save file from Android.
    • Now, Simply “Drag & Drop” the files you want to transfer from Android to Mac from the Android File Transfer window to Finder window as shown below –
      Drag & Drop file from Android File Transfer Windows to Finder Window


    Update  – If the USB MTP Method doesn’t work for you, you can even transfer files between Android & Mac over WiFi by this linked tutorial.

    Thus, you have now successfully copied & shared files from Android devices to Mac OS & even vice versa using Android File Transfer app. The Major advantage of using Android File Transfer app is that it can easily transfer music files, documents PDFs from Mac to Android and Android to Mac as well.

  • How to Easily Install Android ADB & Fastboot on Mac OS X

    How to Easily Install Android ADB & Fastboot on Mac OS X

    Android ADB and Fastboot Drivers are required for many purposes such as installing Custom ROMs, Factory Reset, Troubleshooting device as well as for installing and uninstalling Apps. However, Installing ADB & fastboot drivers on Mac OS X isn’t easy. So, we bring you the Easiest method to Install Android ADB & USB Fastboot drivers on your Mac OS X, so that you can control phone & flash ROM’s directly from your Mac os x device.

    Method to Install Android ADB & Fastboot Drivers on Mac OS X –

    Step.1 Downloading & Extracting the ADB Install Scripts –

    • First we need to download the necessary Adb Installation scripts for Mac, they are available in the link below –
      Click here to Download ADB & Fastboot Binaries & Installation Scripts. (<10 mB)
    • Now, Once the above .zip file has been downloaded, extract it to a Folder using Archive manager and open the extracted contents in finder as shown below –
      Extract the downloaded Zip file, we have extracted it to Android folder


    Search & launch Terminal from Launchpad

    Step.2 Opening Terminal & Installing the Script File –

    • Now launch “Terminal” on your Mac , by Opening “Launchpad” and selecting “Terminal”. Alternatively you can also launch terminal from the utilities folder by pressing the key combination (Shift + Command + U).
    • Once you have opened Terminal,  Switch to the Finder app.
    • There inside the extracted directory look for the file labelled “ADB-Install-Mac.sh” .
    • Now, simply drag & drop that file from Finder & app to the Terminal window as shown in the below image –
      Drag File ADB-Install-Mac.sh from Finder to terminal window

      Now the file name will appear inside the Terminal window.

    • Hit the “Enter or Return” key.
    • Once you hit the enter key it will ask you for your Account password as shown below –
      Enter your account Password & hit the enter key

      Type in your Mac OS X account password and hit the Enter key.

    • That’s it! Now it will execute the scripts & install the ADB & Fastboot binaries as well as the drivers. After the installation is finished it will wish you a “Nice day”, that’s it now you can run & use ADB and Fastboot on your Mac OS X as shown below –
      ADB on Mac OS X

      That’s it you have now successfully configured your Mac OS X machine with Android drivers as well as ADB & Fastboot. This method has been tested on Mac OS X Yosemite , Mavericks, El Capitano versions. If you face any problems feel free to comment.

  • 4 Different Ways to Install Apps & Programs in Mac OS X

    4 Different Ways to Install Apps & Programs in Mac OS X

    Installing apps on Mac OS X is different as compared to other Operating Systems such as Windows & Linux. Thus, users face a major query of How to Install apps on Mac OS X? . Installing Apps on a Mac OS X machine is completely Graphical input based process and terminal isn’t mostly required. Also, Mac OS X Applications come under variety of packages – AppStore followed by .dmg app image files , .pkg installers or even single .app files . Thus, considering the different App packages available for Mac OS X we bring you 4 Ways & Methods to Install all types of applications & Programs in your Mac OS X .

    Way / Method – 1 : By Mac AppStore 

    Mac App Store in Dock

    This is perhaps the most simple & easiest method to install Apps on your Mac OS X. In addition to being simple & effective its perhaps the most Safest as well. Each app is verified by Apple before its being published on App Store  so you are assured of No Malware/Spying.

    To Install Apps from Mac Store –

    • Launch the App Store from the bottom dock as shown in the image alongside.
    • Once, your AppStore is launched, log-in with your Apple ID if required (Register a new ID incase if you don’t own one).
    • Inside the Mac Store you will be shown a big catalogue of Apps , Browse & Search for the app you want to Install.
    • Once, you find the listing of the App you want to Install , First Click on “Get” button besides the app as shown in the image below (highlighted by red color) –
      Tap on Get & then click on Install App

      Now once you tap on “Get” the button will change to green colored with the label “Install App”.

    • Simply, Tap on the “Install App” button as highlighted by blue color in the above image to install your App! .
    • Now your App will be downloaded from the App Store, wait until the download finishes. Once the download is completed , just launch the app from the Launchpad or Applications folder in Finder.
    • Click here to Launch App Store on your Mac OS X Machine.


    Way / Method – 2 : By Installing .dmg files –

    Apps present on App Store although secure lack a bit onto Vital OS functions & commands which are required for proper hardware usage and Speed. Hence, many developers distribute their applications .dmg files which are nothing but Disk Images of their apps. So, If you download any app for your Mac from the web most likely it would either be a .dmg or .pkg extension file. Installing .dmg files is pretty easy if you follow the below linked tutorial –

    Click here to View tutorial to Install .dmg file Apps on Mac OS X.


    Way / Method – 3 : By Installing .pkg files –

    Sometimes Bigger application and programs require multiple directory access, and hence they make their own installers for Mac OS X as they are in Windows. These Mac OS X installers are packaged as .pkg files.

    How to Install .pkg app on Mac OS X  –

    • Navigate to the .pkg app file in Finder.
    • Now, “press control key + mouse click” or “right mouse click” on the .pkg file as shown below –

      Installing .pkg file
    • Select “Open” . You will be shown a dialog box as with options, keep clicking on “Continue” to finish the installation process.
    • Congratulations! you have successfully installed a .pkg application installer on your Mac OS X. Open your application from launchpad or from “Applications” folder inside Finder to launch your App.


    Way / Method – 4 : By Installing native .app files –

    Small applications or single executable file apps for Mac OS X are packages as .app files. The Method of installing or Opening .app files app is similar to as that of executing .pkg files.

    Install / Open .app files in Mac OS X –

    • “right mouse click” or “control+mouse click” on the .app file which you want to open / install.
    • Select the “Open” option from the drop down menu.
    • That’s it your .app file will be executed successfully!.
    • You can even move your .app file to Applications folder using Finder to make it appear in your Launchpad.

    That’s it , these are the 4 ways or methods which will help you to install different applications on your Mac OS machine. If you know of any other method do let us know in comments, Thanks.