Mac OS X Apps which are not present on Mac AppStore are generally distributed in either .pkg or .dmg formats. However, many users find it difficult to install them due to their unfamiliarity with the .dmg format. Here’s a simple tutorial which will guide you on How you can easily install apps packaged in .dmg format on your Mac OS X machine (iMac & Macbook) . This method works on all Mac OS X versions (Mountain Lion, Mavericks, Yosemite & El Capitano as well) . Read on more for the complete tutorial.
Method to Install .dmg Format Apps on Mac OS X –
Pre-Requisites –
The .dmg File of the App you want to install. Download & Save the .dmg file in any folder.
Non-Guest User account access in Mac OS X (Any User account with app-install permissions or Administrator account).
In our Example, We will be using the Opera browser .dmg file to demonstrate the installation process.
Steps to Install .dmg Apps in Mac OS X –
Navigate to your .dmg file in Finder and double-Click on it.
If you didn’t get the error, You will see an installer / or the app will install its image onto your homescreen (.dmg are basically app image files).
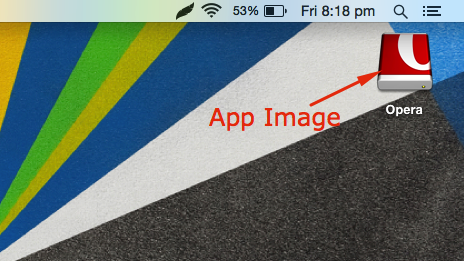
Now, you’ll see the App Image (with a disc type icon) on to your Homescreen on Mac as show below –
App After its Dmg File installed
Installing the Dmg file doesn’t mean its installed, You will need to drag the App Icon image to the “Applications” folder for it to function properly.
Dragging App Icon to Applications Folder – Launch the App by double clicking the App Image icon. It will open a window as shown in the image below-
Drag App Icon on to the Applications Folder
Now Click and drag the App Icon on to the “Applications” folder. i.e from Position 1. to Position 2. in the above image.
Once you drag the Application App Image icon on to the Applications folder, it will be installed & will now be visible inside the Applications folder as shown below –
Successfull Installation
If you see the your App Icon without disk image background , You have installed the .dmg app successfully! .
Simply Double-click the App Icon inside the Applications folder to launch your Application program.
So, this is one of the most simple methods to install .dmg application programs on Mac OS X. Some apps may require a further tweaking but this will get the job done 99 times. If you face any issues or encounter any problems feel free to comment.
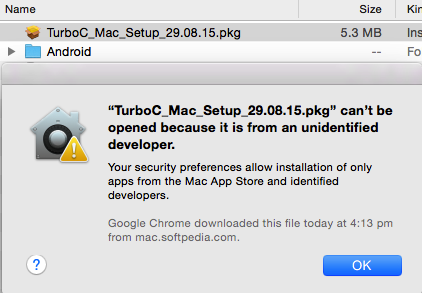
Many times we need to install apps which are not present on the Apple Mac OS X Store. In such cases we either download the app from external sources on the web. These apps prompt errors such as”app can’t be opened because it is from an unidentified developer” when we try to install them. In this tutorial we will show you two ways to Open & install Applications or Programs from Unidentified Developer in Mac OS X. This method has been tried & tested on Mountain Line, Mavericks, Yosemite as well as El Capitano too.
Error Dialogue box
Pre-Requisites :
The Mac App package either in the .dmg , .pkg or .app file Format.
Non-Guest User account access in Mac OS X (Requires any User account with app-install permissions or Administrator account).
Method – 1 Method to Install App from Unidentified Developer Using Command Click .
Navigate & Open the Directory where your App package is located using Finder.
Now, When you try to Open it by double clicking the application file it will show an error as shown in the alongside image of “Unidentified Developer”.
In order to Bypass this error, Simply “press the control key and click your mouse button” or “right-click” the app file to open the app context menu as shown below –
Context Menu after control-click
In the menu select “Open”.
After you click on Open it will create an exception in the Security preferences for the selected app and you will be able to Open & Install your favorite app! without modifying the Security Process at all.
This is perhaps the most easy way of Installing & Open an app from an unidentified developer.
Method – 2 Creating a Manual Exception for the App in System Preferences
The first two steps in this method are same as that of the first one –
Navigate & Open the Directory where your App package is located using Finder.
Now, When you try to Open it by double clicking the application file it will show an error as “unable to open app from Unidentified Developer”.
Now Click on the “Apple icon” on the toolbar and select “System Preferences” as shown below –
System Preferences
In the System Preferences Window select “Security & Privacy” as shown below –
Security & Privacy
Now, inside the Security & Privacy Window click on “General” tab at the top.
Here in General tab, Search for “Open Anyway” button under the label “Allow Apps from”. You will find the name of the app which you recently failed to install/open.
Now simply “Click On Open Anyway”. Congratulations! Your app would be successfully Opened & Installed on your Mac OS X.
Geeky Note – All Apps for Mac OS X need to be signed by Apple which is a paid process, and all developers cannot afford them. Hence, they directly distribute their app packages which are marked as “unidentified” by Apple. Please do check the App Source before you trust your downloaded app/Program.
Recently I needed to transfer some music/songs into my iPhone, and I found that for any song/track which you want to add to the iPhone / iPod it must be synced to the iTunes library. Now we may want to transfer just a song and not have it in Music Library like I wanted or some might need to import only particular Music onto the iDevice without using iTunes (iDevice= iOS devices : iPhone, iPod, iPad) . So, here’s a simple tutorial on how you can copy/transfer music from your Mac/Windows pc-laptop without using iTunes .
Pre-requisites –
This tutorial requires iTunes to be installed on your system, as the newer iOS device drivers can only be installed through iTunes.
Tutorial on how to transfer-copy music soundtrack from Computer/Mac to iPhone / iPod / iPad without iTunes –
First of all connect your iPhone / iPad device to your system , If iTunes automatically opens up & start syncing close it.
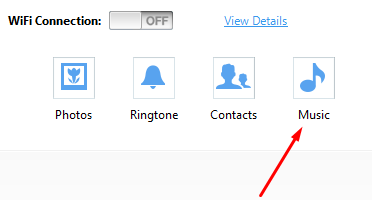
Now, Open iTools app, you will see your iOS device in the window, there in click on the “Music” icon / media tab under the device menu as shown below –
iTools Music icon shown only after device recongnized by iTools
Here you will see all the music tracks present inside your device, Now near the menu bar there’s an option labelled “Import” as shown below –
iTools import music option
Now select/click on the Import option.
After you have clicked on the Import option, it will open an Explorer window, here browse & select either manually select the music tracks or you can even select the directories whose music you want to transfer / import (highlighted by Green arrow in the below image)-
iTools Music Import to iPhone / iPad / iPod
Once you are done with selecting the tracks, Click on the Import button.
Wait for a while until the tracks are copied & indexed, and that’s it! Now you can disconnect your iPhone / iPad from the system and enjoy the music right in your music library! totally without iTunes!
If you encounter any problems while using this tutorial feel free to comment.
We had earlier covered a tutorial for Xender app (iOS) which is probably the most easiest & efficient way to import music from other device (Android) to your iPhone / iOS device. A lot of users were really happy with the results of the app, but some also requested that the songs/music to be imported into the default music player from Xender. Though, not easy but it isn’t impossible either so here’s a tutorial to import songs & music from Xender , ShareIt app to the default Music Player library on your iPhone / iOS device.
Tutorial- How to import music songs/music from Xender to Music Library
Pre-requisites :
We will need two different iOS file explorers to transfer files – iBrowse (to extract/export music from iPhone’s or iOS device’s apps document folder) & iTools (to import the music back into the music library of iPhone/iPad) , however you can skip iTools if you plan to import it using iTunes.
Tutorial Part 1 – Exporting the music from app’s document folder to storage
First of all, connect your iOS device/ iPhone to your computer / Mac.
Now open iBrowse app, now browse through to the app’s document folder as shown below –
Navigate to the apps folder in iBrowse as shown below , and open it –
iBrowse app’s folder
Here scroll down to the app’s folder, as we need to copy music from Xender in our case we navigate to the Xender folder in apps & open it –
Navigate and open Xender Folder
Once you open the Xender folder, please browse to the “Documents” folder which is present inside the Xender folder (Navigate and open the Documents sub-directory inside Xender).
Now check for the music/song inside either the”Inbox” or “Other” sub-directories which are present inside the Xender app as shown below –
Inbox directory inside Xender documents directory
Other directory inside the Xender documents directory
In our case the music file was present inside the “other” folder.
Now, Select the music files you want to export and now right-click on them and select the “Export to folder” option as shown below- . (Select a temporary folder on your hard disk where you will be storing music files, later on we will be importing the files in iPhone’s music library.)
Export to folder option – iBrowse
Tutorial Part 2 – Importing the exported music from Part 1 into Music Library
You can directly import the exported music via iTunes onto your Music Library or –
You can open iTools app after connecting your iPhone / iOS device, then navigate to the “media” option selected by maroon color in the figure below –
iTools method to import music into music library
Now, click on the “import” option highlighted by the green color in above figure, herein select the music files/folder to which we exported our music files in Part 1 of this tutorial and click on “Import”.
That’s it! You have now successfully imported music from Xender to Music Player library on your iPhone / iPad & iPod :).
Well, the tutorial is a lengthy one, but this is probably the only way you can do the import without jailbreaking your device, if you encounter any problems while following the tutorial feel free to comment .
Most of the apps which we use, download & store some background data which they fail to delete even if its not useful anymore. This type of data gets accumulated and stored overtime which results in Insufficient memory in our iOS devices – the result iPhone & iPad internal memory full. Also, iOS unlike Android doesn’t give external apps even access to other app’s data,let alone delete it or even use it -. This results in the absence of proper cache cleaning apps for iPhone’s and junk file deleting apps for iOS. But not anymore – Now we can clear app data/cache and even the junk files by the following tutorial –
Tutorial to clear app data/ app cache and delete junk files on iPhone / iPad using MobileGo
Now, once you’ve downloaded MobileGO, install it . (Note – If you’re using Microsoft Windows OS, it might prompt you to download & install iTunes, this step is necessary as declining the same would result in iPhone drivers not being installed and hence no proper iPhone / iPod connection to PC).
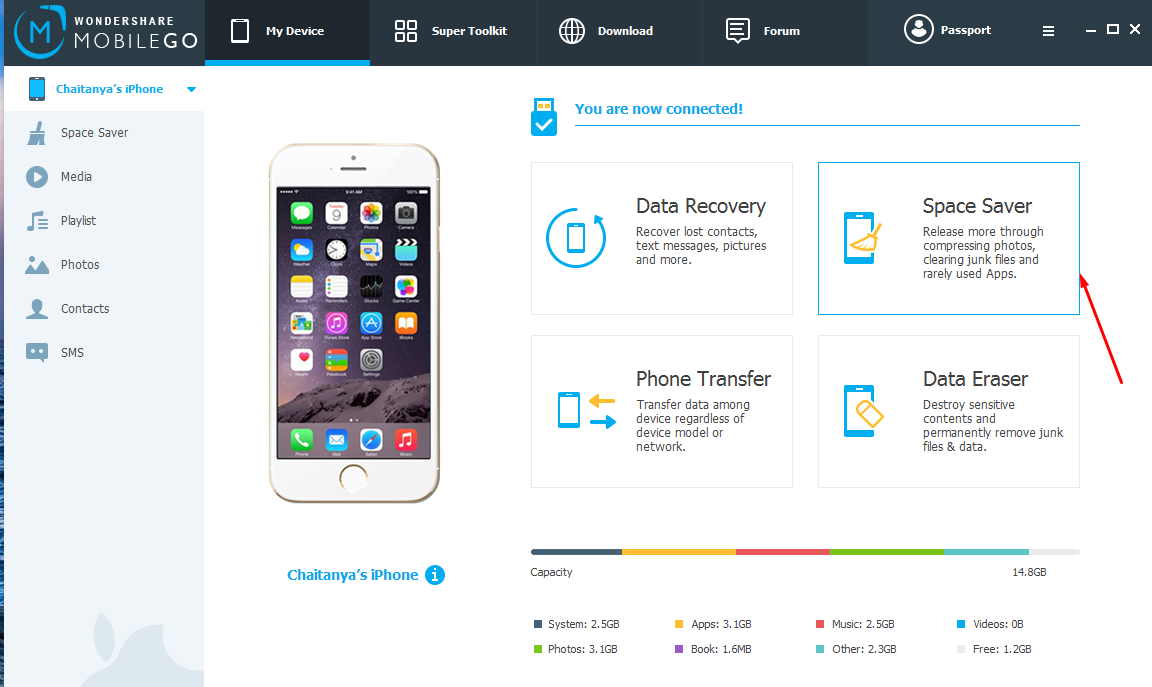
After you’ve installed MobileGo, execute the program, now connect your iPhone or iOS device to PC using the USB lightning cable.
Once you’ve connected your iOS device, MobileGo will automatically connect your device and present you with a dashboard as shown alongside , here click on the “Space Saver” option (as highlighted by red arrow).
Now, it will ask your permission to scan your device for junk files , and cache as shown below – , here click on “Start”. Mobile GO Space Saver Start icon
Now, it will start scanning your device, please wait until your complete device is scanned. (Note : This may take some time depending upon the data present in your iPhone / iPod or iPad).
Once Mobile Go has finished scanning it will ask you to for check-marking the the actions to be performed for space reclaimation , Now just checkmark on the actions you want to perform – “System Junk files”, “App generated junk files” , “photo compressor” .
Now, click on “Resolve” button –
Mobile GO Resolve button
Wait until the process is completed! .
Voila! you’ve now easily and successfully freed-up space in the internal storage memory of your iOS device, that too without Jailbreaking! and without affecting your log-ins/ or affecting security – Keeping it as secured as ever!
If you encounter any problems while using Mobile Go feel free to comment 🙂 .
Unlike Android, testing Apple iOS apps is a kinda tedious tasks as there are NO emulators available for iOS compared to many Android emulators available for either Windows / Linux or Mac OS X . Hence when it comes to testing iOS apps or be it taking a feel of Apple iOS for iPhone or iPad , there are a very few alternatives. But not anymore, we present you Top 3 iOS emulators which you can use not only to take a feel of iOS , but also test your ipa’s – iPhone or iPad apps online. Being cloud based solutions these emulators work on any operating system – Windows 7/8/8.1 , Linux , Mac OS and even Chrome os too!
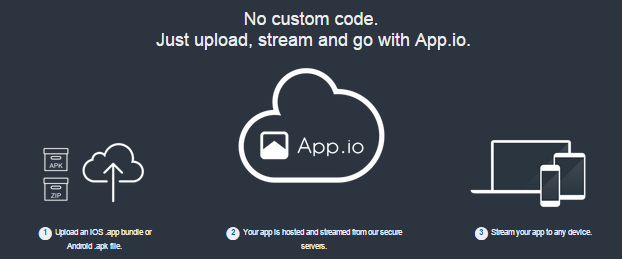
No # 1 – App.io
App.io Process
The most simplest and easy to use amongst them is App.io (Check the alongside screenshot)). All you need to do is upload your iOS .app bundle on App.io , and then it can be streamed from the App.io cloud to any of your devices be it your PC / Mac / Android Phone / Tablet etc. Thus, App.io is a great way to experience iOS apps on Android phones as the apps are streamed from the cloud, hence no extra configuration hardware is required.
App.io offers a free 7-day trial which is enough to get a look and feel of Apple iOS, the keyboard, menus etc. Below is a demo screenshot of eBay app for iOS deployed on the app.io cloud, it works flawlessly with all features! you can yourself check it out on App.io’s homepage.
Appetize.io provides a complete emulated iOS device
Appetize.io is another alternative to app.io which provides iOS & android app deployment on the cloud. And in addition to app deployment Appetize also provides a free live iOS demo which can be used by everyone to have a complete peek into iPhone 4/5s/6 as well as Nexus 5. However, you cannot install any app in the demo emulated device. If you want to test a particular iOS app or .ipa you can upload it using the upload option on the Appetize site, and yo! your emulated iOS app link will be emailed to you 🙂
Personal take – I really like the appetizer iPhone 6 demo, though it was sluggish at first but later it gave a complete hand-on on iOS , highly recommended for users who want to have a feel of Apple iOS for iPhone. Appetizer now has a demo device of iPad available too!
No 3 – Xamarin Testflight
Xamarin – TestFlight
We weren’t able to test this solution personally like we were able to as in case of app.io and appetize.io . However, being tied-up with Apple, Xamarin Testflight also gives a platform to deploy your apps and test them.
So, to be frank there is really no offline software or solution available which can be termed as a complete apple iOS emulator, however we found Appetizer.io to be the closest one can get just to handle and get the feel Apple iOS for iPhone and iPad and run their own apps. App.io also gives a similar solution but has a 7 day free trial and needs to be payed for later..
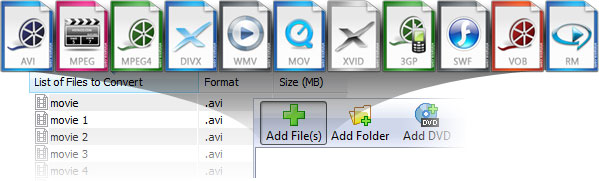
Hello everyone, many times it may happen that a particular video simply won’t play up or a particular playback format might not be supported on your device. In such cases we need handy apps which can convert videos for us or video converters. Finding Free Video converters for Mac isn’t an easy task, and even if you find one it may have some limitations such as Video Watermarks etc, So we bring you the Top 7 Best Free Video converter apps for Mac Os ,which you can also use to as avi,mp4,mkv video converters on mac – let’s have a look onto them in brief –
App # 1 – HandBrake
HandBrake Mac UI
HandBrake lies right at the top in our list for Free Video converters for Mac, and its features are such that it really deserves to be at the top!. The User Interface of Handbrake is quite simple with everything right from source to destination and output video codecs & settings everything be controlled by the User. It also allows you to use predefined recommended video output formats/settings for devices such as iPad,iPod Apple TV, Android. So, if you intend to play on any of those devices, you don’t need much tweaking around.
Also, HandBrake comes in with a Preview Windows, which is really a useful feature considering you might want to preview your video,as to how it will look before going for full conversion.
Yes, you heard it right – Our beloved Media Player – VLC can also be used to convert videos on the go on Mac without any extra codec requirements. The procedure to convert videos using VLC too is pretty easy and is as follows –
Go to Media — > Convert/Save — > Now, in the file tab add your source video/audio file which you intend to convert.
After Adding your file, click on the small “down arrow” mark on the Convert/Save button and Select “Convert”.
Now,specify the conversion format in the “Profile” drop down as shown in the alongside image, Specify the destination file to save the convert file.
Click on “Start”, Your video/audio conversion will be started! and after conversion the converted file will be available in the destination source.
Prism Video Converter [Free] Prism Video converter is yet another alternative to handbrake,a video converter which can easily convert video files , as well as audio. Prism supports all popular video formats including AVI, MOV, WMV, FLV, MKV, MOD, ASF, MPEG1, MPEG2, MP4, 3GP, and many more. All you need to do is simply drag and drop your video files into Prism and you’re ready to convert. Besides, Prism can also be used to compress your video files or as a video compressor for Mac. Prism also allows you to preview files , so that you can have a look before you convert them. The Prism Free supports some basic video formats for home use. But for professional use, you need to purchase the Prism Plus Converter. Click here to download Prism Video converter Free for Mac os.
App # 4 – Miro Video Converter for Mac
iFFmpeg
Miro video converter is yet another free converter for mac os around, it can convert a wide range of audio and video files. And has a good number and varieties of codecs supported . Like Handbrake, Miro video converter also comes with integrated presets and video settings for devices such as PS4, iPhone, iPod etc . Miro though has some issues with ogg output as reviewed by some newer mac os users. Miro is based on ffmpeg and conversion time too is similar to that of its paid counterpart – iFFmpeg.
Permute 2 is a very neat and simple app which will get your conversion job done very neatly and systematically. Permute supports image and audio conversion as well in addition to video conversion between multiple formats. Permute’s user interface is the best amongst all the video converters we have seen its only downside is that its not completely free. However, you can download its free trial version – Click here to download Permute 2.0 free trial
App # 5 – iSquint
iSquint
iSquint was the best video converter for mac, until it broke down in keeping up with Mac os new versions. But for older Mac os versions it still remains the best. The UI, Speed and efficiency combination of iSquint is yet unmatched till date! . So, if you’re using an older version of Mac OS (upto 10.7) you can download it. Click here to download iSquint for Mac Os (Upto 10.7)
App # 7 – DamnVid
DamnVid for Mac
DamnVid ceases to impress us, although its our favorite when it comes to windows but its incompatibility with some mac versions pushes it upto No.7 in the list of video converters for mac. There’s no looking for other solutions/app for video conversion even for professional users, if you get DamnVid running. The .dmg for DamnVid may not work on all mac os versions, but you can always use Wine! to run the windows version of DamnVid on your Mac. Click here to download DamnVid for Mac Os.
So these were some of the best free video converter apps for Mac OS. If you know of any other app or face any problems in any of these feel free to comment .
There are very few or limited options when it comes to transferring data from Android devices to iPhone/iPad , most take the route of using WhatsApp/Dropbox to transfer data from Android to iPhone . Not only it consumes data but is also less speedy, and results in compression/loss of data(as in case of WhatsApp) . Xender for iOS / Android is an awesome app which will solve all your worries! It transfers data from Android to iPhone/iPad using Wi-Fi network but without consuming data!. All you require is to have both the devices connected in a group (i.e have the same Wi-Fi connection) , In-this tutorial We will see transferring data/files/music from Android to iPhone , and transferring data/music from iPhone to android too.
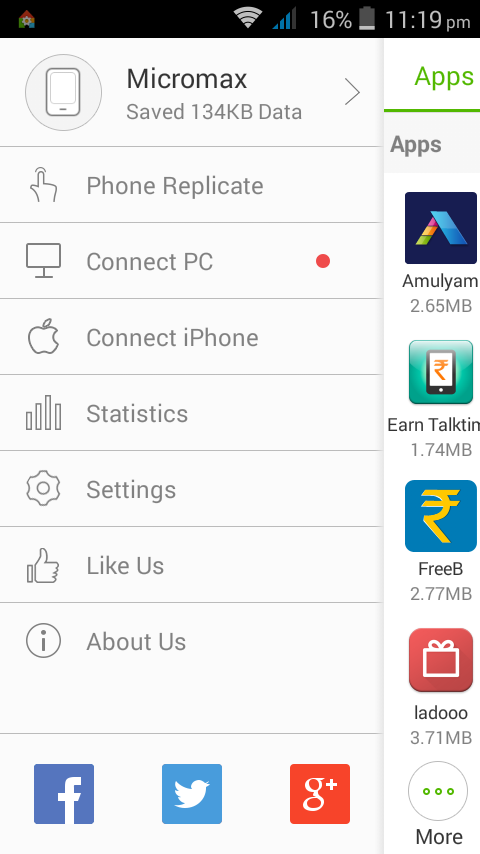
Now , we need to create a group in order to transfer between iPhone and Android so as we can start the transfer, Open the Xender app on Android and select or tap on “more” option. (Its located on the bottom left hand side as shown in alongside image).
After tapping on more select the “Connect iPhone” option from the menu .
Now , On your iPhone/iPad , Navigate to Settings – > WLAN and connect to the WiFi network starting with “ADY etc….”.
Once your iPhone or iOS device gets connected, Open Xender app on your iPhone/iPad and click on the “Connect Phone” Option.
That’s it! now just select the data which you want to send , on either of the device Android or on the iPhone, and tap on “Send” . (Check the second image for details)
Woah! your music/data will be transferred within seconds! and this is perhaps the only way you can transfer songs/music from Music library of iPhone to Android!
Here’s another image which will explain the procedure in a simple way . If you have any doubts/encounter any problems feel free to comment ,and ya Xender app is Free for iOS as well as Android .
Transferring music from iPhone to iPhone was next to impossible without using a Computer/Mac or an internet connection, but not anymore! Now you can transfer not only data but also music,photos,videos from one iPhone/iPad/iPod to another iPhone/iPad without using a computer directly through Wi-Fi by Xender app for iOS/iPhone/iPad. Xender App for iOS enables wireless data/music transfer by Wi-Fi from iPhone to iPad/iPhone and vice versa. (No Jailbreak required).
Now we have to connect both the devices over Wi-Fi there are two ways to do so – Way # 1 – If both the devices are connected on the same Wi-Fi.
Way # 2 – Using one device to connect portable hotspot and connecting the second device to the hotspot.
Let’s check out the method Way # 1
Way # 1 – Both devices connected to same WiFi
Step – 1 for Way # 1 both devices on Same Wi-Fi
Open settings – > WLAN connect to the same network as that of your friend, now open the Xender app on both of the devices parent device (sender) as well as child device (receiver).
Now in Xender app, Click on “Connect Friends“.
Now Select/Click on any photo/image/music which you want to send and click on “send” .
You can even use the “Multi-Select” option to select multiple files for sending!.
You can even create a group of 5 devices on the Same Wi-Fi to share same data on multiple devices! simultaneously with blazing speeds!
Way # 2 Using one device as portable hotspo
Way # 2 – Step 1 Creating a hotspot and letting your friend connect
t and connecting second device to it.
Go to settings > Cellular and turn on “Cellular Data” (Don’t worry no data will be consumed for transfer – We’re enabling it only for making visible the “Personal Hotspot” option.
Now turn on Personal Hotspot in settings.
Let your friend connect to the hotspot you created.
Open Zender App on both the devices and click on “Connect Friends“.
Now Select/Click on any photo/image/music which you want to send and click on “send” .
You can even use the “Multi-Select” option to select multiple files for sending!.
That’s it – The most simple way to transfer data between iPhone/iPad to iPhone/iPad 2/iPod touch . You can even use the replicate phone option to transfer/clone complete phone data.