Category: iOS (iPhone + iPad) tutorials

  • Best Spiritual advice apps for iTunes- iPhone & iPad

    Best Spiritual advice apps for iTunes- iPhone & iPad

    It doesn’t matters if you are a teenager or you are an old person in some point of your life you always need expert advice in your life. A small advice can play a vital role in your life and can help you in taking the life-changing decision in your life. You can get such advice from anywhere like from your friends, parents, etc., but sometimes you need advice from a person who is much experienced, who can help advice you some better ways to tackle the situations.

    There are many types of experts, or we can say psychic advisers like tarot card and palm readers, love psychics, clairvoyant, mediums, fortune telling, dream analysis, astrology, etc. And there are various types of apps through which you can contact all these expert directly from your device only, and in this post, we are going to share a list of Best Spiritual advice apps for iTunes- iPhone & iPad.

    Top Spiritual Advice Apps Available, for Your iOS-Based Device

    Here is a list of some highly rated and downloaded spiritual advice apps in iTunes. (Please make a note that we have reviewed all the below app randomly all these apps are good and can be try.)

    1) Best Psychics – Ask Them Now

    leaf

    It is one of the best psychics advice apps you could find on iTunes. It consists of some worldwide highly rated experts who are available 24 hours to serve their clients. It includes some of the famous love psychics, mediums, Tarot pros, astrology and Vedic astrology experts. Here are some highlights of it have a look.

    1. Only screened and highly rated experts are there to serve their clients.
    2. There are various ways through which customers can interact with experts like live interaction, chatting, phone calls and emails.
    3. All the experts available give nonunbiased helpful advice to their clients so that their clients get maximum benefits from it.
    4. Full confidentiality is provided to users.

    You can go with Best Psychics and can get first 3 minutes of advice free ( for every new psychics expert of a category. Use it and make your love or professional life better.

    2) Free Psychic Reading Prediction

    eyeIt is also one of the best available spiritual advice platforms available, through it you can get some very helpful advice regarding your love life, marriage, etc. You could also get some useful advice for the various important decision of your life. There are different types of experts available who give psychic advice through various ways like Tarot readings, Numerology Readings, Chinese Astrology Readings, etc. and like above app this app also provides first 3 minutes free. Now let us highlight some of its key points.

    1. Huge customer base more than 3 million is one the biggest plus point of it.
    2. Free Psychic Reading Prediction app comes with a good review system, users can easily review any expert and can also check other users reviews very easily, they can also comment on experts bio and their reviews.
    3. Most of the Psychics experts are available 24 X 7.
    4. It pays full focus on customer data security and confidentiality.

    3) Love Psychic Reading

    thirdAs you can get an idea from the name it’s self it is a Love Psychic Reading app which can help you in making better decision in love life whether you are going through a roller coaster of your love life their experts are always there for you. Now let us have a quick view on some its features.

    1. Highly experienced psychic experts are available which can share their experience and thoughts over various love life and marriage life problems. In fact, these experts can help in finding the perfect soul mate.
    2. Some of the experts can act as a medium and can provide a boost to your love life by contacting to your partner.
    3. It also has 3 million plus customer base with 95% satisfaction rate which is quite high.

    4) Psychic Chat Reading

    reading

    Sometimes chatting with the right person can help you in getting better tomorrow and a small advice can assist in getting better future, and Psychic Chat Reading app can help you in making the right decision of your life. Let have a look at some of its features.

    1. User-friendly experts are available to provide 24 hours service to their clients.
    2. There numerous types of specialties available and users can easily choose experts from these specialties.
    3. For each expert, a detailed profile has been provided which helps the users to select the expert according.
    4. Huge customer base ( more than 3 million) clears all doubts about the quality of service.
    5. It also provides first 3 minutes free for every new psychic.

    5) Psychic Mediums

    read

    This is one of the best organized and user-friendly Psychics apps you could find in iTunes, and it comes with various benefits and let us explain each one of them in details in below part.

    1. First 3 minutes for a new psychic is free which can help you in getting best psychic for yourself. Try psychics until you get the best match for yourself.
    2. Proper sorting of experts has been done in it, sorting is done on the base of reviews, price, etc. These types of sorting are very useful in getting right expert.
    3. Unlike other platforms Psychic Mediums have great experts base, you could easily find an expert of your country to which you can connect quickly.

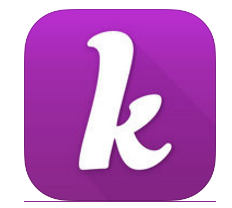
    6) Kasamba – Live Psychic and Tarot Readings

    kasambaIt is one of the most commonly used Psychic reading apps of the iTunes, and we have also reviewed it in our older post too. Kasamba is one the best platform to connect with some tarot card readers, palm readers, love psychics, mediums, fortune telling, astrology, dream analysis experts, clairvoyant, etc. It comes with good users interface and also give first three minutes free for each new expert and now let us highlight some of its key features.

    1. World best Psychic, Palm readers, Tarot Readers, etc. are available for 24 hours to serve their clients.
    2. Huge client based with maximum number of satisfaction rate makes this app more favorable.
    3. It is one of the oldest online Psychic medium (more than 16 years) available on the net.
  • Two apps from Gismart make into the final of Appy Awards in music category

    Two apps from Gismart make into the final of Appy Awards in music category

    Getting into the final of Appy Award, a prestigious annual competition for mobile apps, is good enough. Gismart, a music app developer based in London, managed to appear in the list of finalists twice with their Piano and Beat Maker Go! apps. Both mobile apps made into Top 3 in Music category and will compete for Best Music App title with GHQ app made by Futuri Media.

    awards

    Gismart was founded in London as music app maker. With over 160 million downloads and 11 million MAU, Gismart continues to work on developing new music games and gamifying social music-making apps where music lovers across the world can connect, collaborate and enjoy playing music together.

    Believing that anyone has a creative gene, Gismart aims to give people an opportunity to express themselves through music creation on mobile devices. Both Appy Awards finalists from Gismart prove that creating music is fun. Piano by Gismart allows music lovers to learn piano basics and play favorite songs without having any musical skills. The app has three play options: realistic piano simulator, Magic Keys game and Magic Tiles game. The gaming aspect makes learning something new not so intimidating. To mix things up, musicians can make the piano sound like an electric guitar or organ, among others. Piano by Gismart was named the 4th most downloaded game title in the world in February 2017, outrunning Pokemon Go! and Candy Crash Saga.

    pianoAnother Appy Awards’ finalist from Gismart is Beat Maker Go!. The app let’s electronic dance music lovers and wannabe DJs create their own beats. The developer partners with DJs and sound producers globally to add unique content in various genres like trap, dubstep, drum-and-bass, hip hop and more. The app has 32 pads to perform on and each sound pack has predefined loops and a built-in metronome to help users stay on pace with the rhythm. Users can record and share tracks and save money by working their own house party.

    itunesAppy Awards Final will take place on May 17, 2017 in NYC. Some of the previous winners of Appy Award included Spotify and Shazam in Best Music App, Angry Birds in Best Game App, Facebook and YouTube in Best Time Waster. Good luck to all 2017 finalists!

  • Audials Radio iOS App Review| One Stop for your Entertainment

    Audials Radio iOS App Review| One Stop for your Entertainment

    If you are a music freak, then keep on reading this post and if not then also keep on reading this post as in this post we are going to tell about very interesting music app called Audials Radio. Audials Radio is online radio app which covers thousands of radios (more than 80k) stations of different genres ( more than 120 ) from all over the world, and beside radio stations, Audials Radio also maintains the huge database of various collections of videos and podcasts. If we talk about the availability Audials Radio is available for almost all type of devices it is available for Windows PC and Android and iOS based smartphones and tablet. Now let us explore more about it in below part of the post.

    Exploring Audials Radio App

    audials

    As mentioned above Auidals Radios is a free online radio app which allows its users to access thousands of stations of hundreds of genres. Now let us explore some features of it in details in below part of the post.

    1) Your Choice: Audials Radio focuses on its users requirements and allows them to search for a radio station but entering a name of the station, artist name, language, country, etc. Or users can also search for the top list of radio stations. It also shows location based local radio stations for more convenience of its users.

    2) Your Convenience: Beside search option, Audial Radios comes up with several others features like:

    1. It makes its users see songs lists, artist, albums network information, etc. before listening so that they can choose radio station accordingly.
    2. It makes its users record any song so that they can enjoy it later.
    3. It also shows location based local radio stations for more convenience of its users.
    4. For more users convenience it also comes with car mode which makes it very easy to use while driving a car.
    5. Its tracks down users listening habits and suggests stations accorindigly.

    3) More Personalization: You can personalize your Audials app according to yourself like you can mark your favorite radio stations and can organize them in a proper manner so that you can access them later in one go. You can also pin your favorite genres, artists, or countries to your home screen.

    4) Videos and Podcasts: More than 120k Videos and Podcasts are there covering almost all types of genres like News, previews for video games, comedy, science, movies, sports, language, etc.

    Quick View to the Interface

    In this part of the post, we are going to give a quick view to the interface of the Auidals Radio app for the iOS device.

    1) Opening the app for the very first time, you will get the following screen have a look at it.

    opening the app2) Now you can search for your favorite country or artist or anything. Below we searched for the USA and after that, we have selected our favorite music radio station.

    radio stations3) You can also mark any station as your favorite and can also pin that station.

    PIN stations4) Here is a snap of Podcasts screen have a look. As you all can see you can search for your favorite videos or podcasts. And it covers almost all types of genres.

    business

    Final Thoughts

    Before ending up the post, we are going to share our thoughts on this music app. Read the following points carefully and take action accordingly.

    Pros

    1) The app is free with no annoying ads. This is probably the best point associated with it, as most of the apps of same types are either very expensive or contain hundreds of annoying ads.

    2) The availability of Audials Radio app is also are very big plus point as it is available for almost all types of devices.

    3) The interface of the app is super responsive, and yes it is very attractive also. Both light and black themes are very attractive.

    4) Super responsive customer support is also plus point with it, and Audials Radio team brings updates very frequently, which is also very good.

    Cons

    Sorry, we didn’t find any drawback while using it, everything is just perfect the sound quality of stations played were awesome, video quality was also very good, and we also didn’t notice any streaming issue. If you noticed any drawback while using it, please let us know.

  • Tenorshare iCareFone Review – A Handy tool to fix iOS Stuck Problems & Free Up Space on iPhone

    Many times, iPhones simply get stuck on the Apple Logo and refuse to budge further. Also, the storage issues prevailing in iPhone due to lack of external memory support is a big issue. An iPhone which once affected by any of these problems requires some efforts to restore back to its normal state. In this article, we will be reviewing Tenorshare iCareFone which will automatically solve the above iOS issues by a simple 1-click process.

    Before we move on to the Review let’s look onto the salient features of iCareFone –

    1. Transfer Music, Videos, Apps without iTunes Restriction-Free.  
    2. Say Good Bye to a Slower, Laden, Sluggish and Vulnerable iPhone right away.
    3. Fix Various iOS Stuck related to iOS upgrade, overheat and more.
    4. An ultimate solution to repair iOS system.
    5. Block Ads on iPhone, iPad, and iPod.
    6. Backup and Restore iOS data.

    Tenorshare iCareFone Review & Tutorial – 

    After you have downloaded iCareFone by visiting Tenorshare official website. Connect your iPhone via USB Cable and then launch, the iCareFone app . You will be presented with the Features screen as shown in the image below –

    Tenorshare iCareFone
    Tenorshare iCareFone

    Here all the features are self-explanatory and easy to use. Just click on any button to start with any feature.

    (Note – iCareFone requires iTunes to be installed on your system)

    In, our review we will be covering using iCareFone to free up storage space on your iPhone which will clean iPhone Space.

    • After you have connected your iPhone , click on the “Speedup & Clean” tab as highlighted by the black box in the features image shown above.
    • Now, the app will ask you permissions to Scan your iPhone in order to determine the storage which can be freed up , Here click on the “Quick Scan” button as shown in the image below –
      Tenorshare iCareFone Quick Scan
      Tenorshare iCareFone Quick Scan

      Once you click on “Quick Scan” it will start scanning your phone for apps and data which can be freed up.

    • After the scan is finished, you will be presented a screen along with the cleaning actions which can be performed on your iPhone as shown below – 
    • Here simply tap on “Clean” button next to the cleaning type you intend to perform. Junk files & Temporary files can be easily cleaned without harming the system.
    • Another unique feature we found was the Photos clean-up, it cleans up & free up storage on your iPhone without even deleting the Photos. It does so by compressing the photos without reducing the quality!. Thus, you can free up as much as 80% of storage space taken up by Photos as shown  –
      Photo Compress iCareFone
      Photo Compress iCareFone

      We were able to free up full 112 MB without even cleaning up photos, just by cleaning up junk files which can be seen from the below screenshot –

      Clean Storage iCareFone
      Clean Storage iCareFone

      That’s a lot of space to capture more memories, or get more apps or even few small games!

    Besides, these you can use Tenorshare iCareFone for Backup of WhatsApp Chats / App Documents, & even restoring backup – 

    ICareFone Backup
    ICareFone Backup

    This feature isn’t available even in the iTunes official backup and we found it pretty useful, as it will allow us to restore our important attachments even if we accidentally had our iPhone factory reset.

    Tenorshare also helps you recover your Stuck iPhone on Apple logo, by recovering into DFU mode or recovery mode. Thus, you need not need to worry about your iPhone problems again as iCareFone will take care of your iPhone right from avoiding the problems by optimizing the phone for storage and clean up, and right to solving stuck ios issues by entering into recovery mode.

  • How to use Jio 4G Voice App to make VoLTE Calls on iPhone 5s & 5C / iPhone 5 & 4

    How to use Jio 4G Voice App to make VoLTE Calls on iPhone 5s & 5C / iPhone 5 & 4

    Reliance Jio has one of the best mobile data plans in the Indian Telecom market, but it has one drawback – Reliance Jio is a 4G only network and hence requires VoLTE enabled phones to make calls. Now, since all iPhones are single sim devices and considering iPhone 5S, iPhone 5C, iPhone 5 & 4S do not support VoLTE, Jio cannot be used as the primary network for receiving calls. But not anymore, In this article, we will cover how you can use your Jio 4G Sim to make & receive calls on any iPhone, even iPhone 5S using the Jio 4G Voice app.

    How to Dial & Receive Jio 4G Calls on iPhone 5S, 5C (iPhone 5 & 4S) using Jio 4G Voice App –

    Pre-requisites –

    • Jio Sim.
    • JioFi Wireless Router for (only if you’re an iPhone 4S user this is required) else you can directly insert your Jio sim in your iPhone.
    • In case, if you’re using your iPhone 6, 6S, 7, 7S with any other sim and you wish to make calls using Jiofi then also this process will work. Just start from the Step No.2 in below tutorial.
    • Jio4G Voice App – We will be using the Jio4Gvoice app to make & receive calls, the app functions like your normal phone dialer –
      Click here to Download Jio 4G Voice app for iOS (iPhone) from iTunes App Store


    Step – 1  Configuring your Device on the Jio Network (Only for iPhone 5S / 5 / 5C users)

    In this step, we will enable LTE Network for the Jio network, from our phone settings. No need of doing this step, if you’re trying to make or receive calls via JioFi.

    • First, of all insert your Jio sim into your iPhone.
    • Now navigate to Settings – > Mobile Data. Now select the option “Mobile Data Options” as shown in the image below –
      Mobile Data Options Jio iPhone
      Mobile Data Options Jio iPhone

      After you select the “Mobile Data Options”, in the next screen – Tap on “Voice” and select the “LTE” option as shown below –

      Select the LTE Option
      Select the LTE Option

      That’s it! , Now simply restart your iPhone. You will be on the Jio Network.


    Step – 2   Connecting to the Jio Data Network (JioFi + iPhone common step)

    • Now, simply turn on the Mobile Data of your Jio Sim, or if you’re using Jio Hotspot (Jiofi) device connect to Jiofi wifi network.
    • Once, you’re on Jio Internet (via Sim or Jiofi), simply launch the Jio 4G Voice app which we have downloaded from the app store.
    • Click here to Download Jio 4G Voice app for iOS (iPhone) from iTunes App Store
    • It will now, start registering your Jio sim, as shown in the following image –
      Jio4GVoice Registration on iPhone
      Jio4GVoice Registration on iPhone

      It will take some time to register with the Jio Sim, once it is registered automatically it will now take you to the dialer screen as shown in the below image –

      Jio 4G Voice Dialer iPhone
      Jio 4G Voice Dialer iPhone

      Now, on the dialer screen simply dial the number which you want to dial or leave the app as it is (for receiving calls). When you dial a number or select one from contacts, simply click on the “green call button” and your call will be connected as shown –

      Jio Voice Call VoLTE on iPhone 5S using Jio 4G Voice APP
      Jio Voice Call VoLTE on iPhone 5S using Jio 4G Voice APP

      Thus, you can now enjoy any Jio voice calls or even SMS services from Jio on any iPhone via the Jio 4G Voice app.

    Note – Please, make sure you do not close the Jio 4G Voice app else you won’t be able to receive calls on the iPhone 5S and if you are using JioFi M2 device.

  • How to Turn On Blue Light Reduction on iPhone & iPad for reducing eye Strain

    How to Turn On Blue Light Reduction on iPhone & iPad for reducing eye Strain

    Blue Light Reduction is one of the unique features of the latest iOS 9.3 Night Shift component. The Blue Light Reduction mode filters out blue light which makes it easier to use your iPod , iPhone & iPad at night or bed-time. Thus, making it soothing for your eyes to use your iOS device at night. Here’s a simple tutorial which will help you to turn on Blue Light Reduction mode on iPhone & iPad devices –

    Note-  iOS 9.3 Update is only for 64-bit devices, and hence you will be able to activate & use Night Shift only on iPhone 5S, iPhone 6 Plus, and iPhone 6S Plus, iPhone 7, 8 and iPhone X series.

    Method to turn on & activate Blue Light Reduction on iPod touch, iPhone & iPad

    • Make sure your device is updated and you are on the iOS 9.3 and later version.
    • Now navigate to “Settings”.
    • Inside “Settings” option, tap & navigate to the “Display & Brightness” option as shown in the image below.
    Display & Brightness iOS 9.3 iPhone
    Display & Brightness iPhone
    • Now under the brightness bar you will notice a “Blue Light Reduction” toggle it to turn it “on” as shown in the image below – .
    • Blue Light Reduction iPhone
      Blue Light Reduction iPhone

      Now, once you have toggled it on , you will notice that a bar appears with the ends “cooler” to “warmer”.

    • Cooler colors are recommended to be used during day-time, and during bedtime using “warm colors” are real eye-savers!. Slide on the bar towards “warmer” side during night time.
    • That’s it,  you have successfully activated Night Shift’s Blue Light Reduction mode on your device.
    • Besides, this you can even “Schedule” the Blue Light Reduction according to your convenient timings as well –
      Schedule Blue Light Mode on iPhone
      Schedule Blue Light Mode on iPhone

      Note –  If the  you cannot see the “From Sunset to Sunrise” option under schedule types, please enable automatic time zone under your privacy settings to get it working and enabled.

    Also, if you want to use a Dark Black theme on your iPhone or iPad, we have a tutorial for the same as well . Check on How to enable Dark theme mode on iPhone & iPad

    For Android phone users –  Click here for tutorial to Enable / Activate Blue Light Reduction Mode on Android

  • 3 Apps to use AirPlay on Mac & use Mac as Apple TV Display Receiver

    3 Apps to use AirPlay on Mac & use Mac as Apple TV Display Receiver

    Mac OS X has inbuilt AirPlay transmitter/sender hence you can easily stream or Cast your Mac content to an Apple TV. But We might want to use our Mac OS X device as Apple TV in order to display content from iPhone / iPad. In such cases we need to use our Macbook as an AirPlay receiver display. So, here are the 3 Best Apps to turn your Mac into an AirPlay display reception unit –

    3 Apps to use AirPlay on Mac as Receiver Display –

    App # 1 – Lonely Screen 

    Lonely Screen Receiver
    Lonely Screen

    Lonely Screen is one of the most sleek yet efficient AirPlay receiver for Mac OS X. It turns your Mac OS X into an Apple TV Receiver which is AirPlay compatible, so that you can easily stream your Audio, or Mirror your iOS iPhone or iPad screen.

    • Lonely Screen even supports iOS 9.1, 9.2 updates and is Apple TV 2/3/4 compatible AirPlay receiver.
    • You can easily stream using AirPlay and use your Mac as Apple TV.

    The method to stream to LonelyScreen is quite simple –

    • Mirroring AirPlay iOS 9 to Mac
      Mirroring AirPlay iOS 9 to Mac

      Download & Install the LonelyScreen app for Mac from the link below –
      Click here to Download Lonely Screen for Mac OS X 10.7 & later.

    • Launch the LonelyScreen app on Mac. It will now setup its server.
    • Now make sure that your Mac OS X Receiver and iOS device or AirPlay are on the same WiFi.
    • Now on your AirPlay sender tap the AirPlay icon and in the list of available devices select “LonelyScreen” option as shown in the alongside image.
    • That’s it your iOS device will now be mirrored on your Mac device.


    App # 2 – 5kPlayer

    5kPlayer

    5kPlayer is a multi-function media player which can even be used as an AirPlay receiver. Though 5kPlayer has inbuilt media player, its on second position in our list as its AirPlay compatible only upto iOS 8.3 , 8.4 . Hence, 5kPlayer won’t be able to receive AirPlay casts from iOS 9 and later.

    The Method to use 5kPlayer as AirPlay receiver is same as that of Lonely Screen, and it can be downloaded from the link below –
    Click here to Download 5kPlayer for Mac OS X.


    App # 3 – Mirroring 360 (7 Day Free Trial)

    Mirroring 360 comes from Splashtop which is well known for producing quality applications. Mirroring 360 also is a quality product. Unlike 5kPlayer Mirroring 360 is AirPlay compatible with iOS 9 and later, so that you can even use your latest iPhone 6S , iPhone 6 for mirroring. The only downside of Mirroring 360 is that its a Paid app and hence you will need to pay for it after 7 days to continue using it.

    Click here to Visit the Mirroring 360 Website.

    So, these are the 3 Best AirPlay receivers for Mac OS, which will turn your Mac into an Wireless Apple TV. If you know of any other such good app, feel free to comment.

  • How to Capture 3D Photos on iPhone & iPad by Fyuse App!

    How to Capture 3D Photos on iPhone & iPad by Fyuse App!

    Now you can capture Spatial 3D Photos right on your iDevices – iPhone & iPad. Spatial 3D photos aren’t those normal 3D photos which require 3D goggles to view them, but instead are VR Photos which depect details as you tilt your devices, and show the focussed object in great detail & views. So, here’s how you can Capture Spatial 3D photos on your iPhone & iPad using Fyuse App.

    Method to Capture Spatial 3D Photos using Fyuse App –

    • Fyuse App

      First of all Download & Install Fyuse 3D Photos app from the link below –
      Click here to Download Fyuse App from iTunes App Store.

    • Now, Open the Fyuse App.
    • Once , you have opened the Fyuse App it will show you a “Press & Hold” screen as shown in the alongside image.
    • Let the object / Person whose Spatial photo you intend to capture be Stationary at a fixed position. You can even take a 3D Moving Selfie using your Front camera in Fyuse.
    • Now, “Press & Hold” the Red button and revolve your phone around the object whose spatial view you intend to capture. Make an arc around the object while pressing the button as shown below –
      Move your Phone in an Arc

      Release the Button when you have finished capturing.

    • Once you release the button, The app will now show you a preview of your created Fyuse – Spatial 3D Photo.
    • Now, tilt your 3D Spatial photo to watch it in real-time Virtual Reality on your Screen, tilt your phone to different angles to view more detail.
    • That’s it! You have successfully captured your Spatial 3D Photo ! . You can now share your Fyuse onto the Fyuse Social network so as to let the Whole World! know about your creativity :).

    Note – The Fyused 3D Photos require Fyuse app to view them and hence they won’t be visible to non-Fyuse users.

  • How to Enable or Disable Low Power Mode in iPhone & iPad iOS9

    How to Enable or Disable Low Power Mode in iPhone & iPad iOS9

    With the iOS 9 update, Apple introduced a unique Low Power Mode. The Low Power mode helps in increasing battery life by turning off some visual effects, background mail fetch & automatic downloads. Thus, helping to get more juice out of your iPhone & iPad battery. Though, this mode is automatically notified to user once the battery level reaches below 20% but you can use it manually too. Here’s how you can Enable or Disable Low Power Mode on your iPhone or iPad (iOS 9)

    Tutorial to Activate or Deactivate Low Power Mode in iPhone & iPad –

    • Navigate to “Settings” from your App Drawer.
    • Now Scroll down in Settings until you find the “Battery” option as shown below –
      Battery Option under Settings


    • Tap and Open the Battery Settings.
    • Inside Battery Settings, you will find a toggle at the Top right hand side as shown below –
      Low Power Mode Toggle


    • Here, Slide the toggle right to Enable Low Power Mode manually.
    • Or you can Slide the toggle left to Disable Low Power Mode.
    • Please note that this low power option is available only on iOS version 9 & later. (iOS 9.1 supported)
    • If in case you forgot to disable low power mode, there’s nothing to worry as your iPhone & iPad will automatically disable the Low Power Mode on the device, once you have charged your iDevice to more than 80% battery.
    • If incase you intend to Use Low Power Mode even if your battery percentage is greater than 20 percent you can still do it so by performing the above mentioned steps in our article.
    • Thus, you can now enjoy your iDevice without the fear of dropping battery levels.