Category: Android Tips N Tricks

  • 7 Ways to Free up Internal Phone Memory & Storage if full on Android, iPhone & Lumia

    7 Ways to Free up Internal Phone Memory & Storage if full on Android, iPhone & Lumia

    All the latest flagship devices be it iPhone, iPad or Android devices like Samsung Galaxy S6 etc, now come without external memory expansion (micro sd) slot, hence it becomes necessary to manage the internal phone memory. Also you may need to free-up phone memory if phone says Insufficient space available or for doing some work or for saving data. So, here are 7 Best tips to free up internal phone memory on your Android devices & iPhone , iPad and even iPod . These tips are an easy solution/method to free up phone memory if full on Windows Phone (Lumia) devices too!

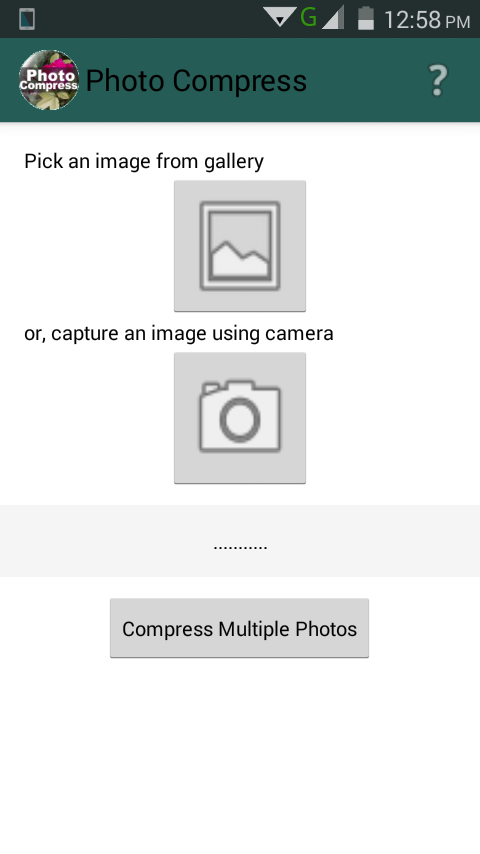
    No.1 – Compress Photos

    The recent advancements in the phone camera quality is not increasing the image quality, but also the image size , and hence now images too are a component which need to be considered for freeing up phone memory . One of the ways is to compress or optimize them by reducing the photo size simultaneously while maintaining the quality intact. This can be done on Android as well as iOS devices especially if iPhone/iPad’s internal memory is is full.
    Click here to open article to reduce size of image(compress photos) on Android devices.
    Click here to open article to reduce size of image(compress photos) on iPhone / iPad / iPod.


    No.2 Uploading Photos & documents to cloud

    With the increasing internet speeds and cloud support integrated by default into apps like Microsoft Office for mobiles, it really makes sense to upload your documents to the cloud, as not only it gives enhanced security if your phone is lost or stolen but it also helps to free up internal phone storage. Same is the case with the photos, uploading them to cloud with services like Google+ photos makes it easier to access and also gives a reliable back-up unlike storage(where the photos are lost if the memory becomes corrupt).


    No.3 Clearing app cache & Junk files –

    Mobile apps be it android or iOS automatically download some cache files and store them in memory as required, but many apps forget to delete those files once they aren’t required by the app. Hence they keep on accumulating in the phone storage and this residual data also fills up the memory. This is the reason why many users keep facing phone memory low despite uninstalling many apps from their devices.
    You can use the following tutorials , to get rid of such residual files and free up phone storage even more –
    Click here on tutorial to clear internal app cache & delete junk files on Android.
    Click here for tutorial to clear internal app cache & delete junk files on iOS devices (iPod / iPhone & iPad).


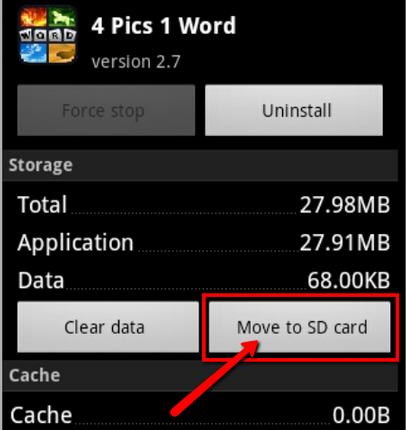
    No.4 Uninstall apps or Move App data to SD Card

    Moving apps to SD card

    This is one of the most simplest thing we can do to free-up phone memory!. You can uninstall the app’s you don’t use much, or move the apps to SD card, if your phone supports transferring apps to SD card to further free up space on your phone.

    Besides, this Factory apps cannot be uninstalled but you can always uninstall their updates in Android which can free up even upto 30mb storage per app e.g Uninstalling Chrome Updates as shown in figure below –

    Uninstall Updates


    No.5 Compressing Videos –

    Like photos, videos too take up a large space on your internal phone storage, hence you can also compress them like images to free up  even more space on your phone’s internal memory.

    Click here for Tutorial on How to Compress Videos on Android.


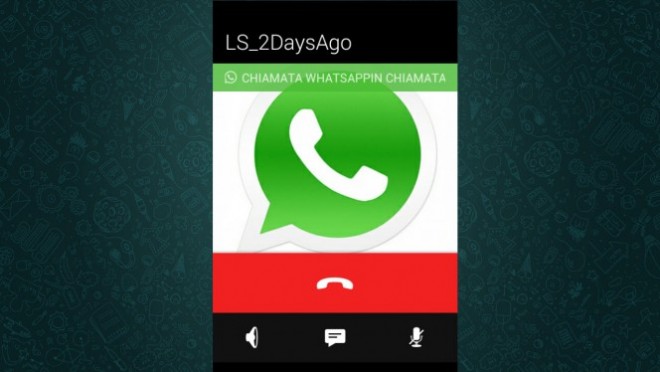
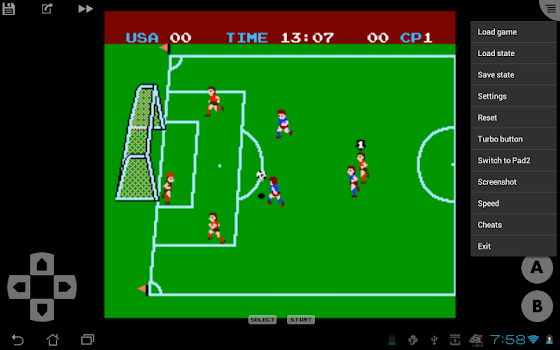
    No.6 Deleting WhatsApp media & other app media using File-explorers –

    Whatsapp media folder delete Android

    Whatsapp is one of the most widely used app on all handheld devices, but using Whatsapp even fills up your internal phone memory as the Whatsapp media (images, videos) are kept intact as it is in Phone memory even after viewing. Thus, we need to manually delete the components of Whatsapp media folder or Whatsapp documents folder in case of iPhones and other iOS devices.

    You can use any Android file explorer apps like X-Plore , ES file managers to delete the Whatsapp media folder as shown in image alongside. But for iPhone, iPad and other iOS devices you need to use any of these 5 iPhone file explorers for PC / Mac to delete the folder (as iOS file managers have very restricted privileges due to iOS app restrictions).


    No.7 Hardreset / Factory Restore the device

    This is the last option which remains to free up phone memory and make it usable . Though this will erase all your personal data and apps, but atleast restoring the phone to factory settings will make the phone more usable!


    So, these are some of the best ways to free up/empty the internal phone memory/storage if its full or nearly full and make the phone likeable and usable as before!. If you know of any other good tip or have a recommendation feel free to comment :).

  • 3 Best apps to Lower/Dim Screen brightness more on Android|Reduce screen brightness even less than minimum [Remove sharper colors for night reading]

    3 Best apps to Lower/Dim Screen brightness more on Android|Reduce screen brightness even less than minimum [Remove sharper colors for night reading]

    Many times, the last thing we see before sleeping or during sleep break is our mobile or cellphone. Some of us also have the habit of browsing on our mobile phones before we sleep, But the blue color light emitted by our cellphones adversely affects our eyes and even the sleeping patterns  . Symptoms such as extreme contracting of pupils on seeing mobile during sleep breaks, minor irration of eyes while using cellphone during night, or simply the inability of eyes to sleep (closing the internal light retina) after using cellphones are all but effects of the emitted light by the mobile displays. A great solution over the problem is to dim & reduce the screen brightness even less than minimum, and by changing the color bandwidth -Here are 3 Best Free apps which will allow you to lower/dim screen brightness even more on Android and make the phone or Android tab ideal for night use and reading –

    App # 1 – Twilight app for Android

    Twilight Paused (Not running)
    • Not to be mislead by the name, Twilight is really a great app to reduce the color temperature , and lower the light intensity emitted by Phone’s display.
    • Twilight also has options to dim the screen by even reducing the phone’s brightness even less than minimum by using “Screen dim” option.
    • Twilight tops our list just because you can customize the display behavior and color temperature using the filters or on movements of Sun (depending upon the phone’s time) . For e.g the general display of our phone’s are built using cool colors recommended during day time , and the same hamper our eyes during night, and hence we need to increase the color temperature for night use.
    • Twilight makes this easy by assigning auto-color-correction to display based upon Alarms, and Sun position! Thus, tweaking the display color according to the time to protect your eyes and enhance the phone’s readability and usage.
    • To Use Twilight simply tap on the “Play” button , or on the “preview” icon  to see the changes yourselves.
    • Click here to download Twilight app from Google Play Store.
    • I would highly recommend you to compare the previous twilight image alongside with the one below to yourself during nighttime to observe the effect colors have on our eyes –
      Twilight Running (Active)

      You’ll definitely find the Twilight Running(Active) image more comfortable than the Twilight Paused(Not running) image, so will your eyes! they too will prefer the one with twilight active one at night.


    App # 2 – Bluelight filter for Android

    Bluelight Filter for Android
    • Bluelight filter can be classified as a worthy alternative to Twilight app for Android, its second in our list just because it doesn’t provide auto-light and color adjustment like Twilight, rest its completely functional and recommended for use.
    • As discussed above, our Cell displays are made with cool colors (which are recommended for day usage) and blue being a cool color is needed to be filtered for night usage, which is what this app does.
    • Bluelight filter app for android filters the blue color so that the phone/tab’s display doesn’t irrate your eyes during night usage .
    • Also bluelight filter has the “Opacity” filter by which you can further reduce the brightness of your device to even more lower levels, soothing your eyes and saving them further more!.
    • Using Bluelight filter is very easy – simply download,install and open the app , And then use the “toggle”/radio button to turn on/off the app.
    • Click here to download Bluelight filter for Android.


    App # 3 –  Night Mode app

    • The above mentioned apps enabled us to change the color as well as the brightness of our screens for night usage, but it may be required that a user only needs to reduce the brightness and not change the screen color for doing some color sensitive work.
    • In such cases we need only an app which can reduce the brightness even more without changing the color, here the Night Mode app comes to rescue.
    • Using Night Mode app, you can reduce the brightness to even less than minimum brightness present in settings option of your phone! and its pretty much easier too .
    • For using Night Mode app, after opening simply adjust the “brightness level” and tap on “Start” , and then to stop the app simply tap on “Stop”. 
    • Click here to download the Night Mode app for Android from Google Play Store.
    • Check out the below images to compare the difference between brightness using the Night Mode app.
      Night Mode app not running
      Night Mode App Running (Active)

      So, these are the 3 Best free apps which we personally tested and found to be the most effective for reducing the screen brightness even more on Android, as well as for filtering the blue color for night usage. If you face any problems while using the above apps, or know of any other good alternatives feel free to comment 🙂


  • How to compress images on Android using Photo Compress app without losing quality (jpg/png)

    How to compress images on Android using Photo Compress app without losing quality (jpg/png)

    The newer crop of Android devices don’t have an external memory card or micro sd card slot, which results in internal phone memory being the only storage solution available for storing data. This internal storage memory also is home to the inbuilt Android OS files and other songs, Whatsapp media, photos & images etc hence preserving the internal phone memory is really important – One way to do the same is by reduce the image/photo size in Android by Compressing the internal photos & images – Here’s one app which will help on How to reduce image size & compress photos without losing quality on Android using Photo Compress App. If you’re an iOS (Apple iPhone) user you can read this linked tutorial.

    Tutorial to compress photos using Photo Compress App

    • First of all download and install the Photo Compress app from below-
      Photo Compress app Android

      Click here to download Photo Compress app from Google Play Store.

    • Once you’ve installed the Photo Compress app, it will ask you to either  “Pick an image from gallery” , “camera” or select “compress multiple photos” (as shown in alongside image – If you’ve selected multiple photos option then select the items/photos or entire album to compress.
    • Once you select the photos / images to compress , it will redirect you to option screen as shown below –

      Options screen Photo Compress app
    • Here select the “Compress Image” option to compress the image, Now the app will ask you to confirm the quality of compressed image as shown below –
      Compression Quality

      You can select “High” as though the quality is large, but the filesize is not large enough so the image is compressed is very much like the original! .

    • Click on “Compress” and that’s it! .
    • Voila! Now, you have successfully compressed the photos & images and saved a large chunk of precious memory on your Android devices. (Do delete the original images from the gallery, so that the space is freed-up and compress images properly replace the originals without duplication!)

    I personally, used this tip to recover a big chunk of precious phone memory by reducing the photo size on my Android devices also its ability to resize images and crop them is a plus. If you face any issues or encounter any problems feel free to comment, also we would like to know of any other such app you use for compressing photos & images on Android .

  • Upload photos to Instagram without cropping on Android/iOS [iPhone+iPad]

    Upload photos to Instagram without cropping on Android/iOS [iPhone+iPad]

    Recently, while uploading a photo to Instagram it prompted to crop the image which was resulting in a person’s face being cropped and other background scenery also being missed out from the photograph, This problem is due to the fact that Instagram requires Square sized image and the photos clicked by our phone camera’s are rectangular sized . Now I wasn’t interested in posting the square-cropped photos to Instagram, and hence was looking out for solutions on how to upload photos to instagram without cropping on android / ios . So , here it is – InstaSquare app – to upload images to Instagram without cropping  (On android devices / iPhones / iPads).

    Method to upload photo to Instagram without cropping it

    • InstaSquare Gallery icon

      First of all download the Instasquare app from the following links –
      Click here to download Instasquare app for Android from Google Play Store.
      Click here to download Instasquare app for iOS from Apple iTunes Store (iPhone / iPod / iPad).

    • Now, click on the “gallery” icon in the app start-up splashscreen.
    • It will now open the photo gallery, herein browse and then select the photo / image you want to open in Instasquare  -.
    • Now, we need to make the image squarish  by filling up the blank space which remains around the rectangle with some color,  in our case we will select the “blur” option (as this option fills the alongside gaps with the same image blurred, it helps preserve the color tone and hence we use it) , Select the blur option as shown in the image below-
    • Blur option to fill the alongside gaps with blue color

      Now after we click on “blur” it automatically fills the space and renders square image ready for Instagram upload which looks as shown in the below image – (The green arrows highlights the filled up portion, while the blue arrow indicates blur zoom, and the “red” indicates directly export to instagram / gallery option.

    • After filling up the blank space using blur

      Thus, you can now export and save the image to gallery using the “outbox” icon highligted by red arrow, or you can directly share it to instagram!

    • Voila! the image fits perfectly in Instagram as shown below –
    • Photo exported from InstaSquare app to Instagram

      Thus, you’ve successfully uploaded an un-cropped pic to Instagram, I hope this tutorial was simple and easy, If you face any problems while using the above method, or know of any good app – method which does the same feel free to comment.


  • Use GoogleWebLight.com to speed up website loading time! & reduce data consumption on your mobile (Android/iOS) and PC too!

    Use GoogleWebLight.com to speed up website loading time! & reduce data consumption on your mobile (Android/iOS) and PC too!

    Many times our cellular data connection’s speed is quite slow be it 2G or 3G , which hampers the loading speed or even simple loading of a website on our mobile devices. Some websites even have some type of ads, which don’t let users view content without clicking on “Skip ad” and some even fail to show the content despite clicking on the ad(e.g mobile.ndtv.com) , or many websites simply put too many images affecting the loading time on our cellphones. All of these combined simply hampers our browsing and reading experience, but not any more – Google light web, or google lite search as its called helps overcome these problems by simply parsing a website’s pages in a mobile-friendly readable format.

    If you’re a webmaster you might have come across traffic from sources such as icl.googleusercontent.com , or googleweblight.com . These are nothing but search traffic with your website optimized for mobile viewing by Google, and you can use the above google URLs to even transcode any other website traffic on your slow/data intensive cellular network to save extra data costs and reduce loading time.

    Method to use GoogleWebLight.com and icl.googleusercontent.com to view optimised websites –

    google light web
    • Simply prepend (write before the actual URL) the following URL strings to load the website in Google optimized mobile format –http://googleweblight.com/?lite_url=http://http://icl.googleusercontent.com/?lite_url=http:// 
    • For e.g if you want to visit our blog techapple.net through the Google mobile transcoder , simply enter –
      http://googleweblight.com/?lite_url=https://techapple.net
      in your browser and voila! it will load techapple.net in mobile optimized format!. (You can check out the alongside image for url prepend format)
    • Similarly you can use it to view other websites too in mobile optimized format , ex
      http://icl.googleusercontent.com/?lite_url=http://www.firstpost.com ,
      http://googleweblight.com/?lite_url=http://mobile.ndtv.com etc.
    • Thus, you can now save on traffic as well as reduce consumption time on any websites you like to visit .
    • You can also use these transcoders on your Desktop / PC as well as if your visited website loading is very slow , and its taking a high time to load.

    Note – If you are an Android user , you can check out the below tutorial to allow internet access only to selected app & restricting other apps background data to access Internet, thus saving your data consumption – Click here for tutorial to allow access to only selected apps on Android using Android Firewall

    Sadly, https requiring websites aren’t fully supported yet by Google transcoder, nor video/active javascript content ones , but nevertheless its a great tool and way to speed-up loading and if all you’re interested in is reading content, the transcoder makes it a pleasure reading the content of websites. Do feel to comment your views and problems faced while using Google Light web (googleweblight.com) transcoding services.

  • Free Instant Rs.250 taxi & cab ride with Uber! First free ride!

    Free Instant Rs.250 taxi & cab ride with Uber! First free ride!

    Uber is the leading cab and taxi provider on the global front, and recently it has began its operations in India too.. Though, Uber might not have started its services in your city, we highly recommend that you grab your first free ride beforehand, as it has just reduced its first free ride benefits from Rs.600 to Rs.250 , and may be the offer can expire before Uber reaches your city 🙁 , so here’s all you need to do to get your first instant Rs.250 free on Uber!.

    Steps to get First Free Rs.250 on Uber!

    Uber Referral Code
    • First of all download the Uber app on your phone from the following links –Click here to download Uber for Android.
      Click here to download Uber for iPhone (iOS)
      Click here to download Uber for Windows Phone (Lumia)
    • Now, once you’ve downloaded Uber, it will ask you to sign-up / register, and link your Paytm wallet.
    • Once you’ve finished signing-up , Open the Uber app and then go to menu by clicking top-left handside corner and tap on “promotions
    • There in enter the promocode – “chaitanyap206ue” and click on “apply” to get instant Free Rs.250 in your Uber account!.
    • Uber may ask you to create a Paytm wallet if in case it doesn’t exist, or may verify it with an OTP, do complete the OTP verification do get extra Rs.50 ,  if you’re a new Paytm wallet user!

    That’s it , Enjoy your Free Rs.250 and grab it as soon as possible before the offer expires!

  • Wondershare Dr.Fone for Android Review – A must have tool for Android Users! [Sponsored review]

    There is a dearth of Android PC suites, or good Android Phone managers when it comes to Mac OS , we too were facing some problems while managing my Android phone on Macbook, until we came across this wonderful tool – Dr.Fone for Android by Wondershare. Wondershare is a well-known brandname, which makes a lot of useful softwares for end users, and Dr.Fone too is very useful, Before we move on to complete review, let us list some salient features of Dr.Fone

    Salient Features of Dr.Fone for Android

    • A complete utility to browse for hidden / unseen photos on your Android . (Many times the photos, and videos on our device don’t get shown in the gallery due to photo hide apps, or due to memory corruption) , Dr.Fone lets you browse all the data in your memory and hence recover them too!
    • Dr.Fone for Android file recovery software is mainly designed to recover files from Android phones and tablets. It is able to recover text messages, photos, contacts, call history, videos, WhatsApp messages, audio files, and more whether you accidently deleted or lost due to OS crash or ROM flashing. Hence, a very useful tool incase if you lose s0ome Data on your phone.

    Click here to download Dr.Fone for Android  (Mac)

    Method to recover your lost Android data using Dr.Fone –

    Enable USB debugging on Android
    • First of all download and install Dr.Fone on your PC /Mac by downloading it from the above links.
    • Now, connect your android phone to PC / Mac, make sure that before connecting the phone, the phone’s battery is atleast 20% charged.
    • Also make sure you’ve enable USB Debugging on your android phone,before you start scanning it, check the alongside screenshot for instructions on how to enable it.
    • Connecting android to Dr.Fone

      Now, once you connect your phone, click on Next.  , Now, it will ask you for what type of data would you like to recover e.g Photos, Text Messages, Whatsapp messages,Whatsapp media etc.

    • Select the ones you want to recover, and click on the “Scan” option.
    • Dr.Fone will now start scanning for the deleted media / and content types of your phone,  and will present you with an option to select which files you want to recover.
    • As, it provides a preview option Dr.Fone is really very unique as no other Data Recovery for software for Android provides, this option.

      Preview pane for message recovery on Dr.Fone
    • Now, checkmark the files you want to recover and click on the “recover” button . That’s it!
    • Yes, now you’ve successfully recovered your deleted data on Android! . Thus, saving the extra costs which are taken by Data recovery centres/services, thus Dr.Fone is really a nice friend, which will help you in any emergency problem which is faced by your Android  Phone!

    Click here to download Dr.Fone for Android – PC (Windows 7/8/10 32-bit + 64-bit)


  • How to Enable/ Activate Whatsapp Voice Call feature Officially On Android

    How to Enable/ Activate Whatsapp Voice Call feature Officially On Android

    Not many users are not aware of the fact that whatsapp has been acquired by facebook founder Mark Zuckerburg, for a certain amount of billion dollars. He is a generous man enough to give out the Whatsapp Voice Call Feature absolutely for free of charge but the investors of whatsapp do not share the same vision as Mark Zuckerburg.

    Innovative visionary man like founder of facebook was preparing to give out the users the next big thing, Recently whatsapp has launched their web version of W

    WhatsApp calling

    hatsapp , where you can use it on your PC directly. Which is why techapple is ready to take on Whatsapp Voice Call Feature. Lets get started without any further due.

    I have tested and found three methods to enable Whatsapp Voice Call Feature on your android device, Each method have its own difficulty and i have divided it into steps.

    Method One :

    • The minimum requirement is to have  v2.11.561 or higher version WhatsApp call feature can only be activated by downloading it from official website, If you’re considering to update it from Google play, I’m sorry, i’m afraid it wont resolve the issue. You can download the official whatsapp from here.
    • After the download finishes install it right after that on you android device, then Re-write th existing file, If any issues occurred during installation, I would recommend you to enable ” UNKNOWN SOURCE” in the settings.
    • If you have any other device, where whatsapp is already being installed try to make a call to your android device to test the feature.
    • Thats it, You will find it working.

    Method TWO :

    • Here comes the difficult part of of the method, This is a little difficult but if you have a bit experience or if you follow the given steps, i can assure you will make WhatsApp call feature work on your device.
    • To begin your android device must be rooted.
    • So lets begin, After rooting your device, Download the latest version of whatsapp directly from the official website itself, Make sure you do not update it from google play store.
    • Go to the given website and download the given emulator, then Install and Open Terminal Emulator for Android.
    • After the emulator opened, write the given code and run it ,su -c am start -n com.whatsapp/com.whatsapp.HomeActivity .
    • Thats it , the next thing you’ll find is Whatsapp Voice Call Feature added to your android device.

    Final Words :

    As of now , whatsapp voice calling feature is not available for IOS and Windows phones. However i will be soon updating with latest methods to make it work on IOS and Windows. One of these days i will sure to upload videos on how to make whatsapp voice call feature work on Android,IOS and Windows. To get such updates like us on social media.

  • Top 5 Best NES Emulators for Android | Play NES games like Mario,Contra on your Android phone!

    Top 5 Best NES Emulators for Android | Play NES games like Mario,Contra on your Android phone!

    Android operating system integrated devices are amongst the most popular throughout the world. Thus, the number of Android users too is very large but not many android users know, that we can experience our old console games like Super Mario Bros, Donkey Kong, Contra , right on our Android devices. This can be done using NES Emulators , and not only can we play the old Nintendo games, but they also take lesser memory and space on our phones giving us even more advantage! . So, let’s have a look onto the current Top 5 Free Nes Emulators for Android devices.

    Note : Only a single emulator  – 64 in 1 comes with in-built NES games (ROMs) , so if you need to play any game of your choice , you may need to download ROM for playing on the emulator . NES games roms are freely available on the following  link – RomHustler.Net and you can search on google too for Nintendo or NES roms.

    Emulator # 1 – Nostalgia.NES (NES Emulator)

    Nostalgia.Nes running Super Mario Brosulator)
    • Nostalgia.nes is perhaps the best Free Nes emulator for Android.
    • I’ve personally tested the emulator and it simply works superfine! without any hiccups whatsoever!
    • You can save your game progress in inbuilt memory slots, and also rewind it.
    • Nostalgia also allows you to configure graphics and fps options as advanced settings.
    • It also supports zapper gun input support for playing games such as Duckhunt. External hardware Keyboard input too is supported!
    • Click here to Download Nostalgia.NES emulator from Google Play


    Emulator # 2 – SuperRetro16 Lite (SNES)

    Super Retro 16 Android
    • Super Retro 16 is one of the fastest Android emulators around for Android.
    • It auto-detects the game ROM’s and also supports cheat codes!
    • It also boasts of turbo mode for fast forwarding games and even supports multi-player gaming using WiFi or Bluetooth!
    • Click here to download SuperRetro16 Lite from Google Play


    Emulator # 3 – NES Emulator – 64 In 1

    Tanks Game present in 61- in -1 NES emulation
    • If you are a classic player,then Nes emulator is loaded with 60 of the best classic games,such as Super Mario, Battle City,Bomber Man, Tanks 1990 etc.
    • It even has the option of Bluetooth/wifi access for multiplayer purposes.
    • Just download and install and you’ll be playing your favourite Old Games in No time!
    • Click here to Download 64 in 1 PGame NES Emulator


    Emulator # 4 – NES.emu Free

    NES.emu Free Nes Emulator
    • NES.emu is another free NES emulator which automatically saves your Game progress.
    • Thus, even if your phone accidentally switches off or the app is closed , the Game progress is totally saved!
    • NES.emu also supports external controllers throug bluetooth,WiFi and even Xbox controller worked!
    • It doesn’t come with NES ROM’s though you may need to download them for using in the emulator.
    • Click here to download NES.emu Free from Google Play


    Emulator # 5 – John NES Lite Emulator

    John NES lite for Android
    • Though developed by an indie-developer but this emulator doesn’t lack anywhere in functionality!
    • It uses Original NES Engine, is able to scan your SD card for ROM’s.
    • Also , it supports any controller used with it e.g Wiimote/Gametel/MOGA/Bluetooth controllers are supported.
    • Click here to download John NES Lite emulator from Google Play


    Final Word

    These were some of the best NES emulators available on PlayStore, and within no time you will be able to play your old console favourites on your portable android devices. If you face any problems while using/configuring these emulators feel free to comment.  Let’s live our Childhood again! 🙂