Recently I was in International roaming, and had to call the roaming country’s phone number but my sim didn’t had any outgoing over there in the foreign country. But still I was able to call over the Hotel Wifi only because of WhatsCall App, I had it verified and it was neatly able to call a local number over Wifi for me. So, here comes the WhatsCall review -an app which gives Free Worldwide calls over wifi to any phone or mobile number.
Salient Features of WhatsCall –
-

WhatsCall : Free Global worldwide calls WhatsCall lets you call any landline or mobile number over your WiFi or internet connection totally for free!.
- It does so by charging you on WhatsCall credits which can be earned easily by using the WhatsCall app itself no money required!.
- There are lots of easy ways to earn Free WhatsCall credits –
- You get Free 1000 Credits on Signing-up & downloading the app –
- Click here to Download WhatsCall app from Play Store or Apple app Store.
- Free 300 Credits to complete your profile.
- You even get credits to Download apps, from the “Credits” section.
- Watching Video ads gives you 50 credits.
- and many more…
- Thus, its really one app which will be really handy, as it will help you to call online to offline phone incase you run out of balance / talktime.
Review & Pre-requisites –
- First of all download & install the WhatsCall app from the link below –
Click here to Download WhatsCall app. - Now, since it requires mobile number verification, Please enter your mobile number and verify using the verification code sent on it.
- WhatsCall is ready!
How to place a free call via WhatsCall ?
Since, I didn’t had the screenshots ready on my foreign trip, i tried to simulate and create the same scenario – Local offline phone calls over internet using WiFi with Airplane mode on!
Now, since AirPlane mode ensured my phone won’t be receiving any signals, I connected to WhatsCall over Internet using Wifi and then started calling from the dialling screen as shown below –

- On the dial screen, as shown in the above image – Select the Country which you want to call.
- Type in the mobile number whom you want to call.
- Press the call button.
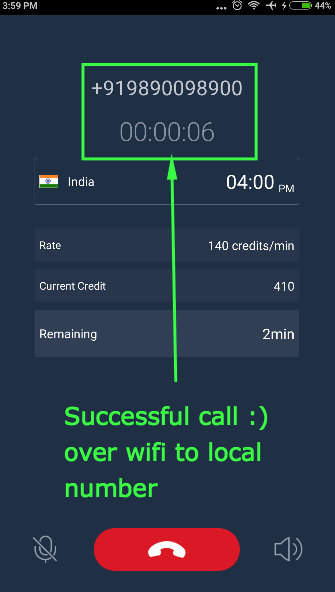
- That’s it ! now wait for some time, until your call is magically connected over the internet connection to non-internet number , as shown in the below image –

Live call to offline number over wifi Call Quality of the app is awesome : Infact the normal mobile calls over Wifi sometimes show distortion on Docomo, Jio but WhatsCall did a good job!. The Clasrity depends on your internet connection though, it requires a decent internet connection.


![How to Read/Write to NTFS disks on USB OTG in Android No Root [Enable NTFS Mount without rooting]](https://techapple.net/wp-content/uploads/2016/08/b46c60e3ed354db69501399bdf645556.png)


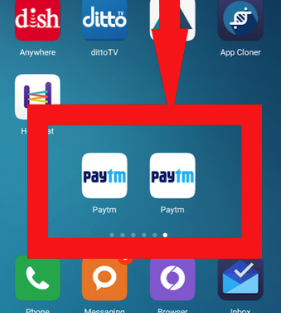


![How to Run 2 variants of same app using Parallel Space on Android Phones [Tutorial]](https://techapple.net/wp-content/uploads/2016/05/paYi7TV.png)