Category: Android Arena

  • Run/Install Official Android SDK Emulator on Linux Ubuntu/LinuxMint

    Run/Install Official Android SDK Emulator on Linux Ubuntu/LinuxMint

    Android SDK is the official android emulator by Google., Most of the guys might want to install this official Android SDK emulator on their machines. SO here’s a tutorial for the same , As Android SDK requires the JDK (Java Development Kit) to be installed on the machine,so in this tutorial, I’m going to be use the openJDK version of Java for installing the Official Android SDK emulator .Procedure to install official Android SDK Emulator-

    • To get started, press Ctrl – Alt – T or Open the terminal from the unity button.
    •  When it opens, the commands below to install OpenJDK.
    sudo apt-get install openjdk-6-jre openjdk-6-jdk icedtea6-plugin


    android_precise


    • Now, download AndroidSDK package by running the commands below. At the time of writing this post, the current version was r20. Or click this link to download the .tgz archive file.
    wget http://dl.google.com/android/android-sdk_r20-linux.tgz


    android_precise_1


    • After the download has finished,execute the commands below to extract the downloaded file.
    tar -xvzf android-sdk_r20-linux.tgz


    android_precise_2


    • After extracting the package, run the command below to change into the tools directory.
    cd ~/android-sdk-linux/tools


    android_precise_3


    • After the execution of previous command, run the commands below to begin the installation.
    ./android


    android_precise_4


    • Install Android updates if there are any available.


    android_precise_5


    • After updating, run the commands below to include AndroidSDK in your path environment.
    gedit ~/.bashrc


    Then add these lines at the very top of the file and save it.


    export PATH=${PATH}:~/android-sdk-linux/tools

    export PATH=${PATH}:~/android-sdk-linux/platform-tools


    android_precise_6


    Log out and log back in, then type android on the command line to launch the software.

    android avd


    Build your own phone. and Enjoy your own Official Android emulation!


    android_precise_7


  • UC Browser 9.4 Handler PC |Use UC Browser on PC without any Android/Java emulator|UC Web Handler setup for PC Windows 7/8/8.1/Windows XP

    UC Browser 9.4 Handler PC |Use UC Browser on PC without any Android/Java emulator|UC Web Handler setup for PC Windows 7/8/8.1/Windows XP

    Hello everyone,  in my last post i had written about Opera Mini for PC with Handler UI , many users then asked me for UC Browser for PC with Handler support, so here’s it, which many requested for – UC Browser PC – Windows7/8/8.1/9/XP with Handler UI . Although UC Browser HD is available for Windows 8/8.1 devices there’s a big difference between the featureset of this UC Browser and the Windows Appstore UC Browser HD such as

    Features of UC Browser 9.4 for PC

    • Handler UI for applying network tweaks .
    • UC Browser boasts of the Best Download Manager, so its Ideal for Downloading big files.
    • In-built Night Mode for Dim-Light browsing.
    • Pages are Optimised and Rendered by the UC Servers, thus reducing the Data Usage.
    • Advanced Network Settings,UI settings present.
    • Single Click installer/Setup works on All version of Windows 7/8/8.1/9.
    • No need of any external Java/Android emulator.
    • Pages are rendered with blazing fast speeds,compared to UC Browser HD.

    Requirements : Java Run-time Environment or JRE must be installed on your System, if not installed,you can download and Install the JRE which can be downloaded from this URL .

    Procedure : After you have downloaded and installed the JRE , Download the UC Browser for PC Setup from here, and install it . After installing just Double click the UC Browser icon and enjoy your favorite browser on your PC. [ You may need to save the settings upon your first Run as shown in the figure below]

    Now, here you can simply hit save and click continue or change the Pinger settings/Handler Settings and continue to using your UC Browser :).

    Note : Press “Ctrl+O” anytime while using to navigate to the Settings.The Same Settings are used to configure Proxy settings by using (Ctrl + O).

    The JRE based UC Browser 9.4 Handler for PC can be downloaded from here –

    Click here to Download UC Browser 9.4 Handler PC – TechApple.Net


    If you have any doubts, queries or suggestions do comment 🙂

  • Use Google Chrome as Calculator,Metric Converter | Hidden Functions of Google Chrome Browser still widely unknown

    Use Google Chrome as Calculator,Metric Converter | Hidden Functions of Google Chrome Browser still widely unknown

    I was just casually browsing on the Internet, then instead of typing ‘.’ in an IP address i accidentally tped ‘*’ and to my astonishment,i was much shocked on the Result, Google Chrome quickly generated the Product of the two numbers for me 🙂 . On further trial and error experiments i found out Google Chrome could be used as a really quick Calculator and Metric Converter . which can be used to save and simplify our work , Let’s check it out how –

    Procedure to Use Google Chrome as a Calculator 

    • Its really quite simple, simply type in your desired expression using the normal ‘+’ , ‘*’ ,’-‘ etc operators in the address bar and it shall return you the results . I have tested the operators (+,-,/,*,%) you can try more of them and tell me the results.
    • Here’s an example operation( “85*48/8+6-2”) and with the result(“514”) it returned in the below image – 

    Similarly Google Chrome Browser can also be used as a Metric Converter too as follows

    • Simply type in your Unit in address bar as shown below – (I typed in “5 feet” in address bar and it showed me the equivalent metres in Output)
    • Also it supports conversions from one Metric to other metric Systems too as shown in the figure I typed (“5 feet in inches”) in address bar and it rightly returned me the Corresponding inches

    Thus , Google Chrome contains this awesome functionality of an inbuilt-calculator cum Metric converter which can be pretty much time saving,especially in cases such as analytics saving the time required to navigate from one window to other . Also this trick is also quite good to show-off or impress folks with your geeky knowledge 🙂 .

    And before i conclude, here’s one more –

    we have explored a widely unknown dimensioon of Google Chrome,if you know more of such dimensions, do let us know by the comments 🙂 . Thank you!

  • Opera Mini PC Handler | Opera Mini for PC without any Any Android Emulator with Downloading Support

    Opera Mini PC Handler | Opera Mini for PC without any Any Android Emulator with Downloading Support

    Opera Mini is the most widely used browser for mobile devices ,and boasts of some unique features.Using Opera Mini on PC can be more than handy or useful for PC users too such as

    • It uses Opera servers to cache and display the web pages, thus, the servers act as a proxy and helps to unblock sites such as facebook etc, if they are blocked on the Network.
    • The server caching also enables Data Compression which uses Data usage by almost 80% thus reducing the Data Usage as well as increasing the browsing speed manifolds 🙂
    • Handler menu can be used to change/modify various network headers and parameters.
    • JavaScript,Ajax-script etc are run/executed on the server side and thus this helps in speedy browsing on lower configuration PCs without the fear of System hang.

    Method to Run/Install Opera Mini Handler on PC

    Method #1 . Using JRE + Opera Mini for PC by Alan Bazan

    Requirements : Java Run-time Environment or JRE must be installed on your System, if not installed,you can download and Install the JRE which can be downloaded from this URL .

    Procedure : After you have downloaded and installed the JRE , Download the Opera Mini for PC Setup from the download links, and install it . After installing just Double click the Opera Mini icon and enjoy your favorite browser on your PC. [ You may need to save the settings upon your first Run as shown in the figure below]

    Now, here you can simply hit save and click continue or change the Pinger settings/Handler Settings and continue to using your Opera Mini :).

    Note : Press “Ctrl+O” anytime while using to navigate to the Settings.The Same Settings are used to configure Proxy settings by using (Ctrl + O).

    The JRE based Opera Mini PC Browser can be downloaded from here —

    Click here to Download Opera Mini 8.1 Handler PC – TechApple.Net
    Click here to Download Opera Mini 7 PC – TechApple.Net

    Mirror Links :

    Click here to Download Opera Mini 8.1 Handler PC – TechApple.Net
    Click here to Download Opera Mini 7 PC – TechApple.Net

    Method #2. Using Opera Mini directly in Google Chrome/Firefox/Web Browser

    Yes, you can use Opera Mini in your browser too, that too without Installing , by following these Simple steps —

    Requirements : Install JRE  or Java Runtime Environment on your system . If JRE is already installed please Skip this.

    Now Navigate to the URL : http://demo.opera-mini.net/public/ on your Browser and Opera Mini will start Loading right on your browser! No need of installing it 😛 . Sometimes, the JRE may show security error in such cases please Go to Configure Java in your System , and Reduce the Security to Medium as shown in the Figure below(You can also see the Opera Mini running in the Background 🙂 ) –

    Thus, these are some of the Most easy methods to Run / Install Opera Mini on PC , if Any doubts/queries/suggestions feel free to comment 🙂

  • Procedure to create Wifi Hotspot on Linux |Creating Wireless Access point on Linux [Ubuntu/LinuxMint/Fedora/OpenSUSE]

    Procedure to create Wifi Hotspot on Linux |Creating Wireless Access point on Linux [Ubuntu/LinuxMint/Fedora/OpenSUSE]

    Many times, we need to share our Internet Connection to our mobile devices/other laptops or gadgets, but we do not have a wifi router or wireless access point at our disposal. In such cases we can use our PC/laptop itself as a wireless access point to share the internet connection to other devices, and its free and doesn’t require any extra hardware too. while Windows OS contains softwares such as connectify.me,virtual router which do the same, Linux on the  other hand has fewer alternatives, one of those alternatives is : hotspotd by prahladyeri@github . Lets have a look on how to create wifi hotspot linux . I have personally tested this on Ubuntu and LinuxMint but it should work on most linux distros.

    Hotspotd is a small daemon to create a wifi hotspot on linux, it works by creating a virtual NAT (Network address transation) table between your connected device and the internet using linux iptables.

    Requirements/Pre-requisites for using hotspotd to create access point

    • dnsmasq (typically pre-installed on most linux distributions).
    • hostapd for AP provisioning.

    hostapd must be installed for hotspotd to be installed, you can install hostapd by running these commands in the terminal —

    For Ubuntu based terminal command issudo apt-get install hostapd

    And for RHEL based distros

    terminal command : yum install hostapd

    hostapd install is quick in process and will get processed in 2 seconds maximum :)shown in the figure below – .

    Now after you have installed hostapd , we need to install our hotspot app – hotspotd

    Installation of hotspotd –

    To install hotspotd, just follow these steps: , type them one by one in the terminal :

    First of all we will download the hotspotd package from wget command –

    wget https://github.com/prahladyeri/hotspotd/raw/master/dist/hotspotd-0.1.tar.gz


    Now,we uncompress the tar file and navigate to the extract directory –

    tar xvf hotspotd-0.1.tar.gz
    cd hotspotd-0.1/
    

    Here, in this installation directory we give the setup command from the terminal by —

    sudo python setup.py install


    If everything goes fine, hotspotd will be installed successfully 🙂

    Using the Hotspot

    To start hotspot:

    sudo hotspotd start

    To stop hotspot:

    sudo hotspotd stop

    The first time you run hotspotd, it will ask you for configuration values for SSID, password, etc. Thus enhancing the security of your hotspot and giving you more customizable options to play with 🙂

    Alternatively, you may also run:

    sudo hotspotd configure

    Precutionary Measures / Troubleshooting

    • Make sure all dependencies (hostapd, dnsmasq and python 2.7) are installed.
    • hotspotd creates the NAT by manipulating iptables rules. So if you have any other firewall software that manipulates the iptables rules (such as the firewalld on fedora), make sure you disable that.
    • To create a hotspot, your wifi must support AP mode. To find that out, use this process:
      • Find your kernel driver module in use by issuing the below command:lspci -k | grep -A 3 -i network(example module: ath9k)
      • Now, use the below command to find out your wifi capabilities (replace ath9k by your kernel driver):modinfo ath9k | grep depend
      • If the above output includes “mac80211” then it means your wifi card will support the AP mode.

    Rejoice, Now you  can use and share your Internet Connection on as many devices as you want  🙂 also, you can create a wifi hub for Gaming too 🙂 , If any doubts/queries/suggestions feel free to comment 🙂

  • Tutorial – Install/Setup Genymotion Android Emulator on Linux [Ubuntu/LinuxMint/Fedora/ArchLinux]

    Tutorial – Install/Setup Genymotion Android Emulator on Linux [Ubuntu/LinuxMint/Fedora/ArchLinux]

    In our previous post, we had discussed about the Best 5 Android emulators for Linux . Many asked us for installation instructions for installing Genymotion on Linux, so we have come up with this tutorial to install Genymotion – the present-best Android emulator for Linux. I have tried and tested this tuorial for Ubuntu and LinuxMint but it should work for all Linux distributions

    Tutorial for Installation/Setup of Genymotion on Linux –

      1. Genymotion requires VirtualBox to be installed on your Linux System for it to run , To learn/install VirtualBox on your machine, you can read the post about it present here . Procedure to Install VirtualBox on Linux .
      2. Now, for Deploying Android Machines on Genymotion we need an account on genymotion cloud, which can be freely obtained by signing up at this Genymotion Cloud Sign-up URL.
      3. Now , first we have to download Genymotion , After Signing up, please logon to the Genymotion site and Download the Genymotion machine renderer from here , depending upon the Linux distro and build you are using [32 or64 bit].
      4. Now go to the Terminal on your Linux by menu or by typing “Ctrl+Alt+T”.
      5. Now in the Terminal , Navigate to the Directory where the downloaded Genymotion image is present [Let’s consider the image downloaded is present in the Downloads folder] , Now type these commands in the terminal.
      6. cd ~/Downloads/

        chmod +x genymotion-2.1.0_x64.bin

        ./genymotion-2.1.0_x64.bin
        
        
      7. Now, Genymotion will be installed as shown in the figure below
      8. Now , run Genymotion from the VirtualBox or from the Menu. Alternatively, you can run it from the terminal by executing
        /home/handbook/Downloads/genymotion/genymotion


    1. Now Genymotion pops up, there login with the Genymotion account we registered earlier,and click on Create New Virtual Device or the “Add”  button.
    2. You will see various Android Images listed as follows , select the one you want to emulateand click Next
    3. The Android image , will now be downloaded to the machine and saved for future use, after its downloaded , Just select the Android image which is present on your system and click the “Play”  button.
    4. Your desired Android Image will be implemented , Now you can Play Games, Install Whatsapp etc and do anything with your Own Linux Device right on your PC :).

    I hope , the tutorial was clean and clear, however if you face any issues/encounter any problems, Please do comment we would be glad to help :).

  • 5 Best Android Emulators for Mac OS X to Run Android Apps [2019] | Run and install Android apps on your Mac OS X , Macbook Air/Pro

    5 Best Android Emulators for Mac OS X to Run Android Apps [2019] | Run and install Android apps on your Mac OS X , Macbook Air/Pro

    What are Android Emulators for Mac ? Why do you need them ?

    Android Emulators are software which let you install Android apps and games on your Mac . Thus, enabling you to run apps and play games made for Android on your system. Considering, the vast number of productive apps and great games for Android, it increases the amount of activities you can do on your Mac. As using it, you can even run Android apps in addition to apps made for your Mac OS X system.

    5 Best Android Emulators for Mac OS X –

    1. Bluestacks AppPlayer Android Emulator
      • Bluestacks emulator for Mac OS
        Bluestacks emulator for Mac OS

        Bluestacks AppPlayer is probably the Best Android Emulator for Mac OS because it uses the unique “LayerCake” technology which allows android OS apps to be emulated and run without requiring an external Virtual Desktop Application such as Virtual Box or Vmware.

    Bluestacks for Mac OS X Features & Drawbacks
    Features Drawbacks
    • Inbuilt Manager to browse and install apps inside the Emulator
    • Gaming performance needs to be improved. Some games face lag

    • Double click on any apk file in Mac OS X to install in Bluestacks

    • Snapchat and Pokemon Go do not work

    • Push Notifications support from Bluestacks to Mac, thus enabling use of Chat apps

    • Free version may show some ads

    • Camera support, thus upload live videos to Android app from Mac Camera


    2. Nox Emulator for Mac OS X
    Nox Android Emulator for Mac
    Nox Android Emulator for Mac
      • Nox is a great emulator for Mac and Mac OS X and is the best suited for playing games without fuss.


    Nox Emulator for Mac OS X Features & Drawbacks
    Features Drawbacks
    • Drag and Drop to install APK
    • Difficult to transfer files between Nox and the Mac OS X system

    • Inbuilt Screen Capture and 60Fps Video Recording Support

    • Camera Module doesn’t work , so cannot use Camera based apps (Video Call)

    • Assign Macro and Keyboard mapping to play touch games via Keyboard

    • The Mac version is less frequently updated compared to Windows version

    • Smooth Video Streaming on Streaming Apps


    NOTE – 
    You might want to check out this new emulator which runs directly inside Google Chrome BrowserARChon! Android Emulator., thus it will work on Mac too!

    3. Andy OS
    ANDY Emulator Gameplay
      • Andy OS by Andyroid.net is another great Android Emulator for Mac OS , but it requires Virtual Box to be preinstalled on the MAC. 
      • You can also use your phone as a controller for controlling / playing the games, the picture alongside explains it 🙂


    Andy OS for Mac Pro’s & Cons
    Pros Cons
    • Directly launch the apps installed in Emulator from OS X Launchpad
    • Resource Heavy, long-time usage may heat up your system

    • OpenGL Acceleration for Better Graphics

    • Camera Module doesn’t work , so cannot use Camera based apps (Video Call)

    • Camera & Microphone Supported

    • Uses Old Android Version

    Update : You might love it to check out the New Firefox OS on PC – Click here to Configure Firefox OS Emulator on your Mac


    4. Genymotion
    Genymotion Live on MAC
    • One of the most striking features of Genymotion is unlike other Android Emulators it allows us to change the type of android device as well as android version we are using!!
    • This is a great feature and allows us to select a particular device as well as particular Android version which we want to emulate.
    • It also supports configuring the amount of resources e.g RAM ,harddisk to be allocated to the Android device is possible! Great feature if your are limited on hardware resources.
    • Directly supports networking through ethernet /Wi-Fi , emulates your connected connection directly so you can use internet directly in your emulated android.
    • ADB Support and it also supports OpenGL hardware acceleration so you can use your Android device fullscreen and play Games on your MAC!
    • Also supports drag and drop file transfer to the emulated SD Card 🙂 , supports Gyroscope,Light and accelerometer sensors too.
    • You need an account on Genymotion Cloudto Download and deploy Genymotion android device .


    5. Xamarin Android Player for MAC
    • Xamarin is yet another android emulator with variety of devices supported, it supports OpenGL, and virtualizes a device instead of emulating it. 
    • This Virtualization increases speed of the emulator to a great extent!
    • Click here to download Xamarin Android Player for Mac.
    • The Configuration/installation instructions for Xamarin on Mac OS can be found here .


    So these were the Best 5 Android Emulators for Mac OS , besides these there are other options available too such as the Android SDK (Official) Emulator ,AndroVM , AndroLite but configuring official Android SDK is a tedious task and other two didn’t interest me much , you can check them out too..

    Hope you liked this post, if you have any doubts/queries/suggestions feel free to comment!

  • 5 Best Android Emulators for Linux | Run Android Apps on Linux Ubuntu,LinuxMint,Fedora,ArchLinux,OpenSUSE,Mageia,CentOS etc

    5 Best Android Emulators for Linux | Run Android Apps on Linux Ubuntu,LinuxMint,Fedora,ArchLinux,OpenSUSE,Mageia,CentOS etc

    Hey Guys, as you know the Smartphone market is dominated by Android OS – which itself is an operating system designed / based on the linux kernel , but unfortunately the Android Emulators for Linux itself are quite less as compared to windows counterparts 🙁 . so let’s have a look on the 5 best  Android Emulators for Linux to run android apps and play android games on Linux -Ubuntu,LinuxMint,Fedora,ArchLinux etc

    1. Genymotion 


    Genymotion – This is probably the Best Android emulator when it comes to Linux Platform due to some unique abilities present only in genymotion, Features of Genymotion are —

    • It allows us to easily Download pre-configured Android Images of various Android Versions and various Android device images such as Nexus 7,Galaxy S2,Galaxy S3 etc directly on our emulator.
    • It also allows us to configure the amount of resources e.g RAM ,harddisk to be allocated to the Android device / Emulator. Great feature if  limited on hardware resources.
    • Genymotion directly supports networking through ethernet /Wi-Fi , emulates your connected connection directly so it use internet directly in the emulated android.
    • ADB Support and it also supports OpenGL hardware acceleration so  your Android device works fullscreen and thus enhancing your experience while playing android games on your Linux!
    • It Also supports drag and drop file transfer to the emulated SD Card 🙂 , supports Gyroscope,Light and accelerometer sensors too.
    • You need an account on Genymotion Cloud – to Download and deploy Genymotion android device —
    • Click here to register on Genymotion site and download Genymotion for Linux [32 bit as well as 64bit].Note – Oracle Virtual Box must be installed on your Machine for Genymotion to work! , installing Virtual Box On Linux is covered at the end of this post 🙂
    • Installation instructions for installing Geanymotion on Ubuntu/Archlinux are available here.

    2.Andro VM


    AndroVM is the Parent Project of genymotion – nevertheless it still works and works awesomely! and the best thing about Andro VM is that the android machine is deployed offline on your PC unlike Genymotion where it is deployed on your PC through cloud, thus you can use Andro VM to install Android Emulator on your linux even offline

    • another striking feature of Andro VM is that it supports hardware OpenGL rendering through Virtual Box.
    • Virtual Box must be installed on your Linux OS for Andro VM to run , check end of the post for Virtual Box installation tutorial .
    • AndroVM supports Net Sharing from guest to host , the internet sharing as well as Installation tutorial for Andro VM is available here at their blog — > Click here for AndroVM installation tutorial
    • AndroVM can be downloaded for both 32bit and 64-bit Linux Kernels from here –> Click here to download Andro VM Virtual Box image for Linux.

    3. Andy Android Emulator by Andyroid.net – Andy OS

    • Although, yet in Beta at the time of writing this article – ANDY OS Android Emulator is pretty much exciting and the best Android emulator for Linux ., being a beta tester i have the access to pre-release features of ANDY , hence i have given it the 3rd place, it  could easily been the first one though!
    • Features of ANDY emulator include Google Play Store support inbuilt, none of the emulator has this feature inbuilt even for Windows builds!
    • Multi-Touch support 🙂 the word explains it all !
    • Use your phone as a controller for controlling / playing the games, the picture alongside explains it 🙂
    • Access the installed apps directly from the Desktop environment!
    • OpenGL hardware acceleration, Camera and Microphone all features supported!
    • You can download the beta version for Linux or the Windows build for Andy from here –> The link will automatically redirect you depending on your OS —
    • Click here to download / Get ANDY OS!

    You might want to check out this new emulator which runs directly inside Google Chrome BrowserARChon! Android Emulator.


    4. Official Android SDK – Android Emulator / AVDs

    • The  Official Android SDK/ Android emulator by Google, has a lot of fans though not me 😛 and is used by default by mostly anyone who wants to develop apps for Android
    • This Android emulator supports all the functions including SD Card support, file transfer et
    • It also supports physical keypad which none of the Android emulators support !!
    • Being developed by Google Engineers you are assured of the quality of product and safety!
    • The Setup of this emulator is the thing which doesn’t impress me much though 🙁
    • An easier setup guide to install the Official Android Emulator can be read here .
    • The required SDK / ADT bundle for Android emulator and plugins can be downloaded from this Google’s Official Page .

    5. Jar of Beans – Wine Compatible!

    • Although Jar Of Beans was developed as an Android Emulator which was Portable for Windows ,it can be run through Wine.
    • It has all the basic support such as APK install, SD Card supports and supports installation of Play Store too..
    • but already Wine being a kind of Emulation environment we wont encourage usage of Jar of Beans on Linux
    • For using Jar of beans for Linux, extract the exe contents of the Jar of Beans.exe file which can be downloaded from here –> , and then by runnint the jarofbeans.exefile with wine .
    • Click here to download Jar of Beans from Google Drive

    Installing VirtualBox on Linux

    • As, we mentioned we need to install virtual box on linux before using Genymotion/AndroVM/ANDY , the eaiest method to install virtualBox on linux is
    • Installing the dependencies by executing  “sudo apt-get install dkms”  in terminal , and then by executing
      sudo apt-get install virtualbox-4.3″ in the terminal! that’s it virtual box will be installed !
    • If it doesn”t get installed you may want to check out this Article.

    Update : You might love it to check out the New Firefox OS on PC – Click here to Configure Firefox OS Emulator on your Linux 

    If you have any doubts/queries/suggestions  Feel free to Comment , we will try our Best to Please you Thanks!

  • 3 Ways to use Telegram on PC! | Run Telegram on PC/Windows/Linux without any Android Emulator !!

    3 Ways to use Telegram on PC! | Run Telegram on PC/Windows/Linux without any Android Emulator !!

    A new instant messaging app has hit the Smartphone market recently,and is making great news especially after Whatsapp was bought by Facebook, The Name of the Instant Messaging app is Telegram.

    What is Telegram/how is it different?
    Telegram may be defined as a clone of Whatsapp,with enhanced features,more security and privacy settings and more facilities as compared to whatsapp.

    Features :

    • Familiar Simple User Interface inherited from Whatsapp.
    • Group Chat can be done simultaneously with 100 people. [Whatsapp maximum limit is 50]
    • Allows sending of Documents and files. [Whatsapp doesn’t allow any documents/files sending]
    • Photos and Video sending size upto 1GB. [whatsapp limit 512MB]
    • Open Source and Cloud Based.
    • Allows you to change your privacy settings,last seen,etc.
    • Messages are encrypted with highest standards and no logs are saved on the server so your chats are completely private!
    • Still, if you are not happy you can even send Encrypted QR messages which only can be decrypted by the Receiver..
    • And All these features are Ad-Free and Free to Use forever,unlike Whatsapp which charges Subscription Fees…

    So, Now 3 Ways you can install and Use Telegram on PC

    Way – I

    1.  TDesktop [Telegram for Windows] [Windows/Linux] :  tdesktop is unofficial Telegram Client for Windows, it comes with a simple setup file, which you can download and setup as any other windows software by specifying directory and clicking next,next!, your telegram for windows [tdesktop] will be installed ,and you can now put number and register. Linux users can use it directly in Wine! it works on all versions of windows 7/8/8.1/XP

    Click here to Download the Telegram for Windows Client / TDesktop

    Instructions :
    now you can locate the shortcut on your desktop. Open the telegram PC app, and..
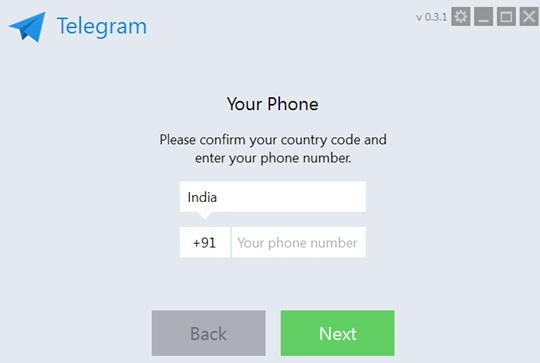
    Now, Enter your Country Code and Mobile Number and Click on Next, you will receive verification code on your number, now put it inside the tDesktop App and yo!  you can start chatting using Telegram

    Way – II

    2.Google Chrome Extension/ App  [Windows/Linux/MAC/Chrome OS] :  If you are not interested in installing the tDesktop client and want to use Telegram in Google Chrome, you can do it too, just install the Webogram Chrome extension from here and follow the same mobile number verification steps to use Telegram.

    Click here to Download/add Webogram [Telegram] Google Extension/App

    Way – III

    3. in your browser Direct/Simple URL  [Window/Linux/MAC/Chrome OS] : Now if you feel lazy and don’t want to install neither Windows client nor Google Chrome Extension , you can Simply type or Go to this Online Webogram URL to load Telegram directly in your Browser!! Simple and efficient isn’t it ?

    Go to this URL to load Webogram right in your Borowser

    http://zhukov.github.io/webogram

    or you can CLICK HERE to load Telegram in your Browser itself!

    here’s a glimpse of Telegram in my Browser : Google Chromewebogram

    So, Lets Enjoy this New,and Opensource Messaging app 🙂 Do like and Share this post if you liked this, else if you have any complaints/suggestions or require any help Feel free to comment 🙂