Category: featured

  • 5 Best Android Emulators for Mac OS X to Run Android Apps [2019] | Run and install Android apps on your Mac OS X , Macbook Air/Pro

    5 Best Android Emulators for Mac OS X to Run Android Apps [2019] | Run and install Android apps on your Mac OS X , Macbook Air/Pro

    What are Android Emulators for Mac ? Why do you need them ?

    Android Emulators are software which let you install Android apps and games on your Mac . Thus, enabling you to run apps and play games made for Android on your system. Considering, the vast number of productive apps and great games for Android, it increases the amount of activities you can do on your Mac. As using it, you can even run Android apps in addition to apps made for your Mac OS X system.

    5 Best Android Emulators for Mac OS X –

    1. Bluestacks AppPlayer Android Emulator
      • Bluestacks emulator for Mac OS
        Bluestacks emulator for Mac OS

        Bluestacks AppPlayer is probably the Best Android Emulator for Mac OS because it uses the unique “LayerCake” technology which allows android OS apps to be emulated and run without requiring an external Virtual Desktop Application such as Virtual Box or Vmware.

    Bluestacks for Mac OS X Features & Drawbacks
    Features Drawbacks
    • Inbuilt Manager to browse and install apps inside the Emulator
    • Gaming performance needs to be improved. Some games face lag

    • Double click on any apk file in Mac OS X to install in Bluestacks

    • Snapchat and Pokemon Go do not work

    • Push Notifications support from Bluestacks to Mac, thus enabling use of Chat apps

    • Free version may show some ads

    • Camera support, thus upload live videos to Android app from Mac Camera


    2. Nox Emulator for Mac OS X
    Nox Android Emulator for Mac
    Nox Android Emulator for Mac
      • Nox is a great emulator for Mac and Mac OS X and is the best suited for playing games without fuss.


    Nox Emulator for Mac OS X Features & Drawbacks
    Features Drawbacks
    • Drag and Drop to install APK
    • Difficult to transfer files between Nox and the Mac OS X system

    • Inbuilt Screen Capture and 60Fps Video Recording Support

    • Camera Module doesn’t work , so cannot use Camera based apps (Video Call)

    • Assign Macro and Keyboard mapping to play touch games via Keyboard

    • The Mac version is less frequently updated compared to Windows version

    • Smooth Video Streaming on Streaming Apps


    NOTE – 
    You might want to check out this new emulator which runs directly inside Google Chrome BrowserARChon! Android Emulator., thus it will work on Mac too!

    3. Andy OS
    ANDY Emulator Gameplay
      • Andy OS by Andyroid.net is another great Android Emulator for Mac OS , but it requires Virtual Box to be preinstalled on the MAC. 
      • You can also use your phone as a controller for controlling / playing the games, the picture alongside explains it 🙂


    Andy OS for Mac Pro’s & Cons
    Pros Cons
    • Directly launch the apps installed in Emulator from OS X Launchpad
    • Resource Heavy, long-time usage may heat up your system

    • OpenGL Acceleration for Better Graphics

    • Camera Module doesn’t work , so cannot use Camera based apps (Video Call)

    • Camera & Microphone Supported

    • Uses Old Android Version

    Update : You might love it to check out the New Firefox OS on PC – Click here to Configure Firefox OS Emulator on your Mac
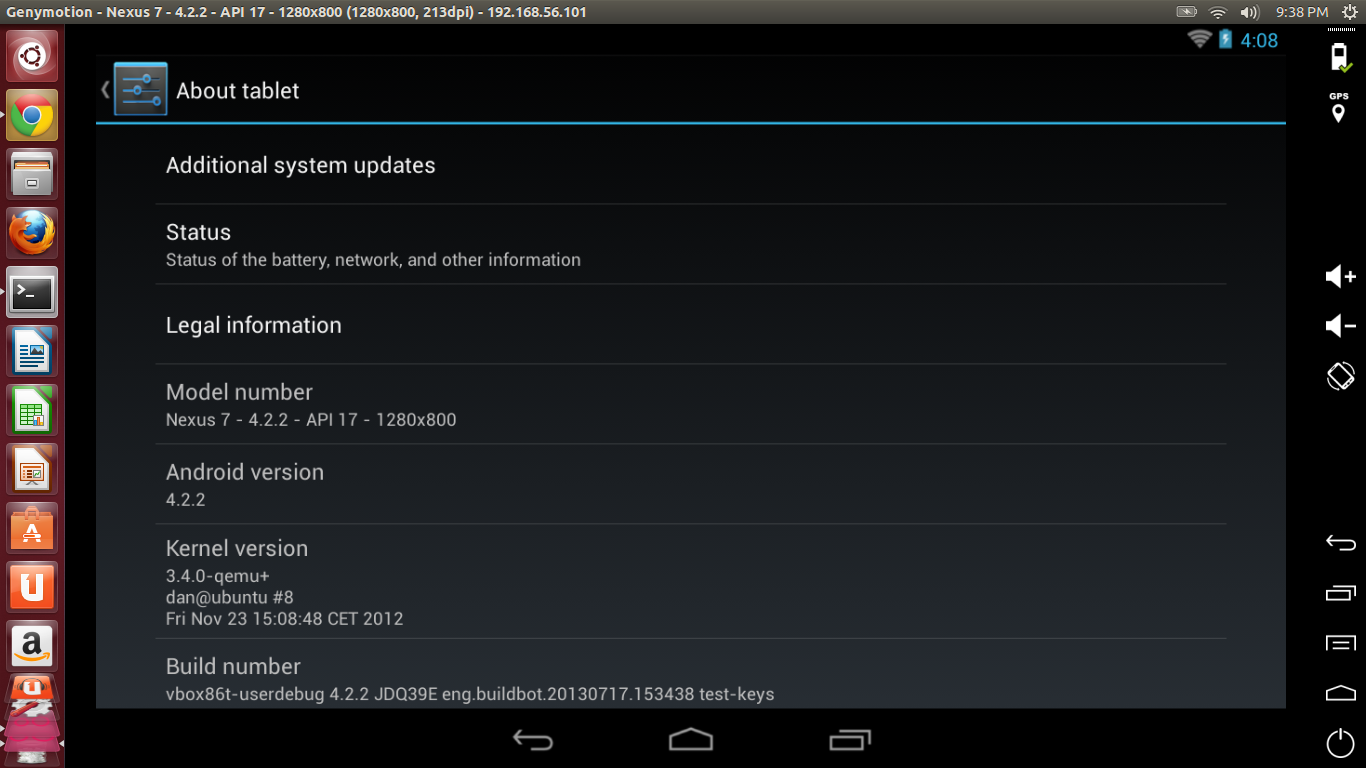
     

    4. Genymotion
    Genymotion Live on MAC
    • One of the most striking features of Genymotion is unlike other Android Emulators it allows us to change the type of android device as well as android version we are using!!
    • This is a great feature and allows us to select a particular device as well as particular Android version which we want to emulate.
    • It also supports configuring the amount of resources e.g RAM ,harddisk to be allocated to the Android device is possible! Great feature if your are limited on hardware resources.
    • Directly supports networking through ethernet /Wi-Fi , emulates your connected connection directly so you can use internet directly in your emulated android.
    • ADB Support and it also supports OpenGL hardware acceleration so you can use your Android device fullscreen and play Games on your MAC!
    • Also supports drag and drop file transfer to the emulated SD Card 🙂 , supports Gyroscope,Light and accelerometer sensors too.
    • You need an account on Genymotion Cloudto Download and deploy Genymotion android device .


    5. Xamarin Android Player for MAC
    • Xamarin is yet another android emulator with variety of devices supported, it supports OpenGL, and virtualizes a device instead of emulating it. 
    • This Virtualization increases speed of the emulator to a great extent!
    • Click here to download Xamarin Android Player for Mac.
    • The Configuration/installation instructions for Xamarin on Mac OS can be found here .


    So these were the Best 5 Android Emulators for Mac OS , besides these there are other options available too such as the Android SDK (Official) Emulator ,AndroVM , AndroLite but configuring official Android SDK is a tedious task and other two didn’t interest me much , you can check them out too..

    Hope you liked this post, if you have any doubts/queries/suggestions feel free to comment!

  • 5 Best Android Emulators for Linux | Run Android Apps on Linux Ubuntu,LinuxMint,Fedora,ArchLinux,OpenSUSE,Mageia,CentOS etc

    5 Best Android Emulators for Linux | Run Android Apps on Linux Ubuntu,LinuxMint,Fedora,ArchLinux,OpenSUSE,Mageia,CentOS etc

    Hey Guys, as you know the Smartphone market is dominated by Android OS – which itself is an operating system designed / based on the linux kernel , but unfortunately the Android Emulators for Linux itself are quite less as compared to windows counterparts 🙁 . so let’s have a look on the 5 best  Android Emulators for Linux to run android apps and play android games on Linux -Ubuntu,LinuxMint,Fedora,ArchLinux etc

    1. Genymotion 


    Genymotion – This is probably the Best Android emulator when it comes to Linux Platform due to some unique abilities present only in genymotion, Features of Genymotion are —

    • It allows us to easily Download pre-configured Android Images of various Android Versions and various Android device images such as Nexus 7,Galaxy S2,Galaxy S3 etc directly on our emulator.
    • It also allows us to configure the amount of resources e.g RAM ,harddisk to be allocated to the Android device / Emulator. Great feature if  limited on hardware resources.
    • Genymotion directly supports networking through ethernet /Wi-Fi , emulates your connected connection directly so it use internet directly in the emulated android.
    • ADB Support and it also supports OpenGL hardware acceleration so  your Android device works fullscreen and thus enhancing your experience while playing android games on your Linux!
    • It Also supports drag and drop file transfer to the emulated SD Card 🙂 , supports Gyroscope,Light and accelerometer sensors too.
    • You need an account on Genymotion Cloud – to Download and deploy Genymotion android device —
    • Click here to register on Genymotion site and download Genymotion for Linux [32 bit as well as 64bit].Note – Oracle Virtual Box must be installed on your Machine for Genymotion to work! , installing Virtual Box On Linux is covered at the end of this post 🙂
    • Installation instructions for installing Geanymotion on Ubuntu/Archlinux are available here.

    2.Andro VM


    AndroVM is the Parent Project of genymotion – nevertheless it still works and works awesomely! and the best thing about Andro VM is that the android machine is deployed offline on your PC unlike Genymotion where it is deployed on your PC through cloud, thus you can use Andro VM to install Android Emulator on your linux even offline

    • another striking feature of Andro VM is that it supports hardware OpenGL rendering through Virtual Box.
    • Virtual Box must be installed on your Linux OS for Andro VM to run , check end of the post for Virtual Box installation tutorial .
    • AndroVM supports Net Sharing from guest to host , the internet sharing as well as Installation tutorial for Andro VM is available here at their blog — > Click here for AndroVM installation tutorial
    • AndroVM can be downloaded for both 32bit and 64-bit Linux Kernels from here –> Click here to download Andro VM Virtual Box image for Linux.

    3. Andy Android Emulator by Andyroid.net – Andy OS

    • Although, yet in Beta at the time of writing this article – ANDY OS Android Emulator is pretty much exciting and the best Android emulator for Linux ., being a beta tester i have the access to pre-release features of ANDY , hence i have given it the 3rd place, it  could easily been the first one though!
    • Features of ANDY emulator include Google Play Store support inbuilt, none of the emulator has this feature inbuilt even for Windows builds!
    • Multi-Touch support 🙂 the word explains it all !
    • Use your phone as a controller for controlling / playing the games, the picture alongside explains it 🙂
    • Access the installed apps directly from the Desktop environment!
    • OpenGL hardware acceleration, Camera and Microphone all features supported!
    • You can download the beta version for Linux or the Windows build for Andy from here –> The link will automatically redirect you depending on your OS —
    • Click here to download / Get ANDY OS!

    You might want to check out this new emulator which runs directly inside Google Chrome BrowserARChon! Android Emulator.


    4. Official Android SDK – Android Emulator / AVDs

    • The  Official Android SDK/ Android emulator by Google, has a lot of fans though not me 😛 and is used by default by mostly anyone who wants to develop apps for Android
    • This Android emulator supports all the functions including SD Card support, file transfer et
    • It also supports physical keypad which none of the Android emulators support !!
    • Being developed by Google Engineers you are assured of the quality of product and safety!
    • The Setup of this emulator is the thing which doesn’t impress me much though 🙁
    • An easier setup guide to install the Official Android Emulator can be read here .
    • The required SDK / ADT bundle for Android emulator and plugins can be downloaded from this Google’s Official Page .

    5. Jar of Beans – Wine Compatible!

    • Although Jar Of Beans was developed as an Android Emulator which was Portable for Windows ,it can be run through Wine.
    • It has all the basic support such as APK install, SD Card supports and supports installation of Play Store too..
    • but already Wine being a kind of Emulation environment we wont encourage usage of Jar of Beans on Linux
    • For using Jar of beans for Linux, extract the exe contents of the Jar of Beans.exe file which can be downloaded from here –> , and then by runnint the jarofbeans.exefile with wine .
    • Click here to download Jar of Beans from Google Drive

    Installing VirtualBox on Linux

    • As, we mentioned we need to install virtual box on linux before using Genymotion/AndroVM/ANDY , the eaiest method to install virtualBox on linux is
    • Installing the dependencies by executing  “sudo apt-get install dkms”  in terminal , and then by executing
      sudo apt-get install virtualbox-4.3″ in the terminal! that’s it virtual box will be installed !
    • If it doesn”t get installed you may want to check out this Article.

    Update : You might love it to check out the New Firefox OS on PC – Click here to Configure Firefox OS Emulator on your Linux 

    If you have any doubts/queries/suggestions  Feel free to Comment , we will try our Best to Please you Thanks!

  • Easily Create Setup / Installer for any Software using InstallSimple Setup creator

    Easily Create Setup / Installer for any Software using InstallSimple Setup creator

    Hey Guys, we at TechApple, post alot of setups and installers for many softwares, ever wondered how to create setup/installer for any software.? in this post, i am going to cover the same Let’s Check out how to easily create a setup / installer for any software.[Windows] and that too without any scripting involved thus no programming language involved! 🙂

    Prerequisites

    • A simple tool / Portable Software – InstallSimple  , which we are going to use for Creating Packaged Software.
    • The Folder/Software of which you want to create Software.
    • This Tutorial 🙂 that’s it 🙂
    • You can download InstallSimple from here . Click here to download InstallSimple Setup Creator [Just 355kB].

    Method to Create/Setup using InstallSimple

    • Open InstallSimple.exe from the Downloaded zip file, you will be greeted with an image as follows , Click on Next to Continue.
    • After Click on Next you will be shown a window asking you to Enter the Window Title and Project Name, Fill in The Window Title – The text you want to show on title bar and the Name of the Software in Project Name and click on Next.
    • Now a dialog box will appear with a Message Text Label and a textbox , in the textbox enter the Custom Text/Greeting text which you want to show when setup starts and click on next.
    • Now a dialog Box will appear with label License Agreement, enter the type of license agreement for your software and click on next.
    • Now in this window “Graphics” we can specify the splash screen we want to display before the execution of the setup as well as the header image of the setup window, Click the Folder icon as shown in below figure to specify the path., CLick on Next
    • Now a window “Files to Distribute” / asking you to select source folder of your setup and setup path for your setup will appear, in source folder option click on “Browse” and navigate to the software folder of which installation you want to create and click “ok” , its generally the folder which contains your .exe setup file,and .dll files etc.., select the root folder which contains your software for source folder, and for setup path, enter the folder and location where you want to install your software ex “Program Files”,”Local user drive” etc as shown in the figure –>
    • Now a Window Labelled “Shortcuts” will appear, here select the Files of which you want to create shortcuts and the locations where you can place the shortcut can be selected on the right side pane such as “Start Menu”,”Desktop” etc, after you click on the file of which you want to create shortcut , a yellow/green color mark will appear as shown in the next figure –> After selecting the files for shortcut click on Next., select the Windows Versions and .NET framework check if you want to add., click on next..
    • Now a tab “Windows Registry”  will appear , Enter here any regitry changes you want to make e.x adding PATH variable with setup etc and click on next,
    • Now a Window  labelled ‘Build Setup” will appear! , Simply Click on Build and your Setup will be Ready!! 
    • The Build WIndow looks like this — >
    •  Congratulations!! you have successfully created your Setup! The Setup.exe can be used on Any Machine..

    The Setup itself creates the program registry,control panel and uninstaller inbuilt, so no headaches / extra efforts whatsoever!

    I hope you liked this tutorial, Do share it with your friends, and if you have any doubts/queries feel free to comment! Thanks!

  • Turbo Pascal 7 for Windows 7 /8.1 & Windows 10 [32bit-64bit] FullScreen Single Installer

    Turbo Pascal 7 for Windows 7 /8.1 & Windows 10 [32bit-64bit] FullScreen Single Installer

    Hello Friends, recently while searching on the internet i came across this thing called as Borland Turbo Pascal 7.0 which is an IDE cum Compiler for running and compiling Pascal language .pas files, Although pascal is taken to be one of the dead programming languages, Pascal is still used widely for education purposes due to its similarities with C and easier to understand programming structures and flows.  but as Turbo Pascal 7 doesn’t work on 64bit OS such as Windows 7/8/8.1 and it works small window in 32bit OS , i have created this installer — >  Turbo Pascal 7 for Windows 7|8|8.1 by TechApple.Net

    Salient Features of this installer are

    • Easy to use , and user friendly Borland Turbo Pascal 7 is used and that too runs fullscreen!
    • World’s most preferred Simple Pascal Language Compiler..that too on a single click installer !!
    • Works On All Versions of Windows, Windows 98,Windows 2000,Windows XP,Windows 7 [64 bit as well as 32 bit] As Well as Windows 8 and 8.1 too [both 64bit and 32 bit]
    • No need of installing DoSBoX and configuring or mounting anything! Everything right from DosBox to running turbo Pascal is built-in and the installer processes it automatically!
    • Thus , everything is automatic bundled in a single installer!
    • Useful For Students as well as Teachers and Professionals.
    • You can save the program directly within it,and open it next time From the Software itself for editing/Use.
    • You can Change the Units and TPDU Directories from the IDE if you want to..
    • Easy and Efficient Pascal Programming.

    Download it here –

    Click here to Dowload Turbo Pascal 7 for Windows 7 | Windows 8 |8.1  32bit and 64bit by Techapple.Net

    Mirror Link #1  Click here to Dowload Turbo Pascal 7 for Windows 7 | Windows 8 | 8.1 32bit and 64bit by Techapple.Net

    UPDATE – Now you can even enjoy your favorite Turbo Pascal compiler on your Android phones , check out the below tutorial – Click here to Install & run Turbo Pascal for Android phone or tablet

    Installation Guide :

    Its rather pretty simple,Just Open the installer and simply keep on clicking Next, Just Don’t change the default installation directory “c:\TP7\”

    Screenshots — >

    Successful Installation and Full Screen Working of Turbo Pascal 7 –>


    Successul Compilation of Sample HelloWorld Pascal Program in Turbo Pascal 7 –>


    .


    Support :

    • Double click the Turbo Pascal icon on the Desktop for Execution
    • If it Doesn’t run Full-screen simply give the command “Alt + Enter” To Open in Full-screen
  • Trick to Obtain Direct Download Links for Dropbox Files | Dropbox Direct Link maker Tool – CloudLinker

    Trick to Obtain Direct Download Links for Dropbox Files | Dropbox Direct Link maker Tool – CloudLinker

    In my last post i wrote about Generating Direct Download Links for Files from Copy.com Cloud Storage.
    Direct Links are links which you can simply share through email/blogs/websites on clicking which file download begins without any landing Page. UbuntuOne used to provide this feature earlier bydefault [Now its closing down] and as Copy.Com is not as popular and user-friendly as DropBox – World’s No 1 Cloud File Storage . Many readers asked me if such thing was possible for DropBox..? snd the answer is Yes! Its possible to Dropbox Direct Link  and i coded a simple tool – CloudLinker for the same !  well you can even do it manually , Just keep on reading to get this exclusive trick!

    Trick to Generate Direct Download Links of Files stored on Dropbox.com Simply follow the Steps Below –

    • Get the Dropbox Sharing URL of the file/s which you want to share,it would look like this “https://www.dropbox.com/s/…..”  , if you don’t know how to get the sharing URL , refer the following steps below..Step 1 . Right Click on the Filename which you want to share and now a dropdown menu will appear , as shown in the figure below 
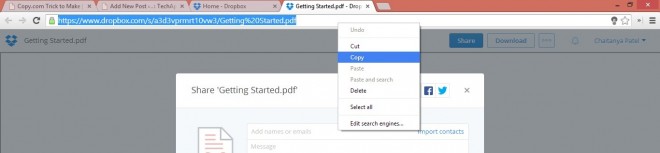
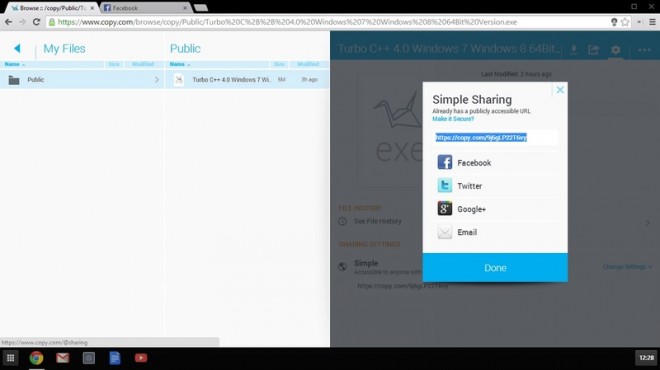
Now Simply Click on “Share Link” Option before the Download Option you’ll get the File Sharing Link which would look like the string discussed above or shown in Picture below –
       This “https://www.dropbox.com/s/…./<filename>” is your sharing URL ..Now Comes the Main Step /Method… 
    • Now , Simply Replace the String “www.dropbox.com” with “dl.dropboxusercontent.com” And your Direct Download Link is Ready!
    • for e.g the Sharing URL looks like “https://www.dropbox.com/s/…../<filename>” now after replacing “www.dropbox.com” with “dl.dropboxusercontent.com” the link becomes “https://dl.dropboxusercontent.com/s/…../<filename>” this link starting with “dl.dropboxusercontent.com” is your direct download link!
    • Pretty Easy isn’t it 🙂

    And For Users who want it readymade, i have created a simple tool – CloudLinker : Direct Link Maker for Copy.com And Dropbox.com
    Features —

    • Simply Enter your Copy.com and Dropbox.com Sharing URL and the Tool Will Provide you / Generate the Direct Download Clickable Links for you.! as shown in the figure —

    CloudLinker Works Nicely and Sound for both – Copy.com as well as DropBox.com Shared URL’s , it will be getting other cloud supported soon

    Update – CloudLinker v3.0 has been launched Online – Click here to Start Generating Direct Download Links using CloudLinker tool

    (The Online Version is based on a new Exploit if you want to use the Old Exploit, you can use the manual method )

    You can Download CloudLinker v1.0 By Clicking this Link


    Do Comment and share your views on this 🙂 and if you liked this post, Please Do Share so that your friends too can enjoy this Awesome Trick!

  • Copy.com Trick to Make | Obtain Direct Download Link of Uploaded content on Copy.Com Cloud Storage

    Copy.com Trick to Make | Obtain Direct Download Link of Uploaded content on Copy.Com Cloud Storage

    Hey Guys, welcome back 🙂 as per the latest news, Canonical has rolled back it Ubuntu One Cloud Storage Service 🙁 which was simply great as it supported Direct Linking Downloads of the Files Uploaded on the Cloud Storage, Naturally after its shutdown i was looking for alternatives and to be honest i found a good i mean great one 😛 — Copy.com

    Salient Features of Copy.com are

    • Speedy Cloud based storage for storage of Personal,Private as well as Corporate Data.
    • Free 15GB Space after registeration, and if you register under my referral you and me both get 5GB extra, so why not we both can benefit. Click here to register under my Ref. to Copy.Com
    • Like UbuntuOne its possible to hotlink/or give Direct Download Link by a Special Trick mentioned here —


    Trick to Obtain Direct Download links for your files uploaded on Copy.com to Share in Public

      1. First of all Upload your files on Cloud.com which you want to share, now navigate to the Folder and then to the file for which you want to generate the Direct Download Link..
      2. Now right Click on the file which you want to get link and click on share, you’ll be shown a dialog box as shown in the figure with short link,


      1. Now , Enter the Short Share URL in your Browser’s address bar you’ll be redirected to a page asking you to download file as shown below

    1. Here Copy the Big URL containing “https://www.copy.com/s/***” and Now HERE Comes the Main Part..
    2. I have Made a specific tool for Making Copy.com Direct Download Links , First of all Download it from here..
      Click here to Download Copy.Com Direct Link Maker [Size : 20kB]
      Update : You can even use the Online Cloud Linker tool if you don’t want to Download the tool Its Way Simpler! – Click here to use Online Cloud Linker tool!
    3. Now Simply enter the big Share URL “https://www.copy.com/s” and click on generate button, you’ll be given Direct Download Link for the Shared URL as shown below 🙂

    Now , you can copy the Direct Download URL and Share it Publicly for Direct Downloads or store them for future use

    Manual Trick Without Using Direct Link Maker

    • Simply Replace “https://www.copy.com/s/***” with “http://copy.com/***” and URL is Direct Downloadable / HotLink enabled 🙂
    • ex. Direct Download Link for “https://www.copy.com/s/xgsjjLci9Gkv/Copy.Com%20Direct%20Link%20Maker.exe” will be “http://copy.com/xgsjjLci9Gkv/Copy.Com%20Direct%20Link%20Maker.exe”
    • Test it , it simply Works!

    Hope you all enjoyed this Post, Do Comment if you find any queries and share the trick if you like it 🙂

    Update!!

    Similar trick is revealead for Dropbox too..! and Our Cloud Direct Link Maker Gets an Update — >Check out this Post ! 🙂

  • 3 Ways to use Telegram on PC! | Run Telegram on PC/Windows/Linux without any Android Emulator !!

    3 Ways to use Telegram on PC! | Run Telegram on PC/Windows/Linux without any Android Emulator !!

    A new instant messaging app has hit the Smartphone market recently,and is making great news especially after Whatsapp was bought by Facebook, The Name of the Instant Messaging app is Telegram.

    What is Telegram/how is it different?
    Telegram may be defined as a clone of Whatsapp,with enhanced features,more security and privacy settings and more facilities as compared to whatsapp.

    Features :

    • Familiar Simple User Interface inherited from Whatsapp.
    • Group Chat can be done simultaneously with 100 people. [Whatsapp maximum limit is 50]
    • Allows sending of Documents and files. [Whatsapp doesn’t allow any documents/files sending]
    • Photos and Video sending size upto 1GB. [whatsapp limit 512MB]
    • Open Source and Cloud Based.
    • Allows you to change your privacy settings,last seen,etc.
    • Messages are encrypted with highest standards and no logs are saved on the server so your chats are completely private!
    • Still, if you are not happy you can even send Encrypted QR messages which only can be decrypted by the Receiver..
    • And All these features are Ad-Free and Free to Use forever,unlike Whatsapp which charges Subscription Fees…

    So, Now 3 Ways you can install and Use Telegram on PC

    Way – I

    1.  TDesktop [Telegram for Windows] [Windows/Linux] :  tdesktop is unofficial Telegram Client for Windows, it comes with a simple setup file, which you can download and setup as any other windows software by specifying directory and clicking next,next!, your telegram for windows [tdesktop] will be installed ,and you can now put number and register. Linux users can use it directly in Wine! it works on all versions of windows 7/8/8.1/XP

    Click here to Download the Telegram for Windows Client / TDesktop

    Instructions :
    now you can locate the shortcut on your desktop. Open the telegram PC app, and..
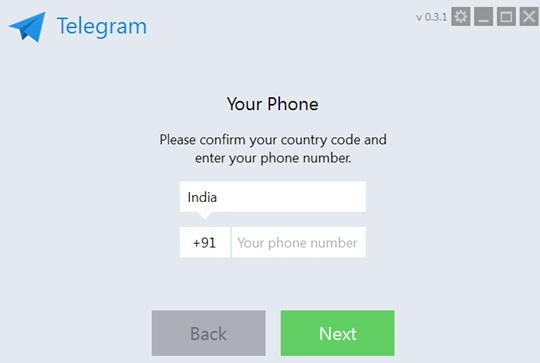
    Now, Enter your Country Code and Mobile Number and Click on Next, you will receive verification code on your number, now put it inside the tDesktop App and yo!  you can start chatting using Telegram

    Way – II

    2.Google Chrome Extension/ App  [Windows/Linux/MAC/Chrome OS] :  If you are not interested in installing the tDesktop client and want to use Telegram in Google Chrome, you can do it too, just install the Webogram Chrome extension from here and follow the same mobile number verification steps to use Telegram.

    Click here to Download/add Webogram [Telegram] Google Extension/App

    Way – III

    3. in your browser Direct/Simple URL  [Window/Linux/MAC/Chrome OS] : Now if you feel lazy and don’t want to install neither Windows client nor Google Chrome Extension , you can Simply type or Go to this Online Webogram URL to load Telegram directly in your Browser!! Simple and efficient isn’t it ?

    Go to this URL to load Webogram right in your Borowser

    http://zhukov.github.io/webogram

    or you can CLICK HERE to load Telegram in your Browser itself!

    here’s a glimpse of Telegram in my Browser : Google Chromewebogram

    So, Lets Enjoy this New,and Opensource Messaging app 🙂 Do like and Share this post if you liked this, else if you have any complaints/suggestions or require any help Feel free to comment 🙂

  • StarCron Browser v1.0 For Windows – Free Unlimited StarSports.Com Streaming !!

    StarCron Browser v1.0 For Windows – Free Unlimited StarSports.Com Streaming !!

    Hello Guys,
    well most of you must have heard about starsports.com : the leading online service for worldwide Sports Streams, well it provides an Official Free Preview of its Streams to the Users for First Ten Minutes Only 🙁  later on,to view the streams we either have to subscribe premium packages or have to go for unofficial and risky streams which may contain malware and such things 🙁

    So,in order to overcome these limitations of StarSports.com We introduce the StarCron Browser for Windows..!!

    Now, lets have a look on the features of StarCron Browser –

    Features

    • In Built Ad-Blocker to Fight and Block those Nasty Ads.! you don’t love them,we don’t love them either 😀
    • ‘Unlimited Sports Events Streaming through StarSports.Com such as
    1. Cricket
    2. Football
    3. Hockey
    4. Lawn Tennis
    5. Table Tennis
    6. Golf
    7. and Many more through StarSports.Com
    • Can,be perfectly used as a Normal Browser too,thus serving the purpose of 2-in-1 🙂

    You can Download The StarCron Browser v1.0 from here–>

    Click here to Download StarCron Browser v1.0 For Windows

    Procedure / Method for using Unlimited StarSports.com Streaming Matches

    • Install StarCron Browser v1.0 For Windows
    • Now Navigate to The site www.StarSports.com and select the live stream which you want to view. [Note : The stream must be available in your country for you to view,if it ain’t available try changing your IP address to get your desired stream]
    • Now once you start with your live stream you will be Given “FREE PREVIEW OF 10 MINUTES” We are Going to increase these 10 minutes to unlimited using StarCron Browser..!
    • Now,after your free preview of 10 minutes is end,or done over with simply right click in any blank area of the WebPage of your Stream and select the option “Apply hack for StarSports.com by TechApple.Net” which is the fourth option as shown in figure..

    starcron

    • After clicking it will display a message “Hack Successfully Applied”,in bottom left corner of your screen..!
    • Now Simply Reload the Page!! and voila!! 🙂 Your Free Preview has been Extended !! 🙂 😉
    • Repeat these steps to get Unlimited High Quality Streaming of your Favourite Sports Videos! on starsports.com!

    You can Download The StarCron Browser v1.0 from here–>

    rp_large-downloadnow.png

    Click here to Download StarCron Browser v1.0 For Windows

    Mirror Link #1 Click here to Download StarCron Browser v1.0 from Mirror #1

    Mirror Link #2 Click here to Download StarCron Browser v1.0 from Mirror # 2

  • TiCTeX – All in One LaTeX Bundle-installer with inbuilt Compiler and IDE/Editor | Easy install LateX on Windows/Linux/Ubuntu

    TiCTeX – All in One LaTeX Bundle-installer with inbuilt Compiler and IDE/Editor | Easy install LateX on Windows/Linux/Ubuntu

    Hello Guys, recently i had to submit a seminar report in my college, but it was to be written in LaTeX.. Now what is LaTeX ?

    • LaTeX is a document preparation system and document markup language,used for preparing standard documents,which are preformatted , in an efficient and easy manner..

    So Now for installing LateX on windows it was quite difficult as it required a separate latex compiler,a separate IDE etc,and also the information regarding which compiler to be used,which IDE/editor should be used etc,is very scarce..so using the Best LaTeX Compiler available : MiKTeX,   Best LaTeX editor : TeXMaker  and various other simple tools required for Preparing LateX, we created TiCTeX : An All in One LaTeX Bundle cum installer with inbuilt MiKTeX,TeXMaker IDE/Editor TiCTeX has the following Components inbuilt in it

    • MiKTeX : The Best Compiler with all the Libraries required for LateX Document creation.
    • TeXMaker : The Best,efficient and most widely used editor cum compiler for writing and creation of Latex documents,with inbuilt PDF Viewer.
    • Asymptote : used for photoand diagram related functions and viewing.
    • GhostScript : An Engine for rendering and viewing .ps and .pdf File formats.
    • GSViewer : A viewer for viewing the .ps and .pdf File Types.

    All this have been bundled up in a Single Package cum Bundle :-> TiCTeX so you can just install TiCTeX and start using and creating documents in LaTeX as simple as 1…2…3.. Everything is included in TiCTeX..so it will run on basically any Windows Operating Systems : Windows 98 / XP / as well as Windows 7 / 8 /8.1 that too on both the 32 bit and 64 bit Variants.. as well as on Linux Too!! UPDATE!! Fixed a Critical Bug in the Previous Version which was causing Compilation errors 🙁 Please Download the New Version From Below Links.. Also Launched a Linux Version of TiCTeX LateX at this LInk CLick here to go on Linux Version – TopLinuxApps.com   Click here to Download TiCTeX For Windows ..one click one bundle solution for LaTeX on Windows OSs

    Click here to Download TiCTeX for Windows

    Mirror Link # 1 Click here to Download TicTeX from Mirror 1. Mirror Link # 2 Click here to Download TicTeX from Mirror 2. More Mirror Links will be added soon..! if you have any doubts/queries/request do comment..and if you liked this post Do share 🙂 Thanks!