Category: Windows Tricks and Tutorials

  • Download Bluestacks + N [Nougat] for Windows 10 / 7 / 8.1 PC & Laptop [Full Offline Setup]

    Download Bluestacks + N [Nougat] for Windows 10 / 7 / 8.1 PC & Laptop [Full Offline Setup]

    The major concern of Android emulators is that many new games and apps are unusable on PC due to old android versions of Emulators.  But not anymore Bluestacks has launched – Bluestacks + N (Nougat Emulator) which is an android Nougat based emulator , thus you can now easily install and play android Nougat on your PC / Computer – Windows 10 / 7 /8.1 . Since its a secret beta version, we will cover here the Direct download of Bluestacks + N for PC / laptop which will let you download Bluestacks N for Windows 10 / 7 / 8.1 for free!.

    Bluestacks N Download
    Download Link Download Link
    Operating System : Microsoft Windows 10, 7 & 8.1
    Type of Installer : Full Offline Installer Setup
    License : Free to use

    Bluestacks N for Windows 10 / 7 / 8.1 Download & Installation Steps  – 

    • First of all in order to install Bluestacks Nougat edition , we need to download the Bluestacks N full offline installer from the link given below –
      Click here to Download Bluestacks N for PC – Windows 10 / 7 / 8.1 (Full 32-bit & 64-bit offline Installer)
    • Now, until the download is done, let’s have a look onto the exclusive features of Bluestacks + N –
      • Install latest Android version – Nougat on your System to test apps and ADB
      • Play Android games on PC / laptop with full screen view (for great graphics experience)
      • Use your Keyboard and mouse to simulate touch, this makes gameplay easier and lot of fun
      • Bluestacks N version uses OpenGL hence, it works smoothly even without Graphics cards or dedicated hardware
      • Multi-player and Google Play support! . Hence download and sync your game progress across devices
    • Click here to Download Bluestacks N Beta
      Click here to Download Bluestacks N for PC/laptop

      Once, you have downloaded the setup by clicking the above link / Bluestacks N logo, double-click on the downloaded file to begin the installation process.

    • It will show you a logo of the new “Bluestacks + N” version. Click on the “Install Now” button as shown in the following image –
      Bluestacks + N Install for Windows 10 / 7 / 8.1
      Bluestacks + N Install for Windows 10 / 7 / 8.1

      Now, it will start installing Bluestacks Nougat on your system, by extracting files, copying binaries and other steps.

    • Please wait while the Engine is Installed and the progress bar turns upto 100% . 
      Bluestacks N Download for PC
      Bluestacks N Download for PC / laptop

      Once the installation is finished , it will ask for your input to complete the installation. Here click on the “Complete” button as shown in the following screenshot –

      Bluestacks N emulator for Windows 10 / 7 /8.1
      Bluestacks N emulator Installation complete

      After clicking on the “Complete” button it will automatically auto-start the Bluestacks Nougat edition for the first time . First boot may take some time , so please be patient until the loading is completed.

      Bluestacks N Loading on Windows 10
      Bluestacks N Loading on Windows 10
    • That’s it ! After this step you can now log on to your Google Games and play account to install games , sync progress and play games more easily !
      Bluestacks + N Google Games Sign In
      Bluestacks + N Google Games Sign In

      Besides, you can even use the Play Store and camera based apps for some fun with photo editing or video calling and chats.Also you can install external APK and apps by clicking on the “Install apk” button highlighted in the above image.

    • That’s it ! you can now seamlessly enjoy the latest Android Nougat version by Downloading Bluestacks N for PC / laptop –
    • Click here to Download Bluestacks N for PC – Windows 10 / 7 / 8.1 (Full 32-bit & 64-bit offline Installer)
    • Incase if you face any problems or difficulties , feel free to let us know in the comment section below. 
  • Movavi 360 Video Editor: The Best Video Editing Tool

    Movavi 360 Video Editor: The Best Video Editing Tool

    The modern day technology is improving with every passing. The new innovations are taking place to enhance the quality of products the end users get. A number of tools are coming up in the video editing industry to enhance the overall perception of how people watch the movies and short films. 360 video editing software is a fabulous tool that lets you make a 360 degree video in few minutes. Let’s explore the tool in detail.

    360 video

    About Movavi 360 Video Editor

    This software allows you to create spectacular immersive videos that can definitely impress the viewers. You can enhance the quality of the videos in just few steps or can turn them into something new. Make your own movies using the transitions, multiple filters, and special effects. Use Chroma Key effect to change the background or show multiple videos on single screen with the Picture in Picture effect.

    download pic

    Not only this, you can adjust the video parameters, stabilize the shaky footage, remove defects, enhance movie quality, create tutorial & video presentations, import the videos from different sources, and do much more using this software.

    Topnotch Features of Movavi 360 Video Editor

    Movavi 360 Video Editor is an impressive tool that can even be used to create awesome VR videos. It is packed with some of the most exclusive features, few of which are mentioned alongside.

    • 3D Preview: You can navigate freely inside the preview window in 360 degree mode. You can actually experience the video in three-dimensions.
    • Color Adjustment: You can enhance the quality of movies by tweaking the brightness, saturation, and few other parameters manually or automatically
    • Ultra HD Video Support: You can even upload and export the videos in 4K resolutions without any trouble.
    • Picture in Picture Effect: You can now insert multiple videos inside your original 360 degree footage.
    • Chroma Key Effect: The entire background of the video can be changed with this effect and you can transport the subjects anywhere in the video.
    • Speed Adjustment: You can easily control the speed of your footage for creating the speeded-up or slow motion effects.
    • Audio Editing: You can normalize the sound, add sound effects, and remove the background noise easily.
    • Highlight and Conceal: You can control the focus to make the viewer concentrate on specific subject by simply blurring out the parts of the video.

    Why choose Movavi 360 Video Editor over Other Software Tools?

    There are a number of reasons to go with Movavi 360 video editor over other tools. The extraordinary performance and awesome features make it the first choice for just any user.

    • It supports multiple input and output formats for audio, video, and image files.
    • The videos can be captured from camcorders, TV-tuners, camera, webcams, and VHS as well.
    • You can manage multiple video and audio files on single timeline panel.
    • You can record the audio from the microphone and other electronic sources.
    • The videos can be converted into mobile-ready formats.
    • You can add titles in between the video using different fonts and colors.
    • Make use of some dominating special effects and filters to create a stunning video.

    The Setup: A Brief Tutorial

    You can download and install the software either for free or after making the payments on your device. After you have installed the software, follow the below guide to use it perfectly.

    • Open the software by clicking on its desktop icon and import the movie you wish to edit.

    editing

    • You can different transitions to your video(s) using different transition effects and enhance the quality.

    different

    • Add title to different parts of the video in an innovative manner using different colors and fonts.

    titles

    • Set different filters and make it more eye-pleasing for the viewers.

    eye pleasing

    • Once you are done with the editing, you can start capturing it in desired format.

    format

    Pros

    • Multiple input/output format supported
    • Create VR compatible videos.
    • Free Lifetime version available with few basic features
    • Available in two different languages

    Cons

    • A bit complex to understand
    The Verdict

    Movavi 360 Video Editor is an awesome tool that is tailored for the aspiring video editors. Now, you can edit 360 degree movies/films using this tool and add special effect to them. With this stunning software, anyone can create VR videos, and 3D presentations. You can try out this tool now and enjoy editing the movies and films without much hassle.

  • NordVPN – Enjoy Complete Internet Freedom with Tightest Level of Security

    NordVPN – Enjoy Complete Internet Freedom with Tightest Level of Security

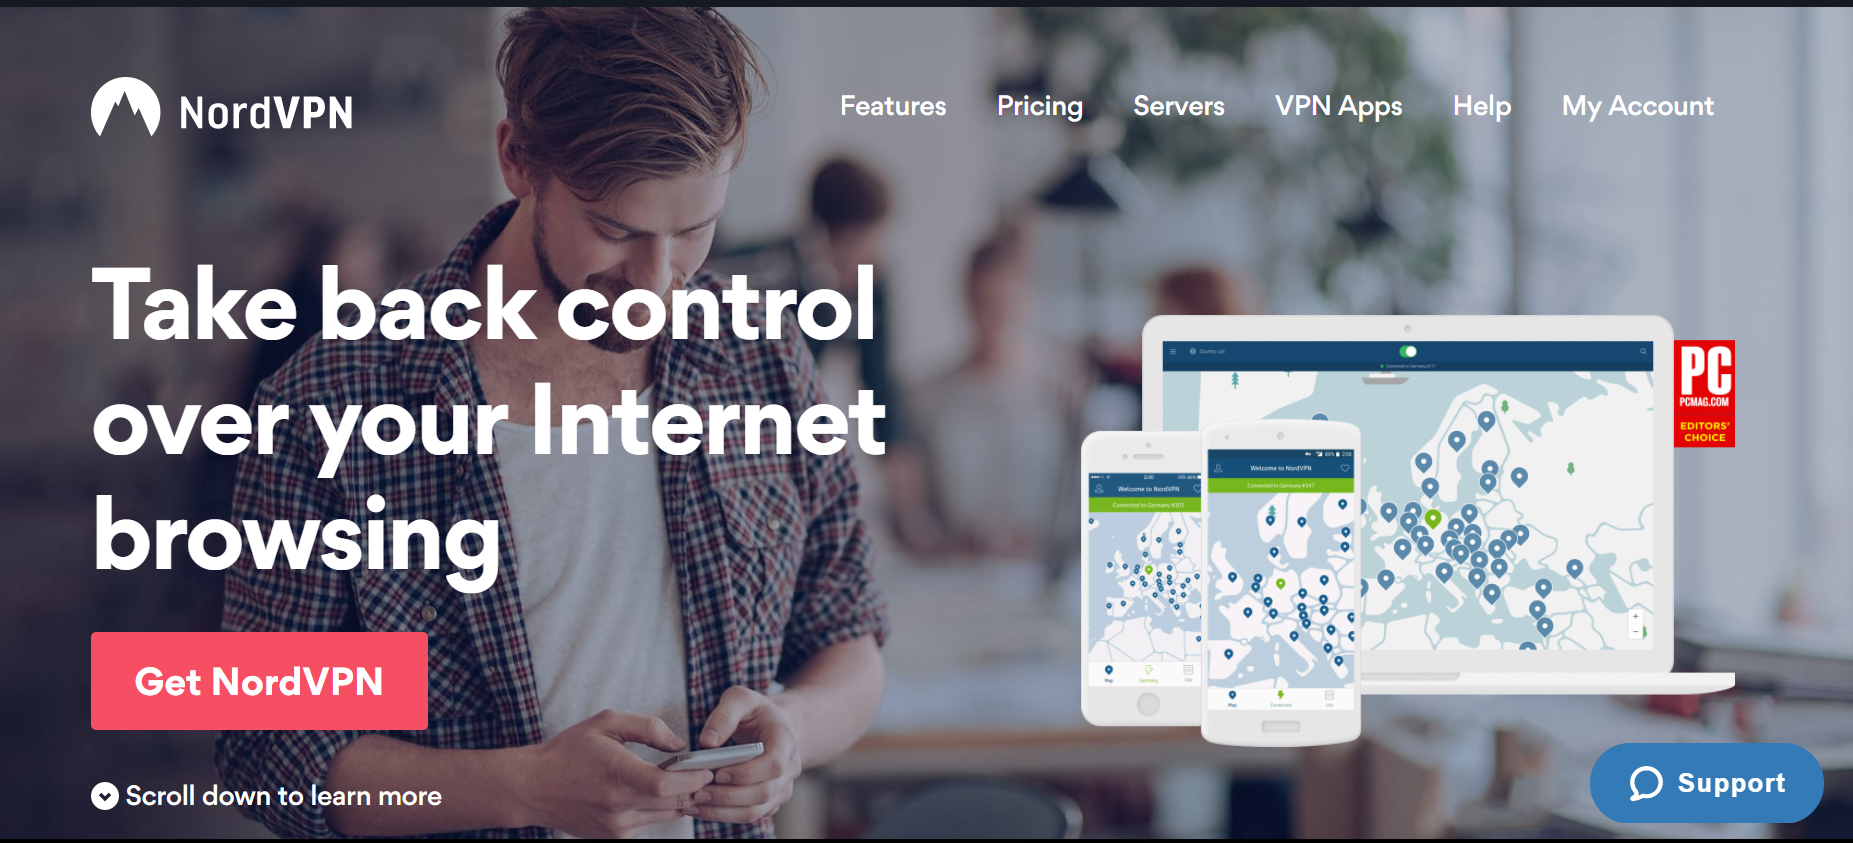
    Internet Privacy is a myth and it would be better for you to stop believing in this myth. You are often tracked by a number of government agencies, your ISP, and a number of spies & hackers trying to bypass your network security. You are at a great risk of leaking your private information on the internet. However, this problem has been solved by the most reliable VPN provider of the world – NordVPN. Let’s learn more about this all-time favorite VPN provider.

    About NordVPN

    internet security

    NordVPN is a Panama-based company that was started by a group of friends in the year 2012 and just in a span of 5 years it has spread its terrain in 60+ nations with a network of 1000+ servers around the globe. Its name has been inspired from the Nordic Ideals of – Trust, Freedom, Confidence, and Innovation. The company has witnessed a significant year in just 5years and has even won the PCMag’s Editor Choice Award two-years in a row.

    NordVPN – Topnotch Features

    features

    NordVPN is the most reliable & trustworthy VPN provider across the globe that have won a place in the heart of its customers. It has been made possible because of the quality features it provides to its customers.

    Double VPN with CyberSec

    It is one of the fewest VPNs that offer ‘Double VPN’ protection to all its users. To provide maximum online security, NordVPN integrates the benefits of VPN with the Onion Router. Moreover, its CyberSec technology prevents the phishing attempts, DDoS attacks, adware, malware, and other threats.

    Large Network of Superfast Servers

    NordVPN offers blazing fast servers to all its clients making streaming and browsing really quick. Moreover, it has a large network of over 1000 servers in 60+ nations of the globe. It doesn’t throttle your internet speed, so you can upstream and downstream without any restrictions.

    Strict No-Logs Policy

    When you connect to NordVPN’s servers, it gives you complete assurance that no logs will be stored in its servers. This means that none of your browsing sessions or private information will be logged on its servers.

    Automatic Kill Switch Technology

    The automatic kill switch technology comes handy during the connection lost situations. At times when you are experiencing slow internet speed and the connection is disconnected; all the current sessions will be terminated there and then by NordVPN to avoid leakage of sensitive data.

    DNS Leak Resolver

    Sometimes, your DNS might start leaking the information about your browsing sessions to your ISP. But with NordVPN, you are connected to its DNS servers and there is no risk of any leakage. All your internet traffic is handled by NordVPN’s DNS servers.

    SmartPlay Technology

    Its SmartPlay technology allows you to stream 400+ streaming websites from just anywhere across the globe. With its SmartPlay technology, the streaming becomes much quicker than your imagination.

    Available for Multiple Platforms

    devices

    NordVPN is available for iOS and Android users. Even the Windows and Mac users can enjoy using this VPN on their devices. Moreover, you can connect to NordVPN from 6 devices simultaneously.

    Pricing & Plans

    pricing

    NordVPN offers 3 different plans catering the needs of different users and offers 30-Days money back guarantee to all its users opting for its plans.

    • Monthly Plan: If you opt for monthly plan, you need to pay $11.95/month to enjoy its services. This plan is good for the first0time testers.
    • Half Yearly Plan: You can avail its half-yearly plan at $7/month billed for 6 months. It can come handy for individuals and small business owners.
    • Yearly Plan: You can opt for yearly plan at $5.75/month billed annually. This plan is best suited for the people who are regular VPN users and wish to save money.

    Pros

    • Double VPN protection
    • No P2P throttling
    • Unlimited Bandwidth
    • DNS Leak Resolver
    • 6-Simultaenous Connection supported

    Cons

    • Green address bar or EV SSL not there, this is not a big issue for 99% of users.
    The Bottom Line

    NordVPN is one of the most reputed and trusted VPN provider in the entire VPN fraternity. It is bit expensive as compared to its competitors, but the extraordinary features cover up for its cost. You will surely enjoy using this VPN. Try it now!

  • Top 5 Nintendo 64 N64 Emulators for PC & Windows 10 with Joystick Support

    Top 5 Nintendo 64 N64 Emulators for PC & Windows 10 with Joystick Support

    Nintendo 64 or N64 is the first gaming console with 3D Graphics Rendering and 64-bit architecture. It is considered as one of the best gaming consoles ever produced by Nintendo.  

    Nintendo 64 has many great games such as Legend of Zelda, Super Mario 64 which are playable even today. Now, since the console is discontinued ; the only way to re-play the old game classics is by emulation.

    Thus, we present you the Best 5 Free N64 Nintendo 64 Emulators for PC and Windows 10 which will let you play N64 games on your Windows PC or Laptop.

    Note – All the emulators below do not come with any game (ROMs) as those are copyrighted. however, a simple google search with game name + n64 rom will give you the game ROMs which can be used to play games in any of the below emulators.

    Top 5 Best N64 Emulators for PC – Windows 10/7/8.1

    1. Project 64

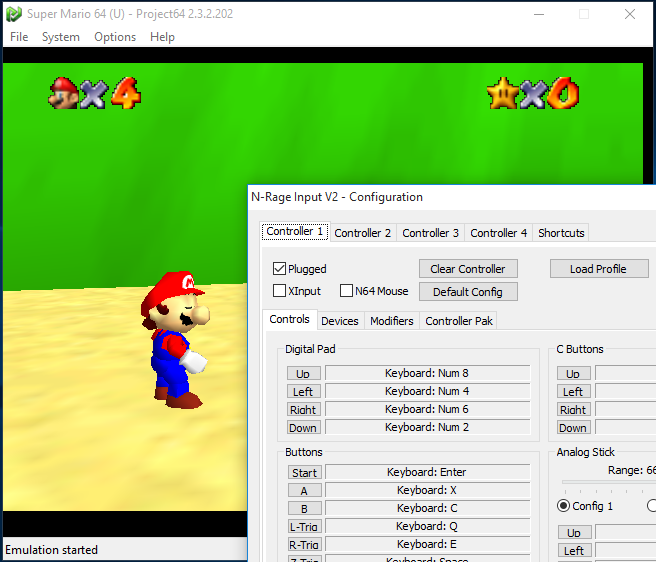
    Project 64 Nintendo 64 or N64 Emulator for Windows
    Project 64 Nintendo N64 Emulator

    Project 64 is perhaps the most actively developed N64 emulator , and also is the most easiest to use too.

    Project 64 has fast and speedy Nintendo 64 emulation as well as it contains unique features such as –

    • Gamepad / Joystick Controller Support.
    • One-click installer (Either install and run or Run Portable version)
    • Ability to Load & Save Game States
    • Cheats Support

    2. Nemu 64

    Nemu 64 Nintendo 64 Emulator for Windows 10
    Nemu 64 Nintendo 64 Emulator for Windows 10

    Nemu 64 is another compact yet unknown N64 Emulator for Windows OS. It didn’t require any installation and ran smoothly with good emulation. Besides, that Nemu 64 has some salient features such as –

    • Multi-player support (Offline)
    • Net based Online Multi player support.
    • Gamepad & Joystick Compatible
    • Save & Load game states anytime

    3. 1964

    1964 Nintendo 64 Emulator for PC
    1964 Nintendo 64 Emulator for PC

    1964 is a popular Nintendo 64 emulator for PC , which is available for Android as well. 1964 has all the standard features like the previous two, but it also has support for additional ROM customization, and custom ROM support. Thus, you too can create your own cheats and customization for games while using 1964.

    However, the User Interface sometimes stops the game and causes the played game to crash unexpectedly , however it can be resumed by clicking the pause button from the menu bar, and then tapping the play button.

    4. Supra HLE

    Supra HLE N64 Emulator for PC / Windows
    Supra HLE N64 Emulator for PC / Windows

    While the above emulators are easy to use for general public, the Supra HLE and Ultra HLE are for the pro users.

    HLE – High Level Emulators offer advanced Configuration options, right from the Video plugin, audio plugin to be used to RAM and buffer size. However, we failed to get any game running on both the HLE emulators on Windows 10, but they worked smoothly on Windows 7

    Note – Use the packaged application – Supra Configurator 2.o to configure Supra before running the emulator.

    5. Ultra HLE

    Like mentioned above, Ultra HLE is another High Level Emulator with advanced options. Infact Ultra HLE also comes with in built debugger to debug game errors. But like Supra, it too failed to work on our Windows 10 system due to absence of old gfx video plugins which are absent in newer versions of Windows.

    Click here to Download Ultra HLE N64 Emulator for PC & Laptop

    Thus, these are currently the latest Best free N64 Emulators for Windows Systems (PCs & Laptops) which will let you play your favorite Nintendo 64 (N64) games on PC with Joystick and save / load game support. If you know of any better emulator or encounter any issues while using them feel free to comment.

  • Qoppa PDF Studio 12 Review – A Powerful PDF Software for Windows 10, Mac and Linux

    Qoppa PDF Studio 12 Review – A Powerful PDF Software for Windows 10, Mac and Linux

    A number of enterprises depend upon the PDFs in some or the other form – whether it is to create the forms, brochures, documents, or whatever purpose you need to use the PDF files. Many people assume that there are only few choices available when it comes to creating/editing the PDF documents. A tool that can work across different operating systems can be a delight for the enterprises with heterogeneous network of computers. PDF Studio 12 by Qoppa Software is a versatile cross-platform tool that allows the users to create, review, edit, annotate, or do anything with the PDF document.

    Download Links For All OS

    PDF Studio Standard (Free Trial)

    PDF Studio Pro (Free Trial)

    Let us have a brief insight about the tool.

    PDF Studio 12 – A Brief Know how

    featured imageThe PDF Studio 12 is a popular all-in-one PDF editor that provides all the useful features at much lower price than Adobe Acrobat and few other editors. It is highly compatible with Windows, Mac, and Linux operating systems and maintains the international standards. If you are looking for efficient software then PDF Studio 12 can come to your rescue. Let us learn about some of the best features of this tool.

    Top Features of PDF Studio 12

    This tool is packed some of the most versatile features. It allows you to create and edit the existing PDF documents easily. Let us explore some of the most versatile features of this tool.

    images

    Review and Annotate

    You can easily highlight, cross-out, or underline the text in the existing PDF documents. Add the text boxes, sticky notes, freehand annotation, sound annotations, graphical annotations, hyperlinks, and rubber stamps as well. You can even import and export the annotations in XDP/FDF/XFDF formats.

    formats

    Design PDF Forms

    Its interactive PDF form designer lets you to create the PDF forms supporting the JavaScript. You can even fill the non-interactive forms using its typewriter tool. The interactive form fields can be flatten as well.

    file formssub dialog box

    Create and Assemble the Documents

    You can scan the papers directly to the PDF. The MS Word documents, images and text files can be converted to PDFs. You can even extract, move, rotate, insert, or delete the pages from the existing document. Even the multiple files can be merged to a single document. Also, apply the watermarks, headers, footers, and do custom actions. You are free to set the document properties and the initial view.

    pro version

    Edit the Content in the Document

    You can easily edit the text content and its properties in the document. Redact and move the text, images, and shapes according to your comfort. The image size can also be edited within the document. You can even optimize the PDFs to reduce its size.

    reduce size

    Add Security Features to the PDF Document

    The documents can be made secure using the passwords and encrypted with the highest level of encryption. You can manage the user roles on the documents and can digitally sign them as well. Not only this, the trusted certificates and the digital ids can also be managed by you.

    filesmulti window

    Batch Functions

    You can work on multiple documents at a go. Convert, crop, merge, apply custom actions, preflight, set initial view, set security, print, and do whatever you want with the document.

    batch functions

    Convert to Different Formats

    You can convert the PDF to text, images, HTML 5, Fast Web View, and few other formats. The images, MS Word documents, text files can also be converted to PDFs.

    formats changedestination folder

    Pricing

    This software is available for Windows MAC, and Linux users. A user can download its free version and utilize most of its features. However, to utilize the premium features, the users must purchase the premium version of this software. It is available in Standard and Pro version which are priced differently.

    pricing

    Pros

    • You can utilize most of its features for free.
    • Gives you liability to edit the PDF documents freely.
    • Available for Windows, Mac, and Linux.
    • Available in four different languages – English, German, French, and Spanish.

    Cons

    • A little complex tool for a newbies out there.
    The Bottom Line

    PDF Studio 12 an expert software that allows you to convert documents and images into PDFs and vice versa. It is a fantastic tool to edit the documents with ease and utilize its potential to create PDF documents and forms. If you are fed up with Adobe Acrobat, you must give it a try once.

  • Top 5 Free SNES Super Nintendo Emulators for PC [Windows 10/7/8.1] to Play SNES games with Controller Support

    Top 5 Free SNES Super Nintendo Emulators for PC [Windows 10/7/8.1] to Play SNES games with Controller Support

    Super Nintendo Entertainment System (SNES) or Super Comboy as it is known is one of the most popular 16-bit gaming consoles from the 90s and is regarded as the best 16-bit console ever. With speculations that Nintendo is releasing a new SNES classic version in 2017 and considering its limited availability it makes good sense to emulate SNES on PC. In this articl,e we write about the best SNES emulators for PC or laptop. These Super Nintendo emulators will let you play Windows 10/7/8.1 [64-bit & 32-bit]

    Top 5 Best SNES Emulators for PC or Laptop – Windows 10 / 7 / 8.1


    SNES Emulators # 1 – BSNES

    BSNES Emulator for PC
    BSNES Emulator for PC

    Considering the SNES is a 16-bit console there are lots of emulators with smooth graphic and audio emulation. Hence, we had to sort them on basis of the features and ease of use they provided and BSNES emerged as the first .

    BSNES lets you emulate SNES games and has a lot of features such as –

    • Ability to emulate multiple gaming consoles – Famicom (NES), Super Famicom (SNES), and even Game Boy, Game Boy Advance too.
    • Gamepad and external game controller joystick support
    • Fast and Speedy emulation.
    • Only con with BSNES is that it supports .sfc SNES roms only hence, we will recommend you to try out SNES GT

    Click here to Download BSNES Super Nintendo emulator for Windows 10 / 7/ 8.1


    SNES Emulator # 2 – SNES GT

    SNES GT SNES Emulator for Windows 10
    SNES GT SNES Emulator for Windows 10

    SNES GT has a pretty neat audio and video emulation for SNES games and unlike Snes9x doesn’t require any dependency files either. Plus it also has some salient features such as –

    • Ability to save game states and load games
    • Controller / gamepad (Multi tap) support
    • Multiplayer slots and multi-player game support

    Click here to Download SNES GT (EmuCR) SNES Emulator for PC / Laptop [Windows 10 / 8 /7.1]


    SNES Emulator # 3 – Snes9X

    Snes9X SNES Emulator for PC
    Snes9X SNES Emulator for PC

    Snes9X perhaps beats BSNES when it comes to features and game emulation. But its dependency on Direct X makes it unusable to download and run, it requires Direct X installation for it to work.

    However, the Direct X library requirements gives it even more unique features and abilities such as –

    • Game Cheats Support
    • Ability to Save game states and load them from the game saves.
    • External Gamepad support.

    Click here to Download direct X Runtime library for Windows 10 / 7 /8.1 [Snes 9X won’t work without this]

    Click here to Download Snes 9x SNES Emulator for PC – Windows 10 / 7 /8.1 [32-bit & 64-bit]


    SNES Emulator # 4 – ZSNES

    ZSNES Super Nintendo Emulator for Windows 10/7/8.1
    ZSNES Super Nintendo Emulator for Windows 10/7/8.1

    ZSNES is one of the oldest SNES emulators around still its on the fourth position due to its medium level user interface, the lack of mouse supports in the UI makes it here.

    Besides, that ZSNES has all standard features such as –

    •  Emulation support for all type of SNES games .sfc , .svc , .zip
    • Speedy and fast gameplay

    Click here to Download ZSNES Super Nintendo Emulator for PC – Windows


    SNES Emulator # 5 – SNEeSeW

    SNEeSeW SNES Emulator for Windows
    SNEeSeW SNES Emulator for Windows

    The SNEeSeW emulator has a complex name and an even complex User Interface. But it provides the most customizations ever in an emulator to play SNES games right from the RAM Size, Video buffer etc.

    Due to the high customization options except for the window size, you can play almost any SNES game inside SNEeSeW which might not have worked in the previous emulators.

    But the User interface of SNEeSeW does take time to get used to.

    Click here to Download SNEeSeW SNES emulator for Windows 7/8.1/10 XP / Vista


    Thus, these are currently the Best Free SNES Emulators for Windows 10 PC , Windows 7/8.1 and laptops are supported too. Incase, if you’re unable to map your Joystick directly you can even map your joystick to emulate keyboard key press to play games – Follow this tutorial to map your Joystick to Keyboard. Incase of any queries feel free to comment below!

  • How To Install pCloud Drive and Sync From Windows 10/8.1/8

    How To Install pCloud Drive and Sync From Windows 10/8.1/8

    Business need space, where they can access the documents to files that are required to run a business efficiently. There are thousands of cloud services are available in the world, but only a few of them have the features, which can help you run a business smoothly. One among the few is pCloud, which provides you Features and Functions to assist you to run your business smoothly.

    How to Install Our pCloud Drive and Sync Some Folder from Your Computer

    PCloud offers you 50GB storage free account without charging you a penny for it, and the validity is for a lifetime. The services are extremely reliable, even for the free version of it. To start with the PCloud, you have to download their latest version of pCloud Windows PC.

    #1 – Features

    pCloud is unique, and it comes with several features, which are incomparable with other Cloud Storage. Here are the unique features of the pCloud.

    1 – pCloud Drive

    When you open “My Computer,” you can see that there is an external 500GB partition on your PC, which happens to be the pCloud virtual storage drive. The virtual partition does give the vibe of physical hard drive feeling, and you can use it the way, you use your regular partitions.

    Example: You can access to Copy files, Move folders, and much more.

    virtual serverNote: You have to download and install the pCloud program.

    2 – Password Protection

    pCloud take measures when it comes security. The latest version of pCloud comes with a password protection download links. When you have a file that you want to share with only specific people, then you can add a Password to it.

    password protection

    3 – Expiration Date

    When you share a link publicly, you can always set an expiration date and time to the files. The public links will be expired, and no one will have access to that particular file.

    date expire

    4 – Statistics of Download Links

    We all have one or two files, which we share publicly but how many of the people have downloaded it? How do you find it? pCloud has added a feature that tracks the number of downloads, which gives you a comparative data on some downloads.

    • Locate the SHARE function,

    share functions

    • Select Stats.

    stats

    • You can check the Stats of public download links.

    public download links

    5 – pCloud Rewind

    When you are in a rush, you delete few important files and data that can cost hundreds of dollars later on but with the Rewind feature, an unusual feature, which lets you RESTORE files and data back to your cloud storage. It is a life saver for those who are into incessant business.

    6 – Premium Services

    pricingsJust to remind you, you can always try the Free version of the service to test the services, which are reliable. When your business demands for more virtual space then nothing is better than pCloud Premium services.

    #2 – Download & Setup

    Step 1: Go to the pCloud Official Website.

    official website

    Step 2: Download the Windows version program.

    windows 10 buildStep 3: The file size of the pCloud is only 8.5MB, which takes less than a minute for you to download it.

    Step 4: When the download is finished, Run the program as administrator.

    run as admin

    Step 5: Make sure to read the Terms and Conditions, then click on “I Agree,” then you can begin the Installation.

    terms and conditions

    Step 6: It takes only a minute to install the program on your Windows PC.

    installing

    Step 7: A pop-up will appear, and Click on “Install.

    installing the software

    Step 8: Click on “Launch.”

    launch drive

    Step 9: You need an account to get things started out. You either go back to the site and Sign up, or you can Sign up for a free account using the program.

    loginStep 10: Once you sign in, this is what you should see on your screen.

    welcome image

    #3 – Upload & Share Anything Publicly

    There are several other things you can do when you have access to the Virtual Storage. However, you can never unleash the true potential of any service without knowing the Features & Functions of the service.

    functions

    pCloud Other features are,

    • It comes a simple to understand and navigate File Manager.
    • Security is assured.
    • Backup your files.
    • Sharing is easy and comes with advanced features.
    • File Versioning.

    Conclusion

    pCloud is suitable for Small to Big business, and having a virtual storage makes it for you access all types of files to demonstrate to your clients and customers. Let us know, what feature is missing from the pCloud and also shoot your opinions in the comment section below.

  • How to Install MEmu Android Lollipop Emulator on PC [Windows 10/7/8.1 32-Bit & 64-Bit]

    How to Install MEmu Android Lollipop Emulator on PC [Windows 10/7/8.1 32-Bit & 64-Bit]

    Most of the Android emulators in the market come with either Android Kitkat or JellyBean, but since both the Android versions are now obsolete most newer games and apps don’t run on them. Now, we can’t simply use official Android Device manager’s emulator to run our custom apps or games so there remain very few alternatives. We bring you, one such method by using MEmu Emulator. Read on below for the complete tutorial on How to install Lollipop Android Emulator on PC or Laptop (Windows 10/8/7 64-bit & 32-bit.

    Tutorial to Install MEmu Lollipop Emulator for PC on Windows 10 / 7 /8.1

    Pre-Requisites –

    • A Windows PC or Laptop with a decent configuration 2GB RAM & above.
    • Now, MEmu lollipop OVA requires Old MEmu 4.4 based emulator already installed on your system. So, if in case your system doesn’t have MEmu installed. Download the Old MEmu emulator and install it from the download link given below –
      Click here to Download MEmu 3.0.7 full Installer [Android 4.4 Base].

    Tutorial –

    • In this step, we will apply the Android lollipop over the MEmu Base we have already installed.  The Android Lollipop emulator ova is separate and hence must be separately downloaded and applied over the base, we will require this file  –
      Click here to Download Lollipop Android Emulator for PC / Laptop (Windows 7 / 8.1 /10)Note – Please note that simply downloading the Lollipop ova won’t work, MEmu base MUST be already installed.
    • Once, you have downloaded the above Lollipop patch, double click & Open it. You will see a message of Successfully Updated”.
    • Now from either the Start menu or Desktop shortcut, launch “Multi-MEmu” App. (Not the default MEmu) It will open a window as shown in the image below

      Multi-MEmu HomeScreen
      Multi-MEmu HomeScreen

      Here select the “Create Android 5.1 emulator” option.

    • It will now start creating your Android Lollipop image as shown below, please wait until the process is completed.

      Android Lollipop Emulator installation
      Android Lollipop Emulator installation


    • Once, the creation process is complete you will now see option to start the new MEmu1 “new lollipop image as shown in the image below –

      Click on Start to launch MEmu Lollipop Emulator for Windows
      Click on Start to launch MEmu Lollipop Emulator for Windows

      Click on “Start” to launch the MEmu Lollipop emulator. It will now show a loading screen, please allow the loading to complete.

    • After the loading is complete , it will boot you onto your default Android lollipop homescreen as shown –

      Android Lollipop Emulator homescreen & Notification Drawer
      Android Lollipop Emulator homescreen & Notification Drawer

      You can even use Playstore to install apps & use Google services.

    • Besides, you can even use your Keyboard to simulate touch, play games via your keyboard & mouse , use rooted apps on your MEmu lollipop emulator.
    • Here’s a screenshot showing the Android version, incase if you face any problems while installing MEmu or the Lollipop patch feel free to comment below .

      Android Lollipop Emulator for PC - Windows 10 / 8 / 7
      Android Lollipop Emulator for PC – Windows 10 / 8 / 7
  • Awario | Helps You To Monitor Your Brand Online

    Awario | Helps You To Monitor Your Brand Online

    Most of the time almost everyone including you and me find it very difficult to search for the most suitable piece of information related to our search keywords or keyphrase, especially when the phrase or keyword we are searching is of less competition and less value.

    Have you ever wished to have a software tool that can help you find the most relevant piece of information for your keyword, no matter how popular it is? Well, then your wish has been granted, thanks to the Awario tool. If you are not aware of the Awario software tool, then today we are here with a detailed review of the same to give more useful insight to the software.

    What is Awario?

    Awario is a software solution that checks for almost every corner in the web, including social medias and search engines, to find the most relevant information and mentions that relate to your keyword. All of the pieces of information from the web related to your keywords or phrases are gathered in real time, thus ensuring that you always get the most latest and updated information for your searches.

    Why Awario?

    Awario is best for business and website owners alike as the tools allows you to instantly view the instant reactions on specific keywords thus giving you an edge over competitors by allowing you to reach and adopt to the latest changes around you to reach a more targeted set of audience. All new social media interactions and other related news to the keyword you give as input is displayed by the tool.

    Features of Awario:

    • Brand name monitoring is one of the key features of Awario. This tool, with its super-fast monitoring and tracking algorithms allow you to track the latest updates, releases and other news from almost all the popular brands out there.

    track mentions

    • You can track the latest reactions for keywords on any language using this online tool.

    languages

    • You can also add negative keywords so as to completely focus on the keywords that will bring only positive results for your business or website.
    • All the data related to all the keywords you search for are grouped as folders so as to give you a more organized view. This helps you in focusing on one keyword at a time and not be confused by all the data from all the keywords you track for at once. You can also mark separate folders for posts or reactions that you would like to view at some later point of time or also for posts that are unread.
    • The analytics of the the social media tracker tool lets you track the increase/decrease in the reach of the keyword you are searching for.

    analytics

    • Awario can also let you find the most influential people targeting the keyword on all popular social media networks.
    • You can also share the stats and reports with your clients or colleagues with the instant share link that can be generated from within the tool itself.
    • You can manage your account across devices and always focus on the data that matters the most to you, no matter whether you are trying to access the tool from your laptop or Smartphone.
    • You can also set Awario to send you daily or even weekly email based alerts of summaries on the latest mentions so that you do not lose track anytime.

    How to Subscribe and Start Using Awario?aw pricing

    To know about the full potential and the full set of features of the Awario tool, then the best way is to find it out yourself. You can opt anytime to check out the Awario tool for free for 14 days by just registering with your email address and without even having to put your credit card information in.

    Once you are satisfied with the product, then you can check for their paid subscription plans that begin at just $19 per month and extends to $299 per month depending on the features you can get. In case you are looking for a customized feature set specific for your business, then you even have the option to get in touch with the Awario team to let them create a plan that suits your need.

    Final Words:

    Hope this article helped you to know in detail about the Awario online tool. If you found this article interesting, then do share it with your friends to spread the word.