Category: iOS (iPhone + iPad) tutorials

  • Upload photos to Instagram without cropping on Android/iOS [iPhone+iPad]

    Upload photos to Instagram without cropping on Android/iOS [iPhone+iPad]

    Recently, while uploading a photo to Instagram it prompted to crop the image which was resulting in a person’s face being cropped and other background scenery also being missed out from the photograph, This problem is due to the fact that Instagram requires Square sized image and the photos clicked by our phone camera’s are rectangular sized . Now I wasn’t interested in posting the square-cropped photos to Instagram, and hence was looking out for solutions on how to upload photos to instagram without cropping on android / ios . So , here it is – InstaSquare app – to upload images to Instagram without cropping  (On android devices / iPhones / iPads).

    Method to upload photo to Instagram without cropping it

    • InstaSquare Gallery icon

      First of all download the Instasquare app from the following links –
      Click here to download Instasquare app for Android from Google Play Store.
      Click here to download Instasquare app for iOS from Apple iTunes Store (iPhone / iPod / iPad).

    • Now, click on the “gallery” icon in the app start-up splashscreen.
    • It will now open the photo gallery, herein browse and then select the photo / image you want to open in Instasquare  -.
    • Now, we need to make the image squarish  by filling up the blank space which remains around the rectangle with some color,  in our case we will select the “blur” option (as this option fills the alongside gaps with the same image blurred, it helps preserve the color tone and hence we use it) , Select the blur option as shown in the image below-
    • Blur option to fill the alongside gaps with blue color

      Now after we click on “blur” it automatically fills the space and renders square image ready for Instagram upload which looks as shown in the below image – (The green arrows highlights the filled up portion, while the blue arrow indicates blur zoom, and the “red” indicates directly export to instagram / gallery option.

    • After filling up the blank space using blur

      Thus, you can now export and save the image to gallery using the “outbox” icon highligted by red arrow, or you can directly share it to instagram!

    • Voila! the image fits perfectly in Instagram as shown below –
    • Photo exported from InstaSquare app to Instagram

      Thus, you’ve successfully uploaded an un-cropped pic to Instagram, I hope this tutorial was simple and easy, If you face any problems while using the above method, or know of any good app – method which does the same feel free to comment.


  • 3 Best iOS apps to Identify & recognize music/song on iPhone / iPod / iPad

    3 Best iOS apps to Identify & recognize music/song on iPhone / iPod / iPad

    Many a times, we need to identify a song which we are currently listening to.. or may be a song which we know and want to recognize the song name which is currently playing, so that we can download it and add it to our music library, or may be to simply know the Singer Artist of the Song/Music. In all such scenarios we need to identify/ detect or recognise the song & music , following are 3 Best Free Music recognition apps for iOS which can recognise the currently playing songs easily!

    App # 1 – Shazam for iOS – iPhone / iPad

    Shazam for iOS

    Shazam is the leading app for music detection be it English, or regional songs. Shazam’s directory and ability to identify songs is the highest amongst all the apps we tried out for iOS. To recognise music using Shazam all you need to do is

    1. Open Shazam app on your phone.
    2. Tap on the “S” icon, which is above the “touch to Shazam” option.
    3. Now place your iPhone/iPad microphone near the source playing music,  Shazam will automatically record the beats and compare with its server’s music directory and Identify the song for you!.

    Besides, these you can now also use your phone Camera to record videos and get your music detected by Shazam app.

    Shazam requires a decent internet connection (WiFi/Cellular Data) for its working, so make sure you turn on the internet on your device before using Shazam!.

    Click here to download Shazam App from the iTunes App Store.


    App # 2 – MusixMatch app (Music ID app for iOS – iPhone / iPad) 

    MusicID option present in MusixMatch

    There was a direct competition between Soundcloud and MusixMatch to be the best alternative to Shazam, but MusixMatch simply races ahead due to some unique features which are absent in Shazam too!

    • MusixMatch can not only detect the songs which you are hearing from an external source, but it also identifies the ones which are played from the Music .
    • Not just music identification, MusixMatch even starts showing the lyrics in synchronisation with the Song Stanza! , so it even plays the lyrics of the detected songs for you , in addition to playing songs at the simultaneously (if you called it for device’s internal music library).
    • For using the external sound recognize function of MusixMatch you need to select the “MusicID” option from the menu, as shown in the alongside screenshot.
    • The rest of the procedure is similar to that of Shazam for identifying the currently played music/songs. ( You need to tap on the “butterfly” icon after selecting MusicID option to start recording (required for Song identification)).
    MusixMatch was able to synchronise with the external music source

    Alongside, is an image result of test which we used to detect a regional bollywood song, it even started showing the lyrics in synchronisation with the external music song/source!. The only thing which kept MusixMatch after Shazam was that Shazam was able to recognize more music types and was quicker as compared to MusixMatch.

    Click here to download MusixMatch for iOS – iPhone & iPad.


    App # 3 – SoundHound

    SoundHound too uses the “S” button to detect songs!

    Ideally SoundHound can be classified as a ditto alternative to Shazam, with almost the same set of features as the latter. SoundHound is 3rd in our list because we faced a few glitches with it while trying to identify and detect local music through it., but SoundHound functions really well for English Music (Hollywood).

    The procedure to use SoundHound is also similar to Shazam, and so it also requires an internet connection.

    Tap the “S” button and place the device’s microphone near to the music playing source, to recognize the song on your iPhone or iPad device.

    Click here to download SoundHound for iOS – iPhone / iPad.


    These are currently the best apps to recognize music/songs , we also tested a few others like “What the Song” (WTS),Genius, soundtracking but didn’t find them worthwhile to be added in this article. If you encounter any problems while using them, or know of any other such good app feel free to comment.


  • How to transfer contacts from Windows Phone to iPhone(iOS) easily without PC using Phoneswappr

    How to transfer contacts from Windows Phone to iPhone(iOS) easily without PC using Phoneswappr

    Switching phones isn’t something we do daily, but whenever we do switch them we face a lot of issues and problems especially while transferring contacts and data from our old phone to new phone. Considering the lack of Bluetooth transfer on iPhone it becomes even more tedious task. But not anymore, we present you a very easy method to transfer all your contacts from Windows Phone / Lumia to iPhone 4/5/6  or even iPad without PC by using PhoneSwappr app! . Its quite easy to use and requires no PC access at all .

    Features of PhoneSwappr

    • Supports transfer of Contacts from Windows Phone to Android/iPhone as well as vice versa .
    • Stores the Contacts from your device on the Cloud for 7 days, providing you ample time to store the contacts.
    • All the contacts stored on the cloud are encrypted with a security key, which is only shared with you. Thus, providing total security of your contacts.
    • The App can be installed on multiple devices thus, allowing download of contacts to multiple devices where a large number of contacts need to be shared between two or more phones.
    • No need of any registration/account Sign-Up! . Simple contacts transfer by using Internet on both the devices.

    Tutorial

    • First of All download and install the appropriate PhoneSwappr version on your Phones, depending upon their OS.
      Click here to Download PhoneSwappr for Windows Phone.
      Click here to Download PhoneSwappr for iOS/iPhone.
    • Now, First of all Install the application on both the phones .
    •  After you install it Open the App on your Old Phone/ Windows Phone from which contacts have to be retrieved (imported) , It’ll present you a screen which looks like below –
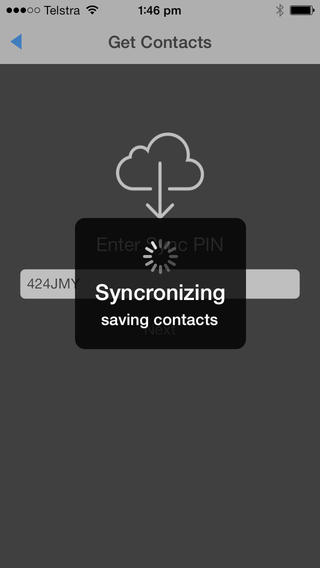
    • Here select the Option “Send Contacts to Cloud”  . Now, all your contacts will start getting uploaded to the Cloud, and once all the contacts are uploaded you will be shown an image with the key/pin as shown below. (Please Note down this Pin as we will use it later to retrieve our contacts ).
    • Now  open the PhoneSwappr app on your (iPhone / iPad) new phone and select the option “Get contacts from the Cloud”. 
    • Now, enter the Pin which we have noted down earlier to start the contacts download! . It will start downloading contacts as shown below – and once it gets downloaded you will be presented with a completion screen as shown below –
    • Importing contacts from Windows Phone to iPhone / iOS

      That’s it!  You have now succesfully transferred contacts from Windows Phone / Lumia to iPhone in no-time with total ease for free. Good enough, isn’t it ?

    • Feel free to comment if you face or encounter any issues/problems while using the PhoneSwappr app.
  • Tutorial- How to play MKV / AVI video files on iPhone & iPad [ Also : VLC for iOS / iPhone / iPad ]

    Tutorial- How to play MKV / AVI video files on iPhone & iPad [ Also : VLC for iOS / iPhone / iPad ]

    The larger and crystal clear screen displays of iPad and iPhone are highly unused when it comes to Video Playback due to the codec limitations of iOS. iOS can only play .mp4,.m4v and .mov files by default, and other formats like avi, mkv, flv etc are not supported by it. But not anymore, you can now play .mkv , .avi , .flv , 3gp , .olv ,.webm and literally any file format by the following three apps – Tutorial to play Mkv and Avi video files on iPhone / iPad –

    Pre-requisite –

    • As, we are playing the mkv , avi files on iPhone / iPad 2 ,3 without converting, hence we need to transfer the files directly to the media players which can play them, and not through iTunes, as iTunes will result in conversion of Video Format.
    • So, in addition to any of the following media players we need the computer or mobile browser to be connected on the same WiFi network (router).
    • The file needs to be transferred by the sender device(movie/video [pc/android/iphone]) to the receiver/playing device ([iphone/ipad]) over wifi by the media player interface (steps mentioned in next section).

    Method or App # 1 – Infuse 3 Media Player for iOS (iPhone / iPad) 

    infuse 3 media player
      • Infuse 3 media player tops our list for Media players for iPhone / iPad or iPod touch which can play mkv / avi / flv etc files due to many reasons, such as –
      • It has very smooth and fluid User Interface.
      • Supports external Sub-titles too!
      • Fully supports DTS, and dts-HD audio.
      • All the 3 Media players discussed in the article require both the devices on the same WiFi ,out of which only Infuse managed to give the Sharing URL if the WiFi network was created using Portable Hotspot on the same iPhone / iPad device!.
    • Steps to play avi / mkv / 3gp or flv files on iPhone / iPad by Infuse 3 –
    • Now, after downloading and installing the Infuse media player , Open it, and tap on the +”  sign on the top-right hand side (which stands for upload).
    • Now, select the transfer method “via browser”.  You will be shown an image as in the alongside figure. Now, enter this URL in either your PC browser, or mobile browser depending upon the other device which is sending videos/movies. Now select the videos, which you want to send and those will be transferred to the Infuse 3 app on your iPhone/iPad.
    • Once, you get the Video or movie in the Infuse  3 app’s library , click on it to start playing! and yo! you can now enjoy your favorite high quality other format videos right on your iPhone / iPad in Fullscreen! .
    • Click here to download Infuse 3 from Apple iTunes App Store. (iPhone / iPad / iPod touch)


    Method or App # 2 – VLC Media Player by VideoLAN (VLC for iOS / iPhone /iPad) 

    VLC for iOS iPhone/iPad
    • You will never come across a person using PC who doesn’t know about VLC, such is the popularity of VLC media player by VideoLAN , though popularity isn’t enough to get you ahead in this race, as VLC for iOS, is a bit slower as compared to its other competitors for video playback at the time of writing this article, hopefully, this can turn anytime!.
    • The procedure to play other video files like mkv, avi on iOS using VLC for iOS on your iPhone / iPad 2 too is pretty same, going to menu – > sharing via WiFi and starting the Video Server .
    • Now, entering the URL in sender web browser, and uploading the video to the receiver’s device. (Explained easily in the next figure).

      Video sharing using WiFI for VLC for iOS and other media players
    • The Received Video will  be available in VLC media library and you can click on it to start the Playback.
    • Besides this, you can also Open Network Streams, or videos / movies uploaded to your Dropbox , Google drive accounts, to start the playback directly.
    • Also, there are additional settings, you can always tweak when using VLC such as playback speed, subtitle synchronisation so that it becomes a pleasing experience.
    • Click here to download VLC Player for iOS iPhone/ iPad / iPod from Apple iTunes App Store.


    Method or App # 3 – PlayerXtreme HD

    Extreme Player for iOS – iPhone
    • Just like Infuse 3 , Extreme Player for iPhone iOS too requires your videos to be downloaded by the WiFi in your device.
    • You can also view movies/videos from your Online cloud storage sites such as Google Drive or Dropbox by extreme Player.
    • To turn on WiFi sharing for extreme player , first connect both of your devices on the same WiFi network
    • In receiver (iOS) device (Go to Menu (Swipe from Left) -> WiFi -> Enable .
    • Now enter the “Web”  URL from receiver device.. in sender device’s web browser and select the files or videos you want to view.
    • Once the file’s are transferred, click on the file in receiver Extreme Player library to start the Playback!
    • All major Video as well as Audio formats are supported!
    • Click here to download PlayerXtreme HDfor iOS (iPhone / iPad) from Apple iTunes App Store.


    I hope, this tutorial will solve all your worries regarding video playback on your iOS devices, still if there are any feel free to comment 🙂 . Happy Watching!

  • How to- Transfer files from Linux to iPhone / iPad by Feem over WiFi

    How to- Transfer files from Linux to iPhone / iPad by Feem over WiFi

    Transfering Files / Music from Linux distributions (Ubuntu / Linux Mint /Fedora) to iPhone/iPad or any other iOS devices isn’t an easy task at all , atleast for beginners . Also , as iTunes isn’t available for Linux OS the options are very limited too.. , here we present you one of the most easiest method , to transfer files between Linux and iPhone or any iOS device. I used this method to transfer files from Linux to iPhone .

    Prerequisites –

    Tutorial to transfer files from Linux to iPhone over WiFi by using Feem – 

    Feem running on Linux Mint 17.1 – iPhone 6
    • First of all download and install Feem app on both devices, by downloading from above mentioned links.
    • Now, connect both the devices to a common/same WiFi network either to a single router or by creating Hotspot on a single device.
    • Open, Feem app on both the devices, now they’ll automatically scan for devices on the same WiFi network which have Feem Running.
    • Now, as shown in alongside figure you will see your device in the list of devices, checkmark the device you want to send the file, and click on the send option (highlighted by spraypaint color in the same figure).
    • Now select the files/folder you want to transfer / send from Linux to iPhone ,and click on OK.
    • That’s it your files will be transferred in a Flash! , with speed and also without using any data connection / NO Internet connection required! .
    • If you are not able to find your devices, click on the [find devices] option to scan for devices again.

    Feem solved much of my prolems, while using Linux. If you encounter any problems or face any issues feel free to comment 🙂 , also we will be glad if you can suggest an app like Feem :).