Author: Chaitanya

  • Top 5 Free SNES Super Nintendo Emulators for PC [Windows 10/7/8.1] to Play SNES games with Controller Support

    Top 5 Free SNES Super Nintendo Emulators for PC [Windows 10/7/8.1] to Play SNES games with Controller Support

    Super Nintendo Entertainment System (SNES) or Super Comboy as it is known is one of the most popular 16-bit gaming consoles from the 90s and is regarded as the best 16-bit console ever. With speculations that Nintendo is releasing a new SNES classic version in 2017 and considering its limited availability it makes good sense to emulate SNES on PC. In this articl,e we write about the best SNES emulators for PC or laptop. These Super Nintendo emulators will let you play Windows 10/7/8.1 [64-bit & 32-bit]

    Top 5 Best SNES Emulators for PC or Laptop – Windows 10 / 7 / 8.1


    SNES Emulators # 1 – BSNES

    BSNES Emulator for PC
    BSNES Emulator for PC

    Considering the SNES is a 16-bit console there are lots of emulators with smooth graphic and audio emulation. Hence, we had to sort them on basis of the features and ease of use they provided and BSNES emerged as the first .

    BSNES lets you emulate SNES games and has a lot of features such as –

    • Ability to emulate multiple gaming consoles – Famicom (NES), Super Famicom (SNES), and even Game Boy, Game Boy Advance too.
    • Gamepad and external game controller joystick support
    • Fast and Speedy emulation.
    • Only con with BSNES is that it supports .sfc SNES roms only hence, we will recommend you to try out SNES GT

    Click here to Download BSNES Super Nintendo emulator for Windows 10 / 7/ 8.1


    SNES Emulator # 2 – SNES GT

    SNES GT SNES Emulator for Windows 10
    SNES GT SNES Emulator for Windows 10

    SNES GT has a pretty neat audio and video emulation for SNES games and unlike Snes9x doesn’t require any dependency files either. Plus it also has some salient features such as –

    • Ability to save game states and load games
    • Controller / gamepad (Multi tap) support
    • Multiplayer slots and multi-player game support

    Click here to Download SNES GT (EmuCR) SNES Emulator for PC / Laptop [Windows 10 / 8 /7.1]


    SNES Emulator # 3 – Snes9X

    Snes9X SNES Emulator for PC
    Snes9X SNES Emulator for PC

    Snes9X perhaps beats BSNES when it comes to features and game emulation. But its dependency on Direct X makes it unusable to download and run, it requires Direct X installation for it to work.

    However, the Direct X library requirements gives it even more unique features and abilities such as –

    • Game Cheats Support
    • Ability to Save game states and load them from the game saves.
    • External Gamepad support.

    Click here to Download direct X Runtime library for Windows 10 / 7 /8.1 [Snes 9X won’t work without this]

    Click here to Download Snes 9x SNES Emulator for PC – Windows 10 / 7 /8.1 [32-bit & 64-bit]


    SNES Emulator # 4 – ZSNES

    ZSNES Super Nintendo Emulator for Windows 10/7/8.1
    ZSNES Super Nintendo Emulator for Windows 10/7/8.1

    ZSNES is one of the oldest SNES emulators around still its on the fourth position due to its medium level user interface, the lack of mouse supports in the UI makes it here.

    Besides, that ZSNES has all standard features such as –

    •  Emulation support for all type of SNES games .sfc , .svc , .zip
    • Speedy and fast gameplay

    Click here to Download ZSNES Super Nintendo Emulator for PC – Windows


    SNES Emulator # 5 – SNEeSeW

    SNEeSeW SNES Emulator for Windows
    SNEeSeW SNES Emulator for Windows

    The SNEeSeW emulator has a complex name and an even complex User Interface. But it provides the most customizations ever in an emulator to play SNES games right from the RAM Size, Video buffer etc.

    Due to the high customization options except for the window size, you can play almost any SNES game inside SNEeSeW which might not have worked in the previous emulators.

    But the User interface of SNEeSeW does take time to get used to.

    Click here to Download SNEeSeW SNES emulator for Windows 7/8.1/10 XP / Vista


    Thus, these are currently the Best Free SNES Emulators for Windows 10 PC , Windows 7/8.1 and laptops are supported too. Incase, if you’re unable to map your Joystick directly you can even map your joystick to emulate keyboard key press to play games – Follow this tutorial to map your Joystick to Keyboard. Incase of any queries feel free to comment below!

  • How to Post & Upload 360 Photos to Facebook from Mobile [Android & iOS]

    How to Post & Upload 360 Photos to Facebook from Mobile [Android & iOS]

    360 Degree photos or Full Panoramas is the new trend in the Market. 360 Photos capture the complete view of you, and your surroundings and thus make a good post of sharing your location and photo gang on Social Media. The good news is Facebook does support 360 Photos and has an inbuilt 360 photo viewer through which your friends can view the complete photo by either moving fingers or by rotating their phone. Here’s a tutorial which will let you Upload 360 Photos to Facebook from your mobile [Android as well as iPhone (iOS) ] so that you can reveal the complete beauty and scenario of the Photo –

    Tutorial on How to Upload 360 Photos to Facebook –

    Pre-Requisites :

    • A 360 Degree Photo (Panorama Photo), Copy the Photo from your Camera to your Phone Storage (This step is necessary , for example, I copied my 360 Photo to Phone Storage via WiFi (Theta S 360 Camera).
    • Facebook App (Installed on your Phone). You can even upload photo without Facebook app, but it won’t let you select the Start Screen of the photo hence, using app is highly recommended.
    • Since, we are using the Facebook App, the procedure is common for both Android and iPhone (we will be using Android in our tutorial)

    Tutorial –

    • Once, you have copied the Photo to your Phone Storage. Open the Facebook App, and navigate to Profile.
    • Here, Select “Photo” option as shown in the image below –
      Select Photo Option in the Facebook App
      Select Photo Option in the Facebook App

      It will now open all the Photos in your Phone Gallery, as shown in the image below –

      All Photos in Phone Gallery (Globe Icon in photo thumbnail means 360 Photo)
      All Photos in Phone Gallery (Globe Icon in photo thumbnail means 360 Photo)

      Now, check for the presence of circular “globe” icon inside the thumbnails of the photo (the 360 degree photo you intend to upload – As Facebook automatically detects photo type – Globe icon in thumbnail indicates 360 photo)

    • Now, if you can see the globe icon in thumbnail, its very easy. Simply select the 360 photos you want to upload (Photos with Globe icon) and click on “Done”.
    • The photos will now be uploaded onto the Facebook server , and it will now ask you to swipe to select the sharing or first screen Starting View as shown in the following image –
      Swipe to Select First screen 360 Facebook
      Swipe to Select First screen Starting View 360 Facebook

      Note – First Screen or Starting View is the first thumbnail which is shown in your profile, so make sure you select the best view inside the 360 Photo, so that your friends will be interested in viewing it!!

      (Swipe using your finger inside the photo up, down , left, right to select the best view as first screen.

    • I swiped around the photo and selected the first screen as shown below –
      New First Screen of the Photo!
      New First Screen of the 360 degree Photo!

      Now, type in any caption, text for the photo and tag location and your friends inside it and Once everything is done, we are ready to post.

    • To Upload or Post it on to Facebook, simply tap on the “Post” button in top right hand side corner.
    • Phew! You have successfully uploaded, tagged people and location in a 360 Degree photo on Facebook!.
    • Here’s how it looks like – Check out the below embedded snippet from our Facebook Page and get a feel of our workplace! 🙂

    Note – Currently Facebook Embed doesn’t has a 360 support, click on the post to go to page and view the complete 360 Photo and browse our workplace. Feel free to comment below incase of any problems or difficulties while uploading 360 degree content to Facebook!

  • How to Install MEmu Android Lollipop Emulator on PC [Windows 10/7/8.1 32-Bit & 64-Bit]

    How to Install MEmu Android Lollipop Emulator on PC [Windows 10/7/8.1 32-Bit & 64-Bit]

    Most of the Android emulators in the market come with either Android Kitkat or JellyBean, but since both the Android versions are now obsolete most newer games and apps don’t run on them. Now, we can’t simply use official Android Device manager’s emulator to run our custom apps or games so there remain very few alternatives. We bring you, one such method by using MEmu Emulator. Read on below for the complete tutorial on How to install Lollipop Android Emulator on PC or Laptop (Windows 10/8/7 64-bit & 32-bit.

    Tutorial to Install MEmu Lollipop Emulator for PC on Windows 10 / 7 /8.1

    Pre-Requisites –

    • A Windows PC or Laptop with a decent configuration 2GB RAM & above.
    • Now, MEmu lollipop OVA requires Old MEmu 4.4 based emulator already installed on your system. So, if in case your system doesn’t have MEmu installed. Download the Old MEmu emulator and install it from the download link given below –
      Click here to Download MEmu 3.0.7 full Installer [Android 4.4 Base].

    Tutorial –

    • In this step, we will apply the Android lollipop over the MEmu Base we have already installed.  The Android Lollipop emulator ova is separate and hence must be separately downloaded and applied over the base, we will require this file  –
      Click here to Download Lollipop Android Emulator for PC / Laptop (Windows 7 / 8.1 /10)Note – Please note that simply downloading the Lollipop ova won’t work, MEmu base MUST be already installed.
    • Once, you have downloaded the above Lollipop patch, double click & Open it. You will see a message of Successfully Updated”.
    • Now from either the Start menu or Desktop shortcut, launch “Multi-MEmu” App. (Not the default MEmu) It will open a window as shown in the image below
      Multi-MEmu HomeScreen
      Multi-MEmu HomeScreen

      Here select the “Create Android 5.1 emulator” option.

    • It will now start creating your Android Lollipop image as shown below, please wait until the process is completed.
      Android Lollipop Emulator installation
      Android Lollipop Emulator installation


    • Once, the creation process is complete you will now see option to start the new MEmu1 “new lollipop image as shown in the image below –
      Click on Start to launch MEmu Lollipop Emulator for Windows
      Click on Start to launch MEmu Lollipop Emulator for Windows

      Click on “Start” to launch the MEmu Lollipop emulator. It will now show a loading screen, please allow the loading to complete.

    • After the loading is complete , it will boot you onto your default Android lollipop homescreen as shown –
      Android Lollipop Emulator homescreen & Notification Drawer
      Android Lollipop Emulator homescreen & Notification Drawer

      You can even use Playstore to install apps & use Google services.

    • Besides, you can even use your Keyboard to simulate touch, play games via your keyboard & mouse , use rooted apps on your MEmu lollipop emulator.
    • Here’s a screenshot showing the Android version, incase if you face any problems while installing MEmu or the Lollipop patch feel free to comment below .

      Android Lollipop Emulator for PC - Windows 10 / 8 / 7
      Android Lollipop Emulator for PC – Windows 10 / 8 / 7
  • Top 5 Best GBA Game Boy Advance Emulators for PC Windows 10 / 8.1/7 [Computer / Laptop]

    Top 5 Best GBA Game Boy Advance Emulators for PC Windows 10 / 8.1/7 [Computer / Laptop]

    Game Boy Advance or GBA is one of the best Retro Gaming consoles and has some great games such as Pokemon Red (Standard Edition), The Legend of Zelda, Super Mario Kart etc. Now you can enjoy and play your favorite or any of the Game Boy Advance games on PC / Laptop using Game Boy Advance emulators. Many of the emulators do not support newer versions of Windows such as Windows 10, 8.1 and even Windows 7. So, here are the Top 5 Best GBA Emulators for PC / Computer or laptop with Windows 10, 8.1, 7 compatibility and sound support.

    Top 5 Best GBA Emulators for PC – Computer or Laptop

    GBA Emulator # 1 – mGBA

    mGBA GBA Emulator for PC Windows 10
    mGBA GBA Emulator for PC Windows 10

    mGBA is one of the fastest lag-free GBA emulators for Windows and will let you play you your favorite Game Boy Advance game on your PC or laptop.

    Besides emulating GBA game ROMs mGBA has some salient features such as –

    • Multi-player multi-window support.
    • Solar Sensors support
    • Game overrides and ROM patch support
    • Cheat code support

    Click here to Download mGBA Game Boy Advance Emulator for PC / Windows 10 / 8.1 /7


    GBA Emulator # 2 – VisualBoy Advance

    VisualBoy Advance GBA Emulator for Windows 10 / 7 / 8.1
    VisualBoy Advance GBA Emulator for Windows 10 / 7 / 8.1

    VisualBoy advance is another great GBA emulator for Windows PCs or Laptop and works flawlessly on Windows 10 , 7  or Windows 8.1 [all 32-bit & 64-bit] variants.

    VisualBoy Advance has some unique features such as –

    • JoyPad or Gamepad support (Play GBA games on PC with Joystick)
    • Cheats support.
    • Save & loading game support.
    • Ability to record Gameplay into videos or screenshots

    Click here to Download Visual Boy Advance GBA Emulator for Computer or Laptop 


    GBA Emulator # 3 – No$GBA Emulator

    No$GBA Emulator for Windows 7/8.1/10
    No$GBA Emulator for Windows 7/8.1/10

    No$GBA or No Cash GBA as it is known is another powerful GBA Emulator for Windows 10 / 8.1 /7.  Besides GBA it can even emulate NDS games thus enabling it to use it as a two in one emulator.

    To play Game Boy Advance game on Windows via No$GBA , navigate to File – > Cartridge menu (Files.lst) and here select the NDS game ROM which you want to play.

    Besides, No Cash GBA also has gamepad or Joystick support to play Game Boy Advance games.

    Click here to Download No$ Cash GBA Emulator for Windows 10 / 8.1 / 7


    GBA Emulator # 4 – Higan GBA Emulator

    Higan GBA Emulator for Laptop / Computer
    Higan GBA Emulator for Laptop / Computer

    Higan is a multi-emulator system which has support for Nintendo famicom, super famicom, game boy color as well game boy Advance emulation support.

    Besides emulating the gaming console, you can even specify custom BIOS rom so that you can even emulate Sega Master System, Mega Drive and even Game Gear.

    The GBA emulation game color reproduction is really good, however the sound is a bit laggy.

    Click here to Download Higan GBA Emulator for Laptop Computer or PC


    GBA Emulator # 5 – BoyCott Advance 

    Unlike the above mentioned GBA emulators which work on Windows 10 , 7 or newer versions,Boycott Advance is GBA Emulator for Windows XP , Vista and older versions .

    We managed to play it on new Windows using Compatibility settings, however it freezed on a number of occassions e.g while entering a Pokecenter in pokemon.

    Click here to Download BoyCott Advance Game Boy Advance Emulator

    Thus , these are the Best Game Boy Advance or GBA emulators for PC / Computer with Gamepad or Joystick support. To Play Game Boy Advance games, you will need Game ROMs which you can download from sites like Romhustler.net as these do not come with any game packaged. Incase if you face any problems feel free to comment.

  • Top 3 Nintendo DS / NDS Emulators for PC – Windows 10 / 7 to Play NDS Games on Computer

    Top 3 Nintendo DS / NDS Emulators for PC – Windows 10 / 7 to Play NDS Games on Computer

    Nintendo DS or NDS is one of the best selling handheld gaming consoles ever by Nintendo. Some of its game titles such as Mario Kart, Pokemon Black are still worth a decent gaming session due to their attractive gameplay. For the solution of How to play Nintendo DS Games on PC – We bring you the Top 3 Free Nintendo DS / NDS Emulators for PC .

    3 Best Nintendo DS / NDS Emulators for PC (Working on Windows 10 too) 

    NDS Emulator # 1 – DeSmuME

    DeSmuME NDS Emulator for PC
    DeSmuME NDS Emulator for PC

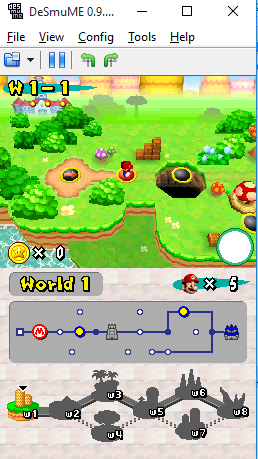
    DeSmuME is perhaps the best Nintendo DS emulator for your PC or Laptop. It can emulate and play Nintendo NDS games at ease, with microphone and sound emulation. Amongst all the emulators we tried our hand at DeSmuME had the best sound reproduction for ROMs & games.

    Besides, these DeSmuME has some great features such as –

    • Ability to Save games & load saved game states.
    • Cheat codes support.
    • External Gamepad and Joystick support.

    Click here to Download DeSmuME NDS emulator for Windows 10 / 7 / 8.1 (64-bit)

    Click here to Download DeSmuME NDS emulator for Windows 10 / 7 / 8.1 (32-bit)


    NDS Emulator # 2 – No$GBA (No Cash GBA)

    No$GBA Nintendo DS Emulation on Windows 10
    No$GBA Nintendo DS Emulation on Windows 10

    Not to be confused by its name, No$GBA is a really capable DS emulator for windows. Though primarily made for GBA it can run NDS games like Pokemon Black with ease..

    The only concern about No$GBA is its loading of ROM which isn’t visible at first.

    To play Nintendo DS game on Windows via No$GBA , navigate to File – > Cartridge menu (Files.lst) and here select the NDS game ROM which you want to play.

    The Emulator is very quick and supports gamepad too, its just sometimes the audio becomes unfiltered on switching between other apps to Nocash GBA.

    Click here to Download No$GBA Nintendo DS emulator for Windows 7/8.1 & Windows 10


    NDS Emulator # 3 – DuoS DSEMU

    DuoS DSEMU NDS Emulator for PC
    DuoS DSEMU NDS Emulator for PC

    DuoS DSEMU is altogether a different and very easy to use DS emulator. It has no User interface to open or load a ROM in order to save memory. All you need to do is right click on your games .nds ROM file and open with the DuoS DSEMU , or you can set file associations for the same.

    So , next time whenever you double click on the ROM it will instantly load inside the emulator.

    Unlike the above two emulators, DuoS doesn’t support gamepad or joysticks, but its really very fast and compatible with almost all Windows versions .

    Click here to Download DuoS DSEMU NDS emulator for PC / Windows 10 / 8.1 /7 


    So, these are the best NDS Emulators to play Nintendo DS games on your Pc or computer without owning the console, however you need to own the game or ROM for the Nintendo DS game you wish to play inside the emulator. A simple google search for NDS ROM plus game or sites like romhustler.net can help you get your desired NDS game.


  • How to Install Turbo Pascal on your Android Phone or Tablet

    How to Install Turbo Pascal on your Android Phone or Tablet

    Turbo Pascal is one of the most used Pascal being used today, despite it being the oldest one. Now, Turbo Pascal was originally meant to be run on DOS PCs , but today’s Smartphones are no less than PCs and can even get DOS running without any lags. So, in article we will show you – How to easily install & use Turbo Pascal on your Android phone or tablet so you can code & execute programs on the run.

    Tutorial to install & use Turbo Pasca; on Android KitKat , lollipop, Marshmallow & Nougat (4.4 , 5.1 ,6.0 , 7.0)

    Pre-requisites –

    Tutorial – 

    Step . 1 – Configuring Dos Box & Turbo Pascal (Only a one-time setup process) – 

    • First of all download & extract the turbo pascal binary zip files into a folder on your device as shown in the image below –
      Turbo Pascal Directory
      Turbo Pascal Directory

      Now as we extracted the zip files into Internal Storage – > Download. The Tp Directory files are accessible at “Internal Storage\Download\Tp” . Thus, the “internalstorage\download\” is our path

    • Now, once you have downloaded & installed Magic Doxbox free app, launch the app it will show a welcome screen, click on ‘x’ to close the message screen.
    • In the next black screen – click on the “+” icon to add new game, then select the “New game” option as shown in the image below –
      Magic DosBox add New Game
      Magic DosBox add New Game


    • The Configuration screen will now ask for the title, and the path of the game (which is Turbo Pascal in our case). Here, we need to specify the path where we have kept our binaries. On this screen Click on “choose” as shown on the following photo –
      Path for Turbo Pascal Android
      Path for Turbo Pascal Android

      Now, navigate using the folder view until the choose folder option shows the folder “TP in the location where you extracted the TP.zip files.

    • Once you see the folder “TP” as shown in the below image , simply tap on “Checkmark” or “✓” sign. Do not click or open the TP folder, as shown below –
    • The Turbo Pascal icon will now be shown in the black screen as shown below – That’s it you have now completed the one-time set up process .
      One time process completed
      One time process completed


    Step.2 – Running Turbo Pascal & launching directly for subsequent uses –

    • Now, for running Turbo Pascal for subsequent uses , simply click on the Turbo Pascal icon inside Magic Doxbox app. Here, you will seeDOSBoxosbox black screen as shown in the image below .
    • Here, we need to type the Turbo pascal binary path to execute turbo pascal, incase if your keyboard doesn’t appear – Please press the back key of your Phone! & select the keyboard as shown in the image below –
      Select Keyboard after back-button if keyboard doesn't appear automatically
      Select Keyboard after back-button if keyboard doesn’t appear automatically


    • Now, on the black screen we need to type in the Turbo C path to execute it , to execute Turbo C file please enter the following commands one by one on the black screen –
      1. Type in “cd tp”  (hit the enter or return / new line key on keyboard)
      2. Now type in “cd bin” (hit the enter or return / new line key on keyboard)
      3. type “turbo” (hit the enter or return / new line key on keyboard)
      4. It will look like below –
        Commands to Open Turbo Pascal on Dosbox Black Screen
        Commands to Open Turbo Pascal on Dosbox Black Screen


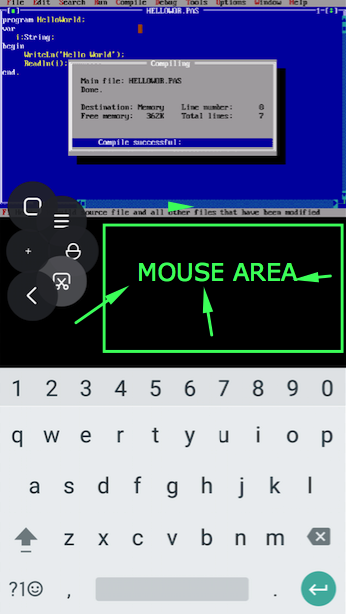
    • That’s it!! your Turbo Pascal will now be launched & opened! 🙂 .. You can now access all functions of keyboard, mouse & start programming of Pascal right on your android device as shown below –
      Turbo Pascal on Android with Mouse & Keyboard
      Turbo Pascal on Android with Mouse & Keyboard

      It feels really awesome & geeky to do programming on your android, and is pretty smooth too! , especially the mouse pointer area and mouse movement as shown in the image above Also the best part is that this works totally without SD card or memory card, so will work on all android phones!

    • Rest all functions of Turbo Pascal work really smoothly. In case if you face any issues or encounter any errors feel free to contact us! Happy Programming!
  • Top 3 Download Managers for Google Chrome to Increase Downloading Speed [2019]

    Top 3 Download Managers for Google Chrome to Increase Downloading Speed [2019]

    Google Chrome is the most widely used Web Browser across the globe and perhaps the fastest when it comes to browsing websites. But, the downloading speed of any download being done via Google Chrome is slow, and often the number of failed downloads only increase our efforts to re-download the file and time too. A solution to the above problems is using a download manager. Download Managers not only reduce the number of failed downloads, but they also help in increasing the speed and giving more controls over the files we download. So, here are the Top 3 Best Download Managers for Google Chrome Browser and Chrome OS –

    Top 3 Download Managers App for Google Chrome Browser – [ChromeBook Chrome OS Compatible]


    Download Manager # 1 – Chrono Download Manager

    Chrono Download Manager
    Chrono Download Manager

    Chrono Download Manager is a full-fledged Download Manager, which gives you more controls over your downloads.

    It comes in with Multi-threaded supports much like IDM, so that you can download via multiple streams from the server resulting in more download speed. Also, it comes with custom one-click download helper, simply right click on any link and “select the Download Link” option from menu.

    Features – 

    • Multi-threaded download support (Configurable from Download Managers – General Settings option page) – chrome-extension://mciiogijehkdemklbdcbfkefimifhecn/ui/options.htm
    • Custom file renaming to give you better control to rename file names before downloading.
    • Pause and Resume downloading support!
    • Automatically replaces Chrome Default download manager.

    Click here to Download Chrono Download Manager from Chrome App Store


    Download Manager # 2 – Turbo Download Manager

    Turbo Download Manager
    Turbo Download Manager

    Turbo Download Manager is another alternative download manager like Chrono to Google Chrome’s Download. We found out Turbo Download Manager to be more powerful than even Chrono, but it lack of user friendliness kept it on the second position.

    Some of the Unique Features of Turbo Download Manager are –

    • Multi-threading support.
    • Automatic retry of failed downloads! if the fail in between.
    • Console log .

    Turbo Download Manager doesn’t automatically grab downloads/links which is a good thing, to download any link via turbo download add it manually in the app or use the Turbo Download Helper extension to enable right click on any link to download via turbo download manager option.

    Click here to Download Turbo Download Manager App from Google Chrome App Store

    Turbo Download Manager proved to be very useful in Downloading Big Files due to its unique capability of letting Chrome Shut down, or even allowing PC to be shut down in the paused downloading file state as shown in the article – How to Shut down Chrome or PC with Active Download and then Resume it.


    Download Manager # 3 – Chrome Download Manager

    Chrome Download Manager
    Chrome Download Manager

    Unlike the above two Download Managers which increase the functionality and allow tweaks to increase the speeds, Chrome Download Manager makes it easy to manage download.

    Its a lightweight extension, which lets you view your current downloads in the top-hand side corner concealed behind the down button (much like firefox) . So that you can manage your downloads without going to the downloads page, thus saving your time!

    Click here to Download Chrome Download Manager from Chrome Extension Store.


    So, these are the Best 3 Download Managers for Chrome which will give you more control over your downloads, thus increasing the Downloading speed!. This method is exclusively meant for Google Chrome browser for Windows 10/7/8.1/ Mac OS X, Linux (Ubuntu) etc and will not work on the Android Chrome version.

    Geek Alert! – You can also use your Chrome to Download Torrents directly – >  Click here for tutorial to download torrents via Chrome.


  • Tenorshare iCareFone Review – A Handy tool to fix iOS Stuck Problems & Free Up Space on iPhone

    Many times, iPhones simply get stuck on the Apple Logo and refuse to budge further. Also, the storage issues prevailing in iPhone due to lack of external memory support is a big issue. An iPhone which once affected by any of these problems requires some efforts to restore back to its normal state. In this article, we will be reviewing Tenorshare iCareFone which will automatically solve the above iOS issues by a simple 1-click process.

    Before we move on to the Review let’s look onto the salient features of iCareFone –

    1. Transfer Music, Videos, Apps without iTunes Restriction-Free.  
    2. Say Good Bye to a Slower, Laden, Sluggish and Vulnerable iPhone right away.
    3. Fix Various iOS Stuck related to iOS upgrade, overheat and more.
    4. An ultimate solution to repair iOS system.
    5. Block Ads on iPhone, iPad, and iPod.
    6. Backup and Restore iOS data.

    Tenorshare iCareFone Review & Tutorial – 

    After you have downloaded iCareFone by visiting Tenorshare official website. Connect your iPhone via USB Cable and then launch, the iCareFone app . You will be presented with the Features screen as shown in the image below –

    Tenorshare iCareFone
    Tenorshare iCareFone

    Here all the features are self-explanatory and easy to use. Just click on any button to start with any feature.

    (Note – iCareFone requires iTunes to be installed on your system)

    In, our review we will be covering using iCareFone to free up storage space on your iPhone which will clean iPhone Space.

    • After you have connected your iPhone , click on the “Speedup & Clean” tab as highlighted by the black box in the features image shown above.
    • Now, the app will ask you permissions to Scan your iPhone in order to determine the storage which can be freed up , Here click on the “Quick Scan” button as shown in the image below –
      Tenorshare iCareFone Quick Scan
      Tenorshare iCareFone Quick Scan

      Once you click on “Quick Scan” it will start scanning your phone for apps and data which can be freed up.

    • After the scan is finished, you will be presented a screen along with the cleaning actions which can be performed on your iPhone as shown below – 
    • Here simply tap on “Clean” button next to the cleaning type you intend to perform. Junk files & Temporary files can be easily cleaned without harming the system.
    • Another unique feature we found was the Photos clean-up, it cleans up & free up storage on your iPhone without even deleting the Photos. It does so by compressing the photos without reducing the quality!. Thus, you can free up as much as 80% of storage space taken up by Photos as shown  –
      Photo Compress iCareFone
      Photo Compress iCareFone

      We were able to free up full 112 MB without even cleaning up photos, just by cleaning up junk files which can be seen from the below screenshot –

      Clean Storage iCareFone
      Clean Storage iCareFone

      That’s a lot of space to capture more memories, or get more apps or even few small games!

    Besides, these you can use Tenorshare iCareFone for Backup of WhatsApp Chats / App Documents, & even restoring backup – 

    ICareFone Backup
    ICareFone Backup

    This feature isn’t available even in the iTunes official backup and we found it pretty useful, as it will allow us to restore our important attachments even if we accidentally had our iPhone factory reset.

    Tenorshare also helps you recover your Stuck iPhone on Apple logo, by recovering into DFU mode or recovery mode. Thus, you need not need to worry about your iPhone problems again as iCareFone will take care of your iPhone right from avoiding the problems by optimizing the phone for storage and clean up, and right to solving stuck ios issues by entering into recovery mode.

  • How to use Jio 4G Voice App to make VoLTE Calls on iPhone 5s & 5C / iPhone 5 & 4

    How to use Jio 4G Voice App to make VoLTE Calls on iPhone 5s & 5C / iPhone 5 & 4

    Reliance Jio has one of the best mobile data plans in the Indian Telecom market, but it has one drawback – Reliance Jio is a 4G only network and hence requires VoLTE enabled phones to make calls. Now, since all iPhones are single sim devices and considering iPhone 5S, iPhone 5C, iPhone 5 & 4S do not support VoLTE, Jio cannot be used as the primary network for receiving calls. But not anymore, In this article, we will cover how you can use your Jio 4G Sim to make & receive calls on any iPhone, even iPhone 5S using the Jio 4G Voice app.

    How to Dial & Receive Jio 4G Calls on iPhone 5S, 5C (iPhone 5 & 4S) using Jio 4G Voice App –

    Pre-requisites –

    • Jio Sim.
    • JioFi Wireless Router for (only if you’re an iPhone 4S user this is required) else you can directly insert your Jio sim in your iPhone.
    • In case, if you’re using your iPhone 6, 6S, 7, 7S with any other sim and you wish to make calls using Jiofi then also this process will work. Just start from the Step No.2 in below tutorial.
    • Jio4G Voice App – We will be using the Jio4Gvoice app to make & receive calls, the app functions like your normal phone dialer –
      Click here to Download Jio 4G Voice app for iOS (iPhone) from iTunes App Store


    Step – 1  Configuring your Device on the Jio Network (Only for iPhone 5S / 5 / 5C users)

    In this step, we will enable LTE Network for the Jio network, from our phone settings. No need of doing this step, if you’re trying to make or receive calls via JioFi.

    • First, of all insert your Jio sim into your iPhone.
    • Now navigate to Settings – > Mobile Data. Now select the option “Mobile Data Options” as shown in the image below –
      Mobile Data Options Jio iPhone
      Mobile Data Options Jio iPhone

      After you select the “Mobile Data Options”, in the next screen – Tap on “Voice” and select the “LTE” option as shown below –

      Select the LTE Option
      Select the LTE Option

      That’s it! , Now simply restart your iPhone. You will be on the Jio Network.


    Step – 2   Connecting to the Jio Data Network (JioFi + iPhone common step)

    • Now, simply turn on the Mobile Data of your Jio Sim, or if you’re using Jio Hotspot (Jiofi) device connect to Jiofi wifi network.
    • Once, you’re on Jio Internet (via Sim or Jiofi), simply launch the Jio 4G Voice app which we have downloaded from the app store.
    • Click here to Download Jio 4G Voice app for iOS (iPhone) from iTunes App Store
    • It will now, start registering your Jio sim, as shown in the following image –
      Jio4GVoice Registration on iPhone
      Jio4GVoice Registration on iPhone

      It will take some time to register with the Jio Sim, once it is registered automatically it will now take you to the dialer screen as shown in the below image –

      Jio 4G Voice Dialer iPhone
      Jio 4G Voice Dialer iPhone

      Now, on the dialer screen simply dial the number which you want to dial or leave the app as it is (for receiving calls). When you dial a number or select one from contacts, simply click on the “green call button” and your call will be connected as shown –

      Jio Voice Call VoLTE on iPhone 5S using Jio 4G Voice APP
      Jio Voice Call VoLTE on iPhone 5S using Jio 4G Voice APP

      Thus, you can now enjoy any Jio voice calls or even SMS services from Jio on any iPhone via the Jio 4G Voice app.

    Note – Please, make sure you do not close the Jio 4G Voice app else you won’t be able to receive calls on the iPhone 5S and if you are using JioFi M2 device.