All audiophiles and music lovers know about the importance of Equalizer, but sadly the default iTunes Music player on Mac OS X doesn’t come with an equalizer. Neither does the Spotify app for music streaming has an in-built equalizer. So, here’s a free app which will add a great working Equalizer to Mac OS X (Mavericks, Yosemite, Mountain Lion & El Capitan as well)
How to Install Equalizer on Mac OS X –
- First of all, Download the eqMac app for Mac OS X from the link below (its free of cost unlike Hear app) and can be classified as a Boom app alternative –
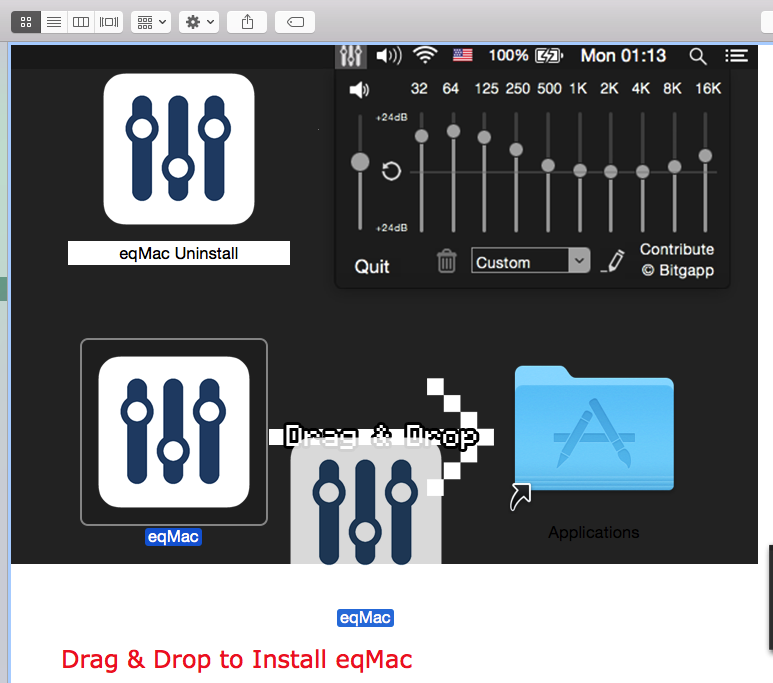
Click here to Download the eqMac Equalizer for Mac app (.dmg) file. - After downloading the eqMac install the downloaded .dmg file , by dragging and dropping the app image to Applications folder as shown in the below image. A detailed tutorial to install apps from .dmg file can be found here. (Tip – open the .dmg file by pressing ctrl key + mouse click to install)

Drag & Drop the icon to install eqMac Mac Equalizer Now, after dragging & dropping the eqMac icon the app will be installed.
- Launch the eqMac app, it will ask you permissions to modify the sound output , permit the app to required audio access.
- The eqMac app will now be showned up on your TopBar as shown in the below image –

Equalizer on Mac (eqMac) Now simply adjust the corresponding toggles to change the Bass , Treble and adjust the equalizer to Bass , Flat , Jazz , Rock or any other type of Songs & Audio.
- You can directly change the audio output from the topbar which no other equalizer app provides for free!.
- Also eqMac isn’t a media player and changes the system audio Stream it works with iTunes, Spotify, Google Chrome (Youtube) or any other media app installed on your Macbook. Thus eqMac is a highly recommended app.
Note – Inorder to disable the app, simply Close the app by clicking on “Quit” in the drop-down menu and your Audio would be back to the normal Mac OS Output.

Leave a Reply