
The Best Email Drip Campaigns Tool: Snov.io Review
Share
Internet marketers are using different types of tools to help grow their business. Being an online marketer, you should have software to improve marketing and drive sales.
We’ve tested a few tools and have chosen Snov.io as the best email drip campaigns tool to write a review on it.
Snov.io is an advanced email drip campaign platform designed for email marketers who can make use of this online instrument for effective email marketing. It will suit small and mid-size businesses.
Being an advanced tool, Snov.io is packed with numerous advanced features to help build different types of email campaigns at ease. You can also keep an eye on your campaigns in real-time with the help of its additional features.
Let’s see how this tool actually works for you!
Why use Snov.io
Snov.io serves an easy-to-use interface allowing email marketers to effectively start multiple email drip campaigns as per their requirements. This tool helps you in developing great business relations with other like-minded people who can actually help you grow your business the way you want.
A guide to using Snov.io
Snov.io has advanced features but at the same time, it doesn’t mean you need some extra skills to start using it. All the features and tools provided are truly easy-to-use and it won’t take you much time to deal with them.
So let’s have a look at which steps you have to take to send your first email drip campaign.
Step 1. Sign up and find leads
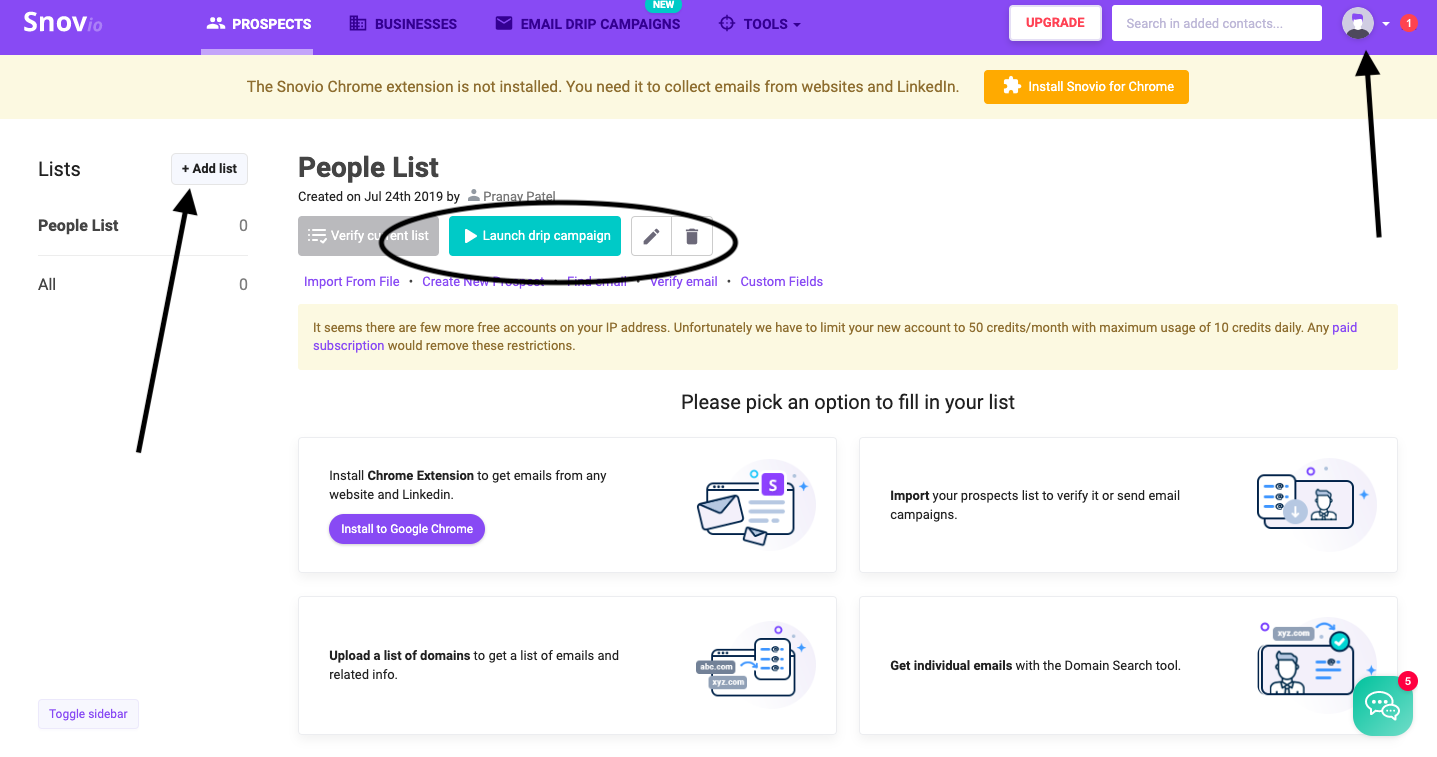
The first thing you need to do is to sign up for this platform. Go to the Snov.io website and register your account. The first page you will see is the dashboard with a lot of useful options and tools that you can use for your campaigns.
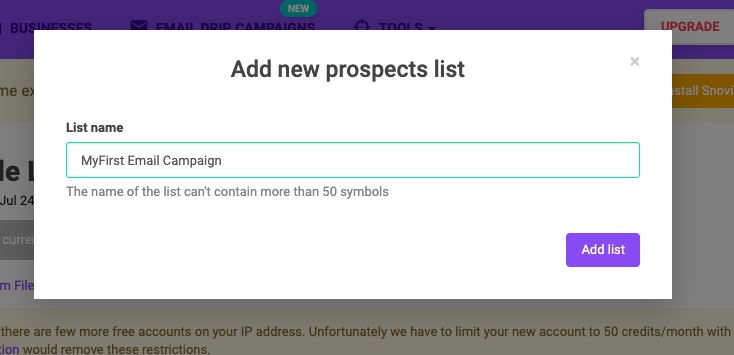
Click the Add List+ button in the upper left side of the page to start your first campaign. Make sure you have a list of emails to upload and start your campaign using this tool. If not, you can find emails for the list of emails on the Internet using email hunter. You can also head over to the Linked.in search bar from where you can get the list just by typing a keyword and activating the Snov.io Email Finder Chrome extension. It is the easiest way to find emails for your campaign.
Once you pick a list of emails, you can verify all the emails using the email checker tool offered by Snov.io. This tool will remove unauthorized and invalid emails from the list so that you can reach a greater number of users with the verified email addresses.
Step 2. Note all the settings
Once you create a list, there is an option to import the list from your desktop. You can also click the Upload button to upload a list of verified emails for a new campaign. Once the list of emails is imported, the next thing you need to do is to modify and build your campaign using different tools available for you.
Now, add a signature to your email using the Signature section. Go to your Profile’s settings and select the Edit option to add a signature for the campaign email. There is an option to insert an unsubscribe link in the signature.
Step 3. Create a campaign
After this, go to the main Dashboard page and click the New Drip Campaign button. Name the campaign. Avoid names like “Campaign 1/2/3” as it will be difficult for you to later find the necessary campaign if you will have to edit it.
Now, at the left sidebar, you will see a number of useful options that are actually very helpful to build an effective campaign for your business. All the basic campaign-related settings can be done from this section. You need to check the required options from here.
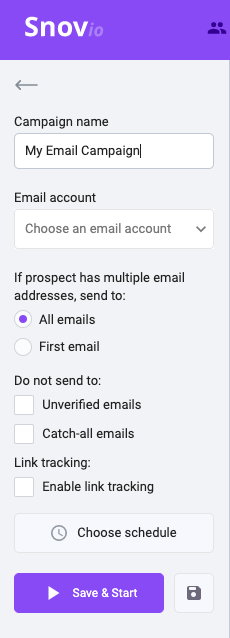
Additionally, there is an option to even schedule the campaign. You can select the days and time to start the campaign on each day. Once everything is set as per your requirements, the next thing you need to do is to make use of the different elements of this tool.
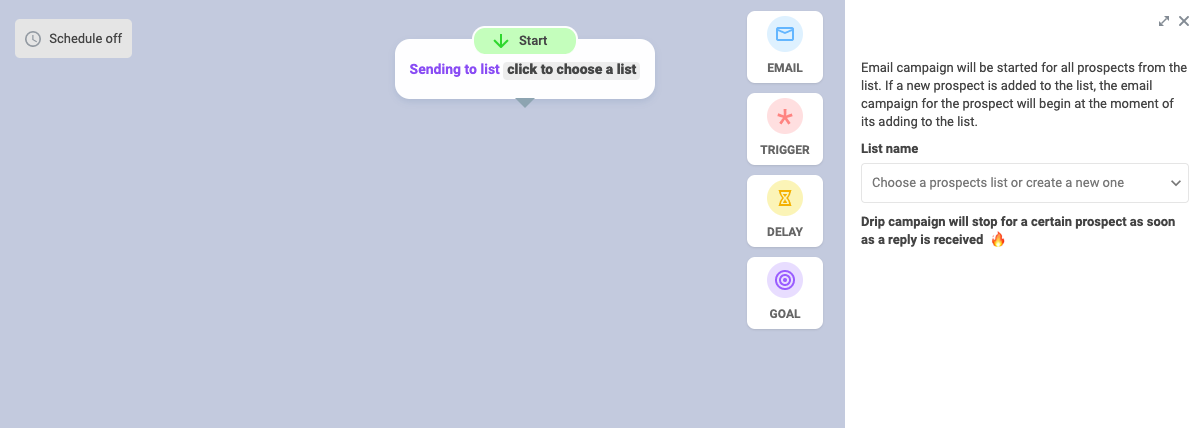
There are many useful drip campaign elements such as Start, Email, Trigger, Delay, and Goal. All these elements are related to your campaign. Fill in the campaign-related details in these elements.
Add as many emails to the email thread as you need, there are no limits. Set the delays to not spam people with emails. Set triggers so leads will get emails from only in case they perform this or that action. Define goals for every email scenario to be aware of how many recipients reach this or that goal. Draw a line between two elements to build an email sequence.
Once you are done with the elements of the email campaign, the next thing you need to do is to click the Save and Start button given at the bottom of the left sidebar of the main page to launch the campaign.
Follow the statistics
You’re done! Your first email drip campaign has just begun. The campaign will work as per the settings that you have made. You can also check real-time data of the campaign by visiting the Statistics section.

