
How to Install Memu Nougat Emulator for PC / Laptop [Windows 10/7/8.1]
Share

Memu is soon becoming the go-to emulator for Playing Android games on PC / laptops with Windows systems. Now, since most of the games for Android are now being made for newer Android versions such as Nougat , Oreo, P . The emulators too need to be updated for feature rich gameplay. Hence, in this tutorial we will cover How you can install Memu 5 Nougat emulator for PC / laptop so that you can play latest games such as PUBG, fortnite on PC with the latest features and without lags .
Tutorial to Install Memu Nougat Emulator for PC & Laptop – Windows 10 / 7 / 8.1 –
Pre-Requisites –
- A PC or a laptop with a decent configuration. Recommended Min.2 GB RAM.
- Memu 5 Emulator installed on your system, incase if not installed the latest Nougat image (ova) won’t work.
- You can download the Memu 5 emulator (base for Nougat) from link below if it isn’t installed on your system –
Click here to Download Memu 5 (Base emulator) to load Nougat (.ova) file
Tutorial –
- In this part, we will apply the Memu Nougat image (.ova) on to our Memu emulator base. Thus, we need to get the latest Nougat system file from the link below –
Click here to Download Nougat emulator for PC / Windows 10/7/8.1 (32-bit & 64-bit)
Note — Simply downloading the base file won’t work, Memu 5 must be installed on your system - Now, from the “Multi-memu” icon on your desktop, launch the Multi-memu instance as shown below –
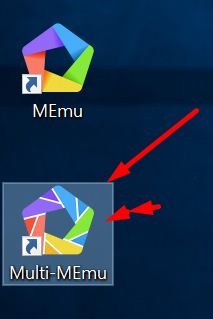
Launch Multi-Memu Instance
- Once you have launched the Multi-Memu , it will show configuration or start options as shown in the following screenshot –
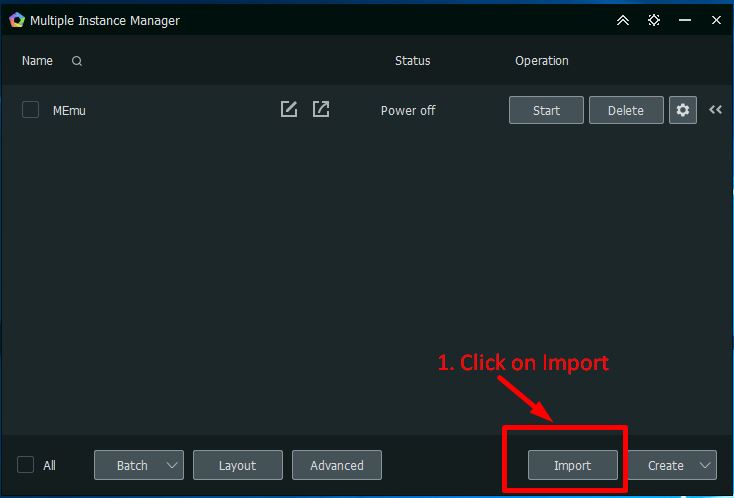
Click on the Import button in Memu Instance Manager
Here, tap on the “Import” button as shown above image. It will now ask you to select the (.ova) file to load.
- Now, in the file browser window which opens, browse to the Nougat image we downloaded in this tutorial, select it and click on the “Open” button as shown in the screenshot below –
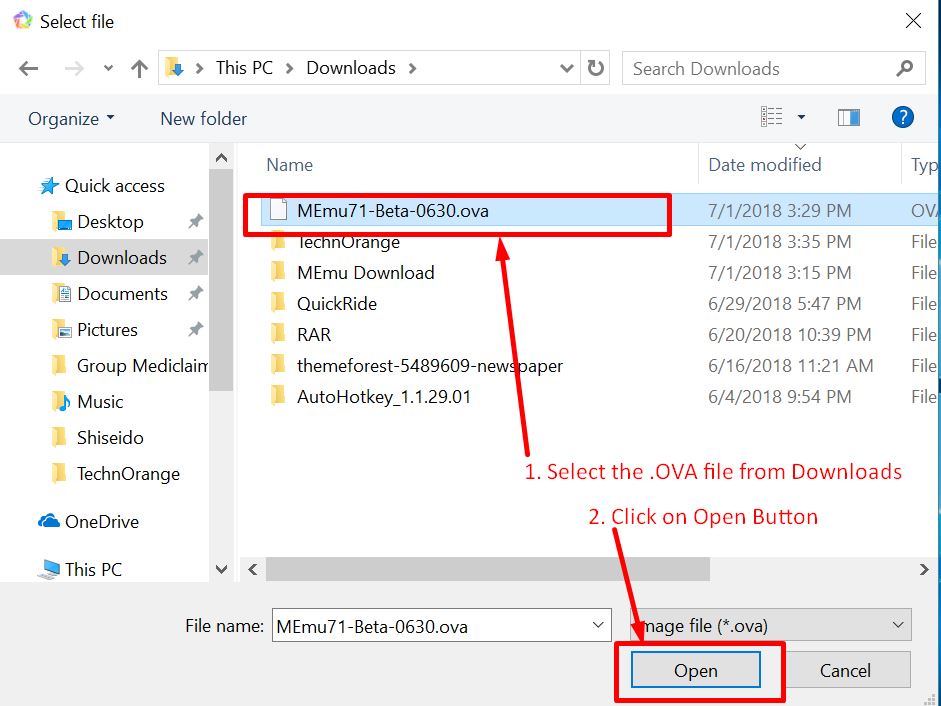
Select the Memu Nougat OVA image and click on Open
- The Instance manager will load the image in its window and list it below the old memu image as shown below.
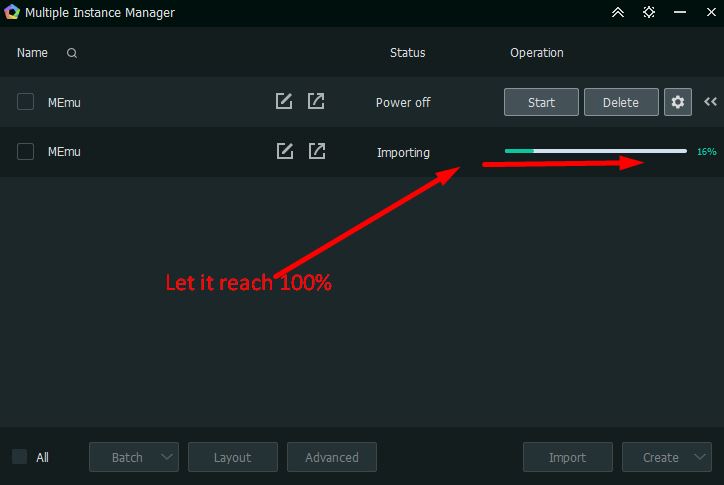
Please wait until the image load reaches 100
- Once, it reaches 100% , simply start the new Memu image by clicking on the “Start”
button besides it, in the instance manager –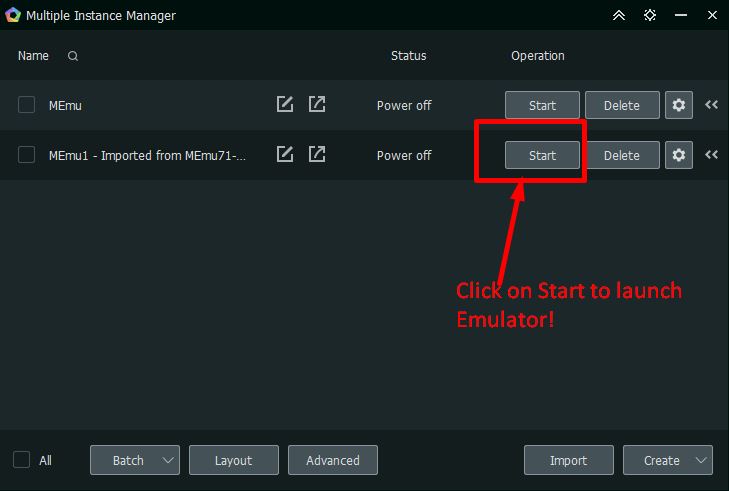
Click on the Start button to load Memu Nougat Version
- That’s it, Memu will now start with the new android Nougat 7 image. It will now be loaded and you’ll be shown a Memu tutorial screen –
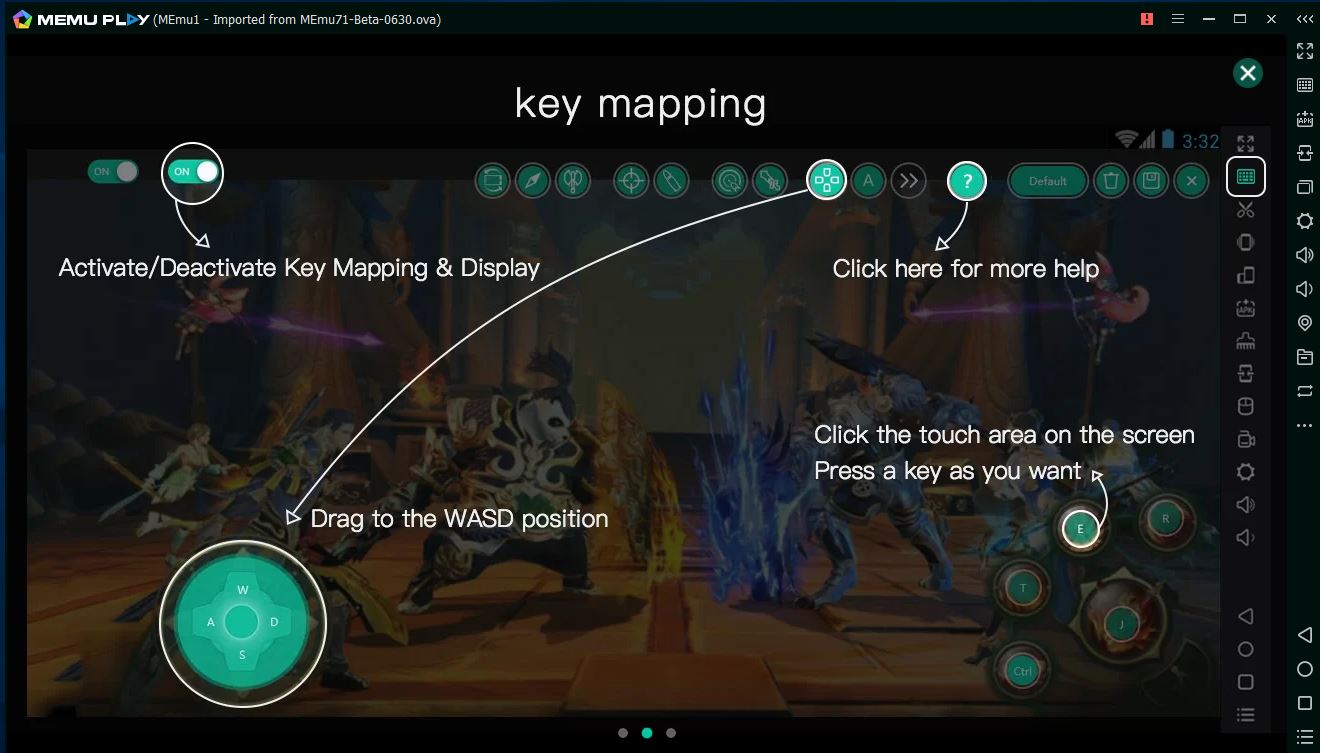
Memu Tutorial Key Mapping Screen
- Simply, close the tutorial screen. Thus, you can now enjoy your Memu Nougat emulator for PC / Laptop.
Memu Nougat Version loaded successfully!
That’s it! You have now successfully installed and loaded Memu Nougat emulator on your Windows 10/7/8.1 (32-bit or 64-bit)
- Incase, if you face any problems or have any queries feel free to let us know in the comments section below.

